Granny Square Hexagon Pattern Free: 7 Easy Honeycomb Designs
Quick Info: This post contains free patterns and step-by-step tutorials. All measurements are in both inches and centimeters. Yarn amounts are approximate, always buy an extra skein to be safe!
Why Hexagon Granny Squares?
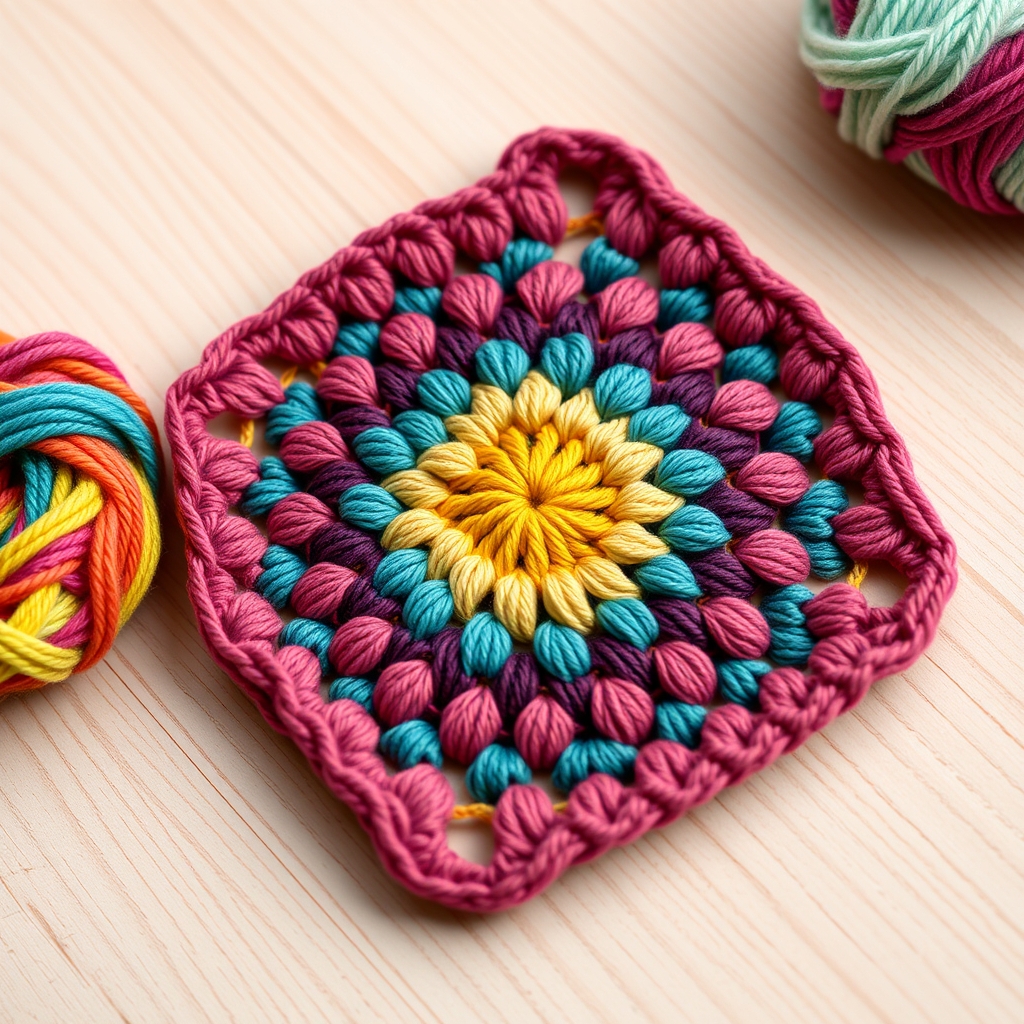
Hexagon granny squares are a fun twist on the classic motif. Instead of four sides, they have six, so they tessellate into honeycomb layouts that flat squares just can’t pull off. That makes them great for blankets, cushions, bags, and garments. This guide walks through the full hexagon, from the basic motif to the honeycomb joining most free patterns skip, with no paywall.
The handy thing about hexagons is how far one motif stretches. A single one makes a coaster, a handful becomes an easy crochet bag, and a few dozen join into a real statement blanket. If you already know how to make a granny square, these will feel familiar, same technique, just six corners instead of four. That one change opens up a lot.
The tutorial covers it all, basic hexagon construction through the honeycomb joining techniques that rarely show up in free patterns. New to hexagons or an old hand wanting to nail the layouts, you’ll find what you need here.
What Materials Do You Need for Your Hexagon Pattern?
When you’re picking a hexagon pattern to follow, look for one that includes a flat joining method, it’s what keeps the finished piece from warping.
Yarn and Hook Recommendations
The yarn and hook you choose will determine the size, drape, and overall look of your hexagons. Here is what we recommend for different project types:
| Project Type | Yarn Weight | Hook Size | Hexagon Size (3 rounds) |
|---|---|---|---|
| Coasters | #4 Worsted Cotton | 4.0 mm (G/6) | 8 cm (3.15″) |
| Blanket | #3 DK or #4 Worsted | 4.5-5.0 mm | 10-12 cm (4-4.75″) |
| Cushion Cover | #4 Worsted | 5.0 mm (H/8) | 12-15 cm (4.75-6″) |
| Bag | #4 Worsted Cotton | 5.0 mm (H/8) | 12-14 cm (4.75-5.5″) |
| Garment | #2 Sport or #3 DK | 3.5-4.0 mm | 8-10 cm (3.15-4″) |
For materials, a worsted-weight yarn is a safe bet, see our best yarn for beginner crochet picks. Acrylic blends suit blankets and garments; cotton is better for bags, coasters, and home decor. Our crochet yarn guide goes deeper on fiber choices.
Complete Materials Checklist
Joined into a honeycomb, hexagons look impressively professional, the shared edges do most of the work for you.
- 600-1200 yards of worsted weight yarn (depending on project size)
- 5.0 mm (H/8) crochet hook (or size per table above)
- Stitch markers (at least 6 for corner marking)
- Yarn needle for weaving ends and joining
- Foam blocking mat and T-pins
- Scissors
For hook recommendations, check our Best Crochet Hooks guide. And if you are unsure about sizing, our Crochet Hook Sizes and Crochet Hook Size Chart references are invaluable.
Basic Hexagon Granny Square
This makes a classic granny-style hexagon with six corners. Each round adds stitches per side, and the six-sided shape just emerges from the corner construction. Before you start, get comfortable with the double crochet stitch and the magic ring, both are the foundation here.
Round 1: The Magic Center
The most popular hexagon designs use a simple 2-round repeat, easy to memorize and easy to customize.
Begin with a Magic Circle Crochet Guide using your main color:
- Create a magic ring. Chain 3 (counts as first double crochet).
- Work 2 double crochet into the ring, then chain 2.
- Work 3 double crochet into the ring, chain 2.
- Repeat the 3 DC + chain 2 sequence four more times (6 groups total).
- Slip stitch to the top of the beginning chain-3 to close.
- Stitch count: 18 double crochet, 6 chain-2 corner spaces.
Each group of 3 DC separated by chain-2 spaces forms one corner of your hexagon. If you are new to the magic ring technique, see our Crochet Magic Ring and Magic Circle Crochet Guide tutorials.
Round 2: Building Six Corners
- Slip stitch into the first chain-2 space. Chain 3 (counts as first DC).
- In the same space: work 2 DC, chain 2, 3 DC (this is your first corner).
- Chain 1. In the next chain-2 space: work 3 DC, chain 2, 3 DC (second corner).
- Repeat around all six corners with chain 1 between each.
- Slip stitch to the top of the beginning chain-3.
- Stitch count: 36 double crochet, 6 chain-2 corner spaces, 6 chain-1 side spaces.
💡 Pro Tip: Use a stitch marker in the first stitch of each round. Hexagons can look deceptively symmetrical, and it is easy to lose your starting point. A simple lock-ring marker saves time and frustration.
Round 3: Expanding the Hexagon
The magic-ring start is what gives you a tight, perfectly round center, well worth learning if you haven’t already.
- Slip stitch to the first chain-2 space. Chain 3.
- In the corner space: 2 DC, chain 2, 3 DC (corner).
- Chain 1. In the next chain-1 space (first side space): 3 DC.
- Chain 1. In the next chain-2 space (corner): 3 DC, chain 2, 3 DC.
- Chain 1. In the next side space: 3 DC. Chain 1.
- Repeat this pattern around all six sides.
- Slip stitch to close.
- Stitch count: 54 double crochet, 6 chain-2 corners, 6 chain-1 side spaces (1 per side now).
Rounds 4-6: Increasing Size
From round 4 onward, the pattern adds one 3-DC group to each side with every round:
Round 4
- Corners: 3 DC, chain 2, 3 DC in each chain-2 corner space.
- Sides: 3 DC in each chain-1 space, chain 1 between groups.
- Stitch count: 72 DC, 6 corners, 12 side spaces (2 per side).
Round 5
- Same pattern continues: corners get corner treatment, sides get 3 DC in each space.
- Stitch count: 90 DC, 6 corners, 18 side spaces (3 per side).
Round 6
- Stitch count: 108 DC, 6 corners, 24 side spaces (4 per side).
- Hexagon measures approximately 14 cm (5.5″) across in worsted weight with a 5.0 mm hook.
Having trouble keeping your sides even? Check our How to Fix Crochet Tension guide and Crochet Tips for maintaining consistent stitch size.
Color Changing Tips for Hexagons
Color is where hexagon projects really come alive. A few approaches worth trying:
The Two-Color Alternate
Alternate between two colors every round for a classic look. Use color A for odd rounds and color B for even rounds. This creates concentric hexagonal rings that highlight the geometric shape beautifully.
The Rainbow Spiral
Use a different color for each round, progressing through a gradient. Work from warm to cool (red → orange → yellow → green → blue → purple) for a rainbow effect. This works best with 5-6 rounds per hexagon.
The Solid Center with Color Border
Crochet rounds 1-3 in a solid neutral color, then add rounds 4-5 in a bold accent color. This creates a clean, modern look well suited to Crochet Basket projects or Crochet Storage containers.
💡 Pro Tip: When changing colors, complete the last yarn-over of the final DC in the old color, then pull through with the new color. This creates the cleanest color transition possible without any awkward dots of the wrong color.
Honeycomb Joining Technique
Unlike squares that meet edge to edge, hexagons join in a honeycomb where each one shares edges with up to six neighbors. This is the trickiest part of working with hexagons, and it’s exactly what most free patterns leave out. Below are two methods, so you can pick the one that suits your skill level.
Join-As-You-Go Method for Hexagons
This is the most efficient method for honeycomb layouts. You join each new hexagon to previously completed hexagons as you crochet its final round:
- Crochet your first hexagon completely (all rounds). Fasten off.
- For the second hexagon, work all rounds except the last.
- On the final round, crochet normally until you reach the edge that will be shared with the first hexagon.
- Instead of chaining 1 and working 3 DC in the side space, chain 1, then draw up a loop through the corresponding chain space of the first hexagon.
- Complete the DC by pulling through all loops on your hook (this connects the two hexagons).
- Continue working the shared side, joining to the adjacent hexagon at each chain space or DC stitch.
- Finish the remaining sides of the new hexagon normally.
Flat Basting Join Method
If you prefer to make all hexagons first and join them later:
- Make all hexagons and block them to identical sizes.
- Lay them out in your desired honeycomb arrangement.
- Thread a yarn needle with matching yarn.
- Working on the right side of the work, whip-stitch through the back loops of both hexagons along each shared edge.
- For corners where three hexagons meet, stitch through all three layers.
- Press seams flat with your fingers as you work.
This method produces flat, nearly invisible seams well suited to blankets and garments. For more on finishing techniques, see our Crochet Tips article.
Honeycomb Layout Arrangements
Hexagon Blanket Layout
For a throw blanket measuring approximately 120 cm × 150 cm (47″ × 59″):
- Use hexagons with 4 rounds each (measuring ~10 cm / 4″ across)
- Layout: 12 hexagons wide × 15 hexagons tall in a honeycomb arrangement
- Total: approximately 90-95 hexagons (honeycomb offset reduces count)
- Yarn needed: approximately 2000-2500 yards of worsted weight yarn
For blanket inspiration, see our Easy Crochet Blanket Pattern, How to Crochet a Blanket, Rose Blanket Crochet Pattern, and Crochet Baby Blanket patterns.
Table Runner Layout
A hexagon table runner is a stunning home decor piece. For a standard dining table runner measuring 40 cm × 120 cm (16″ × 47″):
- Use 5-round hexagons measuring ~12 cm (4.75″) across
- Layout: a single row of 10 hexagons with staggered offsets
- Add a border of Single Crochet Stitch or Moss Stitch Crochet to fill gaps and create a clean edge
- See our Crochet Table Runner and Crochet Doily patterns for complementary home decor ideas
Garment Layout Ideas
Hexagons can be joined to create stunning wearable pieces. A Granny Square Cardigan made from hexagons is particularly eye-catching. For garments, use smaller hexagons (3-4 rounds, 8-10 cm across) with a finer yarn weight for better drape and comfort.
Hexagon Project Ideas
Hexagon Coasters Set
Make a set of 4-6 coasters using 3-round hexagons in coordinating colors. Each coaster measures approximately 8 cm (3.15″) across. This is a perfect beginner project that uses only 15-20 yards of yarn per coaster. See our Crochet Coaster pattern for more coaster inspiration.
Hexagon Cushion Cover
Create a 45 cm (18″) cushion cover using 7 hexagons: one center hexagon surrounded by six hexagons in a flower arrangement. Use 5-6 rounds per hexagon. Add a Single Crochet Stitch border and a fabric back with button closure. This pairs beautifully with our Crochet Storage and Crochet Basket patterns.
Hexagon Tote Bag
Join 12-14 hexagons (5 rounds each) into a rectangular panel for a tote bag. Line with fabric for durability. See our Easy Crochet Bag Pattern, Crochet Market Bag, and Crochet Handbag patterns for bag construction techniques.
How to Use This Sizing and Measurements Guide?
| Rounds | Worsted / 5mm | DK / 4mm | DK / 3.5mm | Yarn per Hex |
|---|---|---|---|---|
| 3 rounds | 10 cm (4″) | 8 cm (3.15″) | 7 cm (2.75″) | 15-20 yds |
| 4 rounds | 12 cm (4.75″) | 10 cm (4″) | 8.5 cm (3.35″) | 25-35 yds |
| 5 rounds | 14 cm (5.5″) | 12 cm (4.75″) | 10 cm (4″) | 40-55 yds |
| 6 rounds | 16 cm (6.3″) | 14 cm (5.5″) | 12 cm (4.75″) | 55-75 yds |
| 7 rounds | 18 cm (7″) | 16 cm (6.3″) | 14 cm (5.5″) | 75-100 yds |
How Do You Fix Common Crochet Problems?
Hexagons Are Curling
Curling usually means your stitches are too tight. Try going up one hook size or being more intentional about keeping loose chain spaces. Our Why Is My Crochet Curling guide covers general solutions for curling crochet projects.
Hexagons Are Different Sizes
Inconsistent tension is the most common culprit. Check our Why Are My Granny Squares Different Sizes and How to Fix Crochet Tension guides. Always block your hexagons to identical measurements before joining.
Hexagons Won’t Lie Flat for Joining
Ensure thorough blocking. Pin each hexagon to its target measurement and spray generously with water. Let dry for at least 12 hours. For stubborn hexagons, steam blocking can help, hold a steam iron 2-3 cm above the hexagon (never touching) and press with your hand.
Corners Are Not Sharp
Make sure you are working the correct stitch count in each corner space: 3 DC, chain 2, 3 DC. If you accidentally work fewer stitches, the corners will round off. See our Why Is My Granny Square Crooked guide for related troubleshooting.
Care and Blocking Hexagon Projects
Blocking Individual Hexagons
- Pin each hexagon to your blocking mat with all six points aligned.
- Use a ruler to ensure each hexagon matches the target measurement.
- Spray with water until saturated but not dripping.
- Allow to dry for 12-24 hours before removing pins.
Blocking Finished Projects
After joining all hexagons, give the entire piece a final blocking. For blankets, lay flat on a clean surface, spray evenly, and reshape. For garments, follow the same process on a blocking board. Check our Crochet Tips for comprehensive care guidelines.
Frequently Asked Questions
How is a hexagon granny square different from a regular granny square?
A traditional granny square has four corners and four sides, while a hexagon granny square has six corners and six sides. The construction technique is nearly identical, both use groups of 3 double crochet separated by chain spaces. The difference is simply the number of corner groups in the first round: 4 for a square, 6 for a hexagon. This changes how the motifs tessellate when joined together.
How many hexagons do I need for a blanket?
For a standard throw blanket (120 cm × 150 cm / 47″ × 59″), you need approximately 90-95 hexagons measuring 10 cm (4″) across each. The exact number depends on your layout pattern and whether you add a border. For a baby blanket (90 cm × 90 cm / 35″ × 35″), you need about 40-45 hexagons.
What is the best join method for hexagons?
The join-as-you-go method is the favorite because it saves you sewing dozens of hexagons together at the end. If you’d rather keep your layout flexible, the flat whip-stitch method lets you rearrange before you commit. And for the flattest, most polished finish, the flat basting join is hard to beat.
Can I make a hexagon granny square without a magic ring?
Yes! Instead of a magic ring, chain 4 and slip stitch to the first chain to form a ring. Then work Round 1 into this chain ring. The result is the same, though the center hole may be slightly larger. See our Crochet Magic Ring tutorial to learn the magic ring technique, it creates a much tighter center.
For hexagon inspiration, browse Ravelry hexagon granny square patterns and Spruce Crafts hexagon patterns.
How do I fill the gaps between hexagons in a blanket?
In a honeycomb layout, the triangular gaps between hexagons can be filled with half-hexagons (hexagons with three flat sides) or small triangles worked in Single Crochet Stitch. Alternatively, add a 3-4 row border of Double Crochet Stitch or Moss Stitch Crochet around the entire blanket that bridges and covers the edge gaps, creating a clean rectangular finish.
Can I use this hexagon pattern for amigurumi projects?
While hexagons are primarily used for flat projects, you can use them as decorative panels on bags or as the base/face of stuffed toys. For actual three-dimensional amigurumi, check out our Crochet Amigurumi guide and patterns like the Crochet Octopus, Crochet Bee, Crochet Bunny, Crochet Axolotl, and Crochet Jellyfish.