Amigurumi Toy Patterns: 7 Ideas for Beginners + a Free Starter Pattern

Amigurumi Toy Patterns: 7 Ideas for Beginners + a Free Starter Pattern

Quick Answer

Amigurumi toy patterns are step-by-step instructions for making small stuffed toys, animals, dolls, and the like. They use basic stitches worked in the round to build 3D shapes, which makes them one of the most rewarding projects for beginners. With the right yarn, hook, and stuffing, you can finish your first toy in a few hours.

For something a little different from the usual amigurumi shapes, try this crochet jellyfish pattern, it makes a great hanging decoration or bath toy.

Easter crocheters will love our how to crochet a bunny guide, which walks you through three easy patterns well suited to spring gifting.

For something a little more whimsical, try this free crochet axolotl pattern, it uses the same basic amigurumi techniques with adorable results.

Tip: Always use a hook one size smaller than your yarn label recommends so your stitches stay tight and stuffing stays hidden inside the finished toy.

At a Glance

  • Skill level: beginner
  • Time needed: 2-6 hours per toy
  • Best yarn: worsted-weight cotton or acrylic
  • Hook size: 3.5 mm (E/4) to 4.0 mm (G/6)

Common Mistakes → Quick Fixes

  • Loose stitches showing stuffing: switch to a smaller hook and maintain consistent tension throughout
  • Toy eyes pulling through fabric: add a safety backing or use embroidered eyes for child-safe amigurumi toy patterns
  • Uneven shaping: count every round carefully and use a stitch marker at the start of each round

Mini Glossary

MC (magic circle), sc (single crochet), inc (increase), dec (decrease), FO (fasten off), BLO (back loop only), FLO (front loop only), hdc (half double crochet), ch (chain), sl st (slip stitch)

This is KnotToYarn’s own original pattern, free to use, and you’re welcome to sell what you make from it.

Every design idea below builds on one core shape: the amigurumi sphere. Master this complete starter pattern first and you will be able to tackle nearly any toy, heads, bodies, fruit, and balls all use the same construction.

Materials

  • Worsted weight (category 4) acrylic or cotton yarn, about 30 g in any color
  • 3.5 mm (US E) crochet hook (smaller than the yarn label suggests, so stuffing doesn’t show)
  • One pair of 8-10 mm safety eyes (or embroider eyes with black yarn for children under 3)
  • Polyester fiberfill stuffing
  • Stitch marker, yarn needle, scissors

Finished size: About 7 cm (2.75 in) diameter
Skill level: Beginner
Abbreviations (US terms): ch (chain), sc (single crochet), inc (2 sc in the same stitch), dec (single crochet 2 stitches together, invisible decrease preferred), st(s) (stitch/es)

Instructions

Crochet flat-circle increase chart: magic ring with rounds of 6, 12, 18 and 24 single crochet
Flat-circle increase chart: 6 sc in a magic ring, then +6 stitches every round (12, 18, 24…). Original KnotToYarn chart.

Work in continuous spirals, do not join rounds. Mark the first stitch of each round with your stitch marker and move it up as you go.

Round 1: 6 sc in a magic ring: 6 sts.

Round 2: Inc in each st around: 12 sts.

Round 3: *Sc 1, inc; repeat from * around: 18 sts.

Round 4: *Sc 2, inc; repeat from * around: 24 sts.

Round 5: *Sc 3, inc; repeat from * around: 30 sts.

Rounds 6-10: Sc in each st around: 30 sts (5 plain rounds).

Round 11: *Sc 3, dec; repeat from * around: 24 sts.

Now place the safety eyes between Rounds 7 and 8, about 6 stitches apart, and snap the backs on firmly. Begin stuffing the ball, packing it more firmly than feels natural, amigurumi relaxes over time.

Round 12: *Sc 2, dec; repeat from * around: 18 sts.

Round 13: *Sc 1, dec; repeat from * around: 12 sts. Top up the stuffing.

Round 14: Dec around: 6 sts.

Finishing

Cut the yarn leaving a 15 cm (6 in) tail. Thread the tail on your yarn needle, run it through the front loop of each of the 6 remaining stitches, and pull tight like a drawstring to close the hole. Bury the tail inside the ball. Embroider a small V-shaped mouth below the eyes with black yarn if you like.

Made this? We’d love to show off your work, send a photo through our contact page and we’ll feature it here with credit to you.

Tip: If you can see stuffing through your stitches, go down another half hook size. Tight, dense fabric is the single biggest difference between a beginner and a professional-looking amigurumi.

If you’ve been curious about making your own crocheted toys, this is a great place to start. The designs range from simple shapes to detailed characters, and most need only the basics, brand new? Start with our beginner guide. Unlike garments or big blankets, these are small, quick, and very satisfying when you’re after fast results.

Below are seven free amigurumi patterns written with beginners in mind. Each focuses on the toy-making essentials, safe stuffing, secure eye attachment, and child-friendly materials, which is what sets them apart from general amigurumi. Making a gift for a child or just adding a handmade piece to your collection, these will walk you through it.

Why Amigurumi Toy Patterns Work Well for Beginners?

Amigurumi is the Japanese craft of crocheting small stuffed creatures and objects. A general guide covers the broad technique, but these patterns zero in on one goal: finished toys that are safe, durable, and fun. That makes them a great first project, since you’re building something with a clear purpose from round one.

Most of these patterns lean on just two things: the single crochet stitch and working in a continuous spiral. If you can chain and single crochet, you’re set. Brand new? Our beginner guide covers the basics in under half an hour.

Working round after round builds muscle memory fast, so your tension improves with every toy. And because these are small projects, you can finish one in an afternoon, that little hit of accomplishment is what keeps you going.

What Materials Do You Need for Making Amigurumi Toys?

Before diving into the seven free patterns below, gather these core supplies. Having the right materials on hand makes a huge difference in how your finished toys turn out.

Yarn

The best yarn for beginners here is a smooth, medium-weight (worsted) cotton or acrylic. Cotton gives crisp stitch definition and a firm fabric that holds stuffing well; acrylic is softer and cheaper, which is why it’s popular for gifts and charity makes. Skip fuzzy or textured yarns for your first few toys, they make it hard to see your stitches and count rounds.

Hooks

Use a crochet hook that is one size smaller than the yarn label suggests. For most worsted-weight yarns, a 3.5 mm (E/4) or 4.0 mm (G/6) hook works well. The tighter gauge prevents poly-fiber stuffing from peeking through the stitches. According to the Craft Yarn Council, choosing the correct hook size is one of the most important steps in achieving consistent gauge across any crochet project.

Safety Eyes and Noses

Plastic safety eyes with locking washers are the standard choice for amigurumi toy patterns intended for children over three years old. They snap into place from the inside and cannot be pulled out by small hands. For toys intended for babies and toddlers, embroider the eyes directly with yarn instead, this eliminates any choking hazard entirely.

Stuffing

Polyester fiberfill is the most common stuffing material. It is washable, lightweight, and hypoallergenic. When stuffing your amigurumi toy patterns, add filling gradually in small handfuls rather than one large clump. This produces an even, smooth shape without lumps.

Stitch Markers

Because amigurumi is worked in a continuous spiral without joining rounds, a stitch marker is essential for tracking where each round begins. Clip-on markers or a simple loop of contrasting yarn both work well.

What Should You Know About Crochet Abbreviations in Toy Patterns?

Amigurumi toy patterns use standard crochet abbreviations. Familiarizing yourself with these terms before you start will save time and prevent confusion. Common abbreviations you will encounter include sc (single crochet), inc (increase, two single crochets in the same stitch), dec (decrease, single crochet two stitches together), MR (magic ring), and FO (fasten off). For a complete reference, check our crochet abbreviations for beginners guide.

Most amigurumi toy patterns also include stitch counts at the end of each round, written in parentheses. For example, “(24)” at the end of a round means you should have twenty-four single crochet stitches in that round. Checking your count after every round is the single best habit you can build as a beginner.

7 Free Amigurumi Toy Patterns for Beginners

Below are seven free amigurumi toy patterns you can start today. Each one is designed to teach you a new skill while producing an adorable finished toy. For even more inspiration, browse free toy patterns on Ravelry.

1. Simple Sphere Rattle Toy

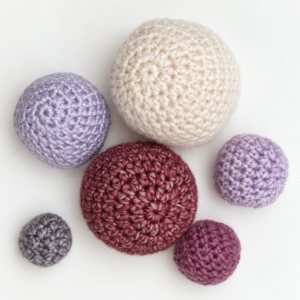
The sphere is the foundation for almost every amigurumi toy. This one teaches the magic-ring start, even increases, and invisible decreases. Work twelve single crochets into a magic ring, increase evenly each round until it’s as wide as you want, work a few even rounds, then decrease until there’s a small opening for stuffing. Add a rattle insert before stuffing and closing for a baby-safe toy. It’s the simplest one here and the perfect place to begin.

2. Crochet Ball with Striping

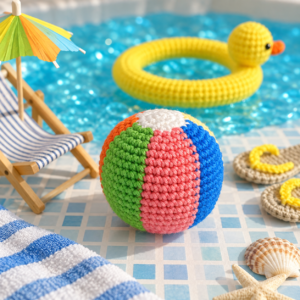
Once the basic sphere clicks, add color changes for a striped ball. Switch colors every two or three rounds to practice seamless joins. It also shows how much visual interest you can get from just two colors. Striped balls make great baby toys, pet toys, and decorations.

3. Amigurumi Teddy Bear

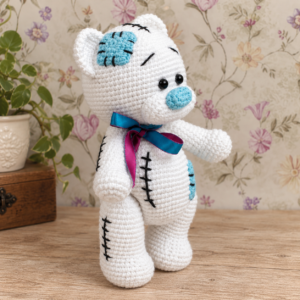
A small teddy bear is one of the most popular amigurumi toy patterns for a reason. This pattern uses a round head, a cylindrical body, two flat ears, four limb tubes, and a small tail. Each piece is worked separately and then sewn together. The teddy bear pattern teaches you to work flat pieces (the ears) alongside in-the-round pieces, and to align parts during assembly. Use safety eyes for children over three and embroidered features for younger kids.

4. Crochet Baby Doll

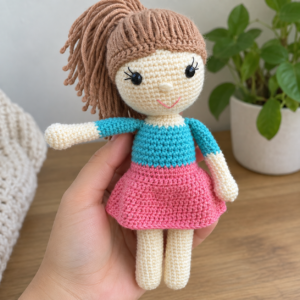
Amigurumi doll patterns are a wonderful introduction to character design. This beginner baby doll uses a simple round head, a small rectangular body, stubby arms and legs, and a tiny hat for personality. The pattern focuses on proportion and symmetry, skills that transfer directly to more advanced amigurumi toy patterns. Use skin-toned yarn for the head and limbs, and a pastel color for the body and hat.

5. Octopus Stuffed Toy

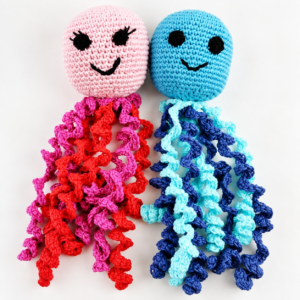
The crochet octopus has become a beloved amigurumi design. It begins like a sphere for the head, then eight chains are worked from the bottom opening and each chain is worked back along to create curly tentacles. This amigurumi toy pattern introduces chain-loop techniques and shows how a simple variation can create a completely different toy shape. Octopus amigurumi are commonly donated to neonatal intensive care units because the tentacles remind premature babies of the umbilical cord, providing comfort.

6. Crochet Car

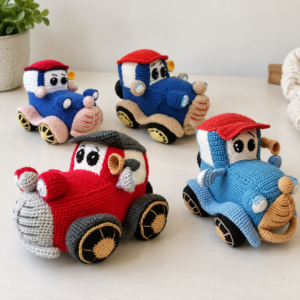
Not all amigurumi toy patterns are creatures. This simple crochet car is worked flat in a rectangle for the body, with two small circles for wheels and a small rectangle for the window. The pattern introduces flat panel construction, which is a departure from the usual in-the-round approach. Crochet vehicles like cars, trucks, and rockets expand your amigurumi toy patterns collection into an entirely new category of playthings.

7. Star-Shaped Baby Toy

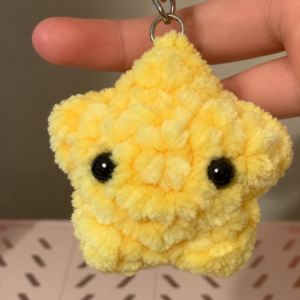
This five-pointed star toy is worked flat from the center outward, then two stars are crocheted and stuffed before being sewn together along the edges. The star shape makes an excellent teething toy and grasping toy for babies. It is one of the few amigurumi toy patterns that combines flat crochet with stuffing, giving you practice with both techniques in a single project.

What Safety Guidelines Should You Follow When Amigurumi Toy Patterns: 7 Free Designs for Beginners?

When creating toys for children, safety is just as important as aesthetics. Here are the essential guidelines every toy-maker should follow when working with amigurumi toy patterns:

  • Embroider eyes and facial features for any toy intended for children under three years old. Safety eyes can be pulled out by determined toddlers and pose a serious choking risk.
  • Secure all ends firmly. Weave in yarn tails for at least two inches inside the stuffed body. A loose tail can work its way out and become a strangulation or choking hazard.
  • Overstuff slightly. A well-stuffed toy holds its shape better and feels more satisfying to hold. However, avoid stretching the stitches to the point where stuffing is visible between them.
  • Test attachments. Pull firmly on all sewn-on parts, ears, limbs, tails, before giving the toy to a child. If anything feels loose, reinforce the seam with additional stitching.
  • Choose washable materials. Babies and toddlers will chew on and drool over toys. Cotton yarn and polyester stuffing can both be machine washed on a gentle cycle, keeping the toy hygienic over time.

How to Assemble Amigurumi Toys Like a Pro?

Assembly is where amigurumi toy patterns come to life. The way you pin, position, and sew pieces together determines whether your finished toy looks polished or homemade. Follow these steps for professional results every time.

First, lay out all pieces on a flat surface before sewing anything. Position the head, body, arms, legs, ears, and any accessories where you think they belong. Use locking stitch markers or straight pins to hold each piece in place. Step back and look at the toy from different angles, sometimes pieces that look aligned from the front are crooked from the side.

When you are happy with the placement, use a long strand of yarn and a yarn needle to sew each piece. The whip stitch and mattress stitch are the two most common techniques for amigurumi toy patterns. The whip stitch is faster and easier for beginners, while the mattress stitch creates a nearly invisible seam. Work through both the piece and the body with each stitch so the connection is secure.

After sewing, weave the yarn tail through the body for two to three inches, then trim. Never cut a tail right at the knot, it will unravel over time, especially with play and washing.

Styling and Customizing Your Amigurumi Toys

One of the joys of amigurumi toy patterns is how easily you can customize each design. Swap yarn colors to match a nursery theme. Add a small crochet bow, a tiny hat, or a scarf to give each toy its own personality. You can even embroider initials or a small heart on the belly of a teddy bear for a personalized gift.

For a complete reference on understanding pattern instructions, our guide on how to read a crochet pattern will help you decode any modifications you want to make. Once you are comfortable reading amigurumi toy patterns, you can mix elements from different designs, putting bunny ears on a bear body, for instance, to create genuinely unique toys.

Frequently Asked Questions

What are amigurumi toy patterns?

They’re crochet instructions made specifically for small stuffed playthings, animals, dolls, and shaped objects. Unlike general amigurumi, which might include decor or wearables, toy patterns focus only on finished toys that are safe, durable, and fun. They use simple stitches in continuous rounds, so even a complete beginner can follow along.

How long does it take to complete a beginner amigurumi toy?

Most beginner toys take two to six hours, depending on the design and your speed. Simple shapes like spheres and balls can be done in one to two; multi-part toys like teddy bears or dolls run four to six including assembly. Either way they’re small enough to finish in a sitting or over an easy weekend.

Are amigurumi toys safe for babies and toddlers?

You can make these completely safe for babies and toddlers with the right choices. For under-threes, always embroider the face instead of using plastic safety eyes. Use washable cotton or acrylic and polyester fiberfill, weave all ends in securely inside the body, and tug-test every sewn-on part before handing the toy to a child.

What is the best yarn for amigurumi toy patterns?

Worsted-weight cotton or acrylic yarn is the best choice for amigurumi toy patterns. Cotton provides excellent stitch definition and a firm fabric that holds stuffing securely, while acrylic is softer, more affordable, and available in a wider range of colors. Avoid novelty yarns like eyelash, boucle, or chunky textures, as they make it difficult to see individual stitches and maintain even tension throughout the pattern.

Do I need to know how to read crochet patterns to make amigurumi toys?

While knowing how to read patterns is helpful, many beginner amigurumi toy patterns include step-by-step written instructions alongside the abbreviations. Learning the core abbreviations, sc, inc, dec, MR, and FO, is enough to get started on most simple toy patterns. As you gain confidence, you can expand your knowledge with resources like our crochet abbreviations for beginners guide to tackle more advanced designs.

Similar Posts

Leave a Reply

Your email address will not be published. Required fields are marked *