How to Crochet a Flat Circle Without It Curling Up
Quick Answer
Learning how to crochet a circle flat requires understanding the math of stitch increases: in single crochet, increase 6 stitches per round, in half double crochet increase 8, and in double crochet increase 12. This consistent increase pattern keeps your circle perfectly flat. For more free crochet tutorials, visit KnotToYarn.com.
Tip: If your circle starts to ruffle, skip one increase round before continuing, this lets the stitches settle naturally.
At a Glance
- Skill level: beginner
- Time needed: 20-45 minutes per circle
- Best yarn: smooth acrylic or cotton worsted weight
- Hook size: 5.0mm (H/8)
Common Mistakes → Quick Fixes
- Circle curling into a bowl: you are not increasing enough stitches, add one more increase stitch per section
- Circle ruffling or waving: you are increasing too many stitches, skip one increase round
- Hexagon shape instead of circle: stagger your increase points in each round so they do not stack vertically
Mini Glossary
MR (magic ring), ch (chain), sc (single crochet), hdc (half double crochet), dc (double crochet), inc (increase: 2 stitches in one stitch), sl st (slip stitch)
If you’ve ever wondered how to keep a crochet circle flat, you’re not alone. One of the most common beginner frustrations is watching a carefully worked circle curl into a bowl or ruffle out like a wave. Getting it flat is a foundational skill that opens the door to dozens of projects: coasters, mandalas, amigurumi bases, hats. This guide covers the math behind stitch increases, step-by-step instructions for three stitch types, and tips to keep your circles even every time.
Why does Learning How to Crochet a Circle Flat matter?
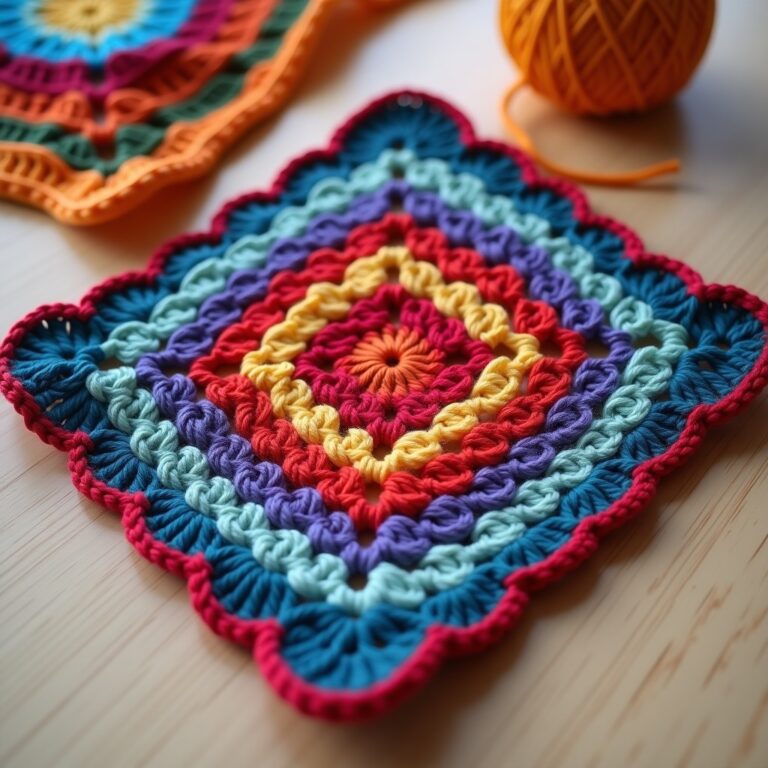
Keeping a circle flat is one of the most valuable skills you can develop. Flat circles are the foundation for countless projects, coasters, doilies, mandalas, round pillow covers, market-bag bottoms, even the base of stuffed animals. If the circle won’t lie flat, everything built on it has problems.
Learning this also builds a deeper feel for crochet geometry and tension. You start seeing how each stitch relates to the ones around it and how small changes shift the whole shape, knowledge that carries straight into working in tubes, shaping garments, and seamless joins.
According to Craft Yarn Council standards, understanding stitch multiples and increase rates is considered a fundamental competency for all crocheters, whether you are a hobbyist or pursuing professional certifications.
The Golden Rule: How to Crochet a Circle Flat Every Time
The secret comes down to one principle: consistent stitch increases in every round. Each round has a slightly bigger circumference than the last, so to fill that extra space without stretching or bunching, you add a fixed number of stitches each time.
The number of stitches you need to add depends on the height of your stitches. Taller stitches cover more horizontal space per stitch, so they require more increases per round. Here is the formula that works every time:
- Single crochet (sc): increase 6 stitches per round
- Half double crochet (hdc): increase 8 stitches per round
- Double crochet (dc): increase 12 stitches per round
- Treble crochet (tr): increase 16 stitches per round
So if Round 1 has 6 single crochets, Round 2 has 12 (6 + 6), Round 3 has 18 (12 + 6), and so on, each round adds the same number of stitches as your base count. That simple pattern is the most reliable method in any stitch type.
For a refresher on foundational stitches, check out our single crochet stitch tutorial and our guide to the half double crochet stitch.
Step-by-Step: How to Crochet a Circle Flat in Single Crochet
Single crochet makes the tightest, most fabric-like circle, well suited to coasters, hot pads, and amigurumi bases. Here’s exactly how to do it in single crochet from start to finish.
Round 1
Start with a magic circle crochet guide or chain 2 and work into the first chain. Make 6 single crochet stitches into the ring. Pull the magic ring tail tight to close the center gap. Join with a slip stitch to the first sc. You now have 6 stitches total.
Round 2
Chain 1 (does not count as a stitch). Make 2 single crochet in each stitch around. Join with a slip stitch to the first sc. You now have 12 stitches total (6 increases).
Round 3
Chain 1. Make 1 sc in the first stitch, then 2 sc in the next stitch. Repeat this pattern (sc, inc) around. Join with a sl st. You now have 18 stitches total.
Round 4
Chain 1. Make 1 sc in each of the first 2 stitches, then 2 sc in the next stitch. Repeat (2 sc, inc) around. Join with a sl st. You now have 24 stitches total.
Round 5
Chain 1. Make 1 sc in each of the first 3 stitches, then 2 sc in the next stitch. Repeat (3 sc, inc) around. Join with a sl st. You now have 30 stitches total.
See the pattern? Each round you add one more regular stitch between increases. That’s the core technique in single crochet, keep going for as many rounds as you need, widening the gap between increases by one each round.
How to Crochet a Circle Flat in Half Double Crochet?
Half double crochet circles work up faster than single crochet and give a slightly more open, drapier fabric. The method is the same, only your base number changes to 8 instead of 6.
Round 1
Start with a magic ring. Make 8 hdc into the ring. Pull the tail to close. Join with a sl st to the top of the first hdc. You have 8 stitches.
Round 2
Chain 2 (does not count as a stitch). Make 2 hdc in each stitch around. Join with a sl st. You have 16 stitches.
Round 3
Chain 2. Make 1 hdc in the first stitch, then 2 hdc in the next stitch. Repeat (hdc, inc) around. Join with a sl st. You have 24 stitches.
Round 4
Chain 2. Make 1 hdc in each of the first 2 stitches, then 2 hdc in the next stitch. Repeat (2 hdc, inc) around. Join with a sl st. You have 32 stitches.
Each round adds one more stitch between the increase pairs. This is the exact same concept as the single crochet method, just with a different base number. If your tension tends to be tight, you might find that hdc circles are more forgiving when learning how to crochet a circle flat. Visit our guide on how to fix crochet tension if you notice your circles curling even when following the pattern correctly.
How to Crochet a Circle Flat in Double Crochet?
Double crochet circles are the fastest and give a more open, lacy fabric, great for mandalas, doilies, and decorative pieces. Same method, base increase number of 12.
Round 1
Make a magic ring. Chain 3 (counts as your first dc), then make 11 dc into the ring. Pull the tail to close. Join with a sl st to the top of the chain 3. You have 12 stitches.
Round 2
Chain 3 (counts as first dc). Make 1 dc in the same stitch as the chain 3, then 2 dc in each remaining stitch around. Join with a sl st to the top of the chain 3. You have 24 stitches.
Round 3
Chain 3. Make 1 dc in the next stitch, then 2 dc in the following stitch. Repeat (dc, inc) around, ending with 1 dc in the last stitch before the chain 3 base. Join with a sl st. You have 36 stitches.
Round 4
Chain 3. Make 1 dc in each of the next 2 stitches, then 2 dc in the next stitch. Repeat (2 dc, inc) around. Join with a sl st. You have 48 stitches.
Because double crochet stitches are tall, they can sometimes mask tension issues. This means that while the circle may look flat as you work, it might develop a wave or ruffle after a few rounds. Keep checking your work against a flat surface to ensure you are properly mastering how to crochet a circle flat with each round you complete. For more detailed guidance on working in the round, check out this Spruce Crafts crochet in the round tutorial.
7 Essential Tips for Perfect Flat Circles
Now that you’ve got the basic method, here are seven tips for consistently professional results.
1. Use stitch markers to track your rounds. When working in continuous spirals, it is extremely easy to lose count of your rounds. Place a stitch marker in the first stitch of each round and move it up as you progress. This single habit prevents more mistakes than any other technique.
2. Stagger your increases to avoid hexagon shaping. If you always place your increase in the same position relative to the round before, the increases stack vertically and create visible corners. Shift the starting point of your increase pattern by one or two stitches each round so the increases spread evenly around the circle.
3. Check your work flat after every two rounds. Do not wait until you have finished the entire piece to check if it is lying flat. Place your circle on a table after every couple of rounds and look at it from eye level. This makes it easy to catch curling or ruffling early when it is still simple to fix.
4. Match your hook size to your yarn weight. Using a hook that is too small for your yarn will create tight, curling circles. Using a hook that is too large will create loose, ruffly circles. Check the yarn label for the recommended hook size and start from there. If your circle curls, try going up one hook size.
5. Block your finished circles for a polished look. Even perfectly crocheted circles can benefit from blocking. Pin your finished circle flat on a blocking mat, mist it lightly with water, and let it dry completely. This sets the stitches and ensures your circle lies perfectly flat.
6. Pay attention to your joining method. If you join each round with a slip stitch and then chain up, those chain stitches can create a visible seam and slight unevenness. For the smoothest results, try working in a continuous spiral and use a stitch marker to track rounds. If you prefer joined rounds, be consistent about whether the chain counts as a stitch.
7. Know when to stop increasing. At a certain point, usually around 6 to 8 inches in diameter depending on your yarn and hook, the natural drape of crochet fabric will keep the circle flat even without continuing the strict increase pattern. Many crocheters find that switching to an increase-every-other-round pattern for larger circles produces the best results. This advanced technique is key to understanding work a flat circle at any size.
Frequently Asked Questions
Why does my crochet circle curl up instead of lying flat?
Your circle curls because you’re not increasing enough stitches per round. Each round has a bigger circumference than the last, and if you don’t add enough stitches to fill it, the fabric pulls inward into a bowl. Add a stitch or two more per section next round, or go up a hook size to loosen your tension.
How many stitches should I increase per round when crocheting a flat circle?
The correct number of increase stitches depends on your stitch type. For single crochet, increase 6 stitches per round. For half double crochet, increase 8 stitches per round. For double crochet, increase 12 stitches per round. These numbers come from the geometric relationship between stitch height and the circumference of a circle, and they remain consistent regardless of how large your circle grows.
What is the difference between crocheting a circle in SC vs DC?
The main difference is the number of increases needed per round and the overall look of the finished fabric. Single crochet circles require 6 increases per round and produce a tight, dense fabric ideal for coasters and amigurumi. Double crochet circles require 12 increases per round and produce a more open, lacy fabric better suited for mandalas and decorative pieces. Half double crochet falls between the two with 8 increases per round.
How do I stop my crochet circle from becoming a hexagon?
A hexagon shape occurs when your increase stitches stack vertically in the same position across multiple rounds, creating six visible corners. To fix this, stagger your increase points so they shift by one or two stitches each round. This distributes the increases evenly around the circle and maintains a smooth, round shape. Using a stitch marker and counting carefully each round makes this much easier to manage.
What can I make with a flat crochet circle?
Flat circles are incredibly versatile, coasters, hot pads and trivets, mandalas and wall hangings, doilies, basket and bag bases, hat bottoms, the starting rounds of amigurumi, round pillow covers, and appliqué motifs. Once you’ve got this down, you’ll reach for it in project after project.