Granny Square Pullover: 7 Ideas + a Free Granny Rectangle Pattern

Granny Square Pullover: 7 Ideas + a Free Granny Rectangle Pattern

Granny Square Pullover: 7 Ideas + a Free Granny Rectangle Pattern

Quick Answer

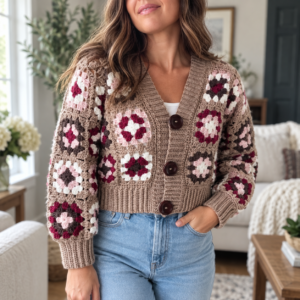
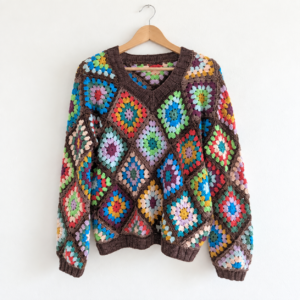
A granny square pullover is a crocheted top made by joining granny squares into a seamless, round-construction garment. Unlike a cardigan, it has no open front, so your joining technique and stitch consistency matter even more. Depending on your bust size and square gauge, you’ll use roughly 15-40 squares.

Tip: Always block your granny squares before joining: this ensures uniform sizing and a professional-looking finished pullover.

At a Glance

  • Skill level: intermediate
  • Time needed: 30-60 hours
  • Best yarn: DK or worsted weight cotton or acrylic blend
  • Hook size: 5.0 mm (H-8) or 5.5 mm (I-9)

Common Mistakes → Quick Fixes

  • Uneven square sizes: block each square and count stitches carefully before joining
  • Pullover too tight: add a half-square border or work a chain-and-single-crochet panel at the sides
  • Neckline too small: skip 2-3 squares at the top center for a comfortable opening

Mini Glossary

GS (granny square), SC (single crochet), DC (double crochet), CH (chain), SL ST (slip stitch), FO (fasten off), SP (space), PM (place marker), BLO (back loop only), FSC (foundation single crochet)

This is KnotToYarn’s own original pattern, free to use, and you’re welcome to sell what you make from it.

You don’t actually need forty tiny squares to get the granny-pullover look, two big granny rectangles do it with four seams. The full formula is below, and the seven ideas after it restyle that same base.

Materials

  • Worsted weight yarn, 450-700 g in 3-5 colors
  • 5.5 mm (US I) crochet hook
  • Stitch markers, yarn needle

Finished size: Custom, formula given (sample numbers are for a 100 cm chest)
Skill level: Confident beginner
Abbreviations (US terms): ch (chain), dc (double crochet), sc (single crochet), sl st (slip stitch), sp (space), cluster (3 dc in one space)

Instructions

The Granny Rectangle (make 2)

A granny rectangle is a granny square with a spine: instead of starting from a point, you start from a center chain.

Foundation: Ch 25 (this sets how much wider than tall your rectangle is, longer chain, wider sweater panel).

Round 1: 3 dc in the 5th ch from the hook. *Skip 2 ch, 3 dc in the next ch;* repeat to the last ch; in the last ch work (3 dc, ch 2, 3 dc, ch 2, 3 dc), first end turned. Working back along the other side of the chain: 3 dc in each space made by the skipped chains; in the final ch (the one with the first 3 dc) work (3 dc, ch 2, 3 dc, ch 2) and sl st to join, a tiny oval with 4 corner spaces, two at each end.

Round 2 onward: granny rhythm, (3 dc, ch 2, 3 dc) in each of the 4 corner spaces, 3 dc in every side space. The piece grows as an ever-larger rectangle.

Work each rectangle to: WIDTH = (chest ÷ 2) + 8 cm ease, HEIGHT = your desired sweater length. With worsted yarn that is typically 13-16 rounds. Make the second rectangle identical (count rounds, match colors).

Assembly

Right sides together: seam the shoulders in from each edge leaving a 25 cm neck gap; seam the sides from the hem up, leaving 22-25 cm armholes. Turn right side out.

Sleeves, worked straight onto the body

Join yarn at an underarm. Round 1: work (3 dc) clusters evenly around the armhole edge, about one cluster per row-end or space, ending with an even count; sl st to join. Continue granny-in-the-round, decreasing one cluster every 4th round (work 2 clusters’ spaces together) to taper gently toward the wrist. Work to wrist length; finish with 2 rounds of sc.

Finishing

Neckline: 1 round of sc, then 1 round of crab stitch to stop the granny fabric from stretching out of shape. Weave in all ends along matching colors and block to measurements.

Made this? We’d love to show off your work, send a photo through our contact page and we’ll feature it here with credit to you.

Tip: In garment-sized granny fabric, the ch-2 corners can leave noticeable holes at the underarms. Work the first sleeve round’s underarm clusters THROUGH the seam rather than into spaces and the holes vanish.

A granny square pullover is a genuinely satisfying make, classic motifs with the cozy structure of a seamless top. For more wearable ideas, browse our crochet sweater patterns. Whether you’re an experienced crocheter after your next project or an intermediate maker ready to level up, the seven free patterns here will get you started.

Why Choose a design Over a Cardigan?

Granny square cardigans get most of the attention, but a pullover is a different build: worked as a continuous tube with no front opening. That means no buttonholes or zippers, and a cleaner, more streamlined shape.

The real difference is the joining. A cardigan is usually two flat panels joined at the shoulders and sides; a pullover arranges squares in a circular or rectangular grid and seams them into a closed shape. You have to plan the neckline and armholes more carefully, but the payoff is a polished garment that reads almost store-bought.

Essential Skills for Crocheting a Granny Square Pullover

Before you start any of the seven patterns, get comfortable with a few core skills. You want a solid single crochet (the backbone of most joins and edging) and the ability to read a crochet pattern, since every designer uses slightly different terms and abbreviations.

Most of all, your tension needs to be consistent. If your tension varies from square to square, the pullover will twist, pucker, or hang unevenly. Swatch, measure, and adjust your hook before committing to the full project.

Gauge and Blocking Basics

Every pattern gives a target gauge, usually rounds and inches per finished square. Block your swatch by pinning it flat, misting with water, and letting it dry fully; that relaxes the stitches for an accurate measurement. The Craft Yarn Council has standard sizing charts to help you work out how many squares you need.

7 Free Granny Square Pullover Patterns

1. The Classic Granny Square Pullover

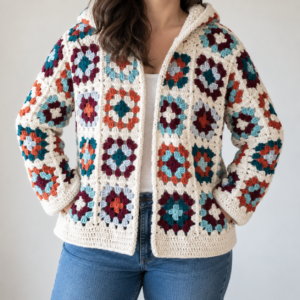
This beginner-friendly version uses traditional three-round granny squares joined with a simple slip-stitch seam: worsted yarn, a 5.5 mm hook, and a relaxed fit that’s great for spring layering. For a medium bust you’ll need about 24 four-inch squares in a 4, 6 grid, with two left open for the neckline and six forming each armhole.

2. Solid Square Spring Pullover

For a more modern, less textured look, this one uses solid granny squares, each round filled with continuous double crochet instead of chain-space clusters. The fabric comes out dense and warm, lovely in autumn colors. You join the front and back at the shoulders and sides, then add ribbed edging at the neckline and cuffs.

3. Motif yoke pullover

This intermediate option sets a ring of granny squares around the yoke and shoulders, then works the body in continuous rows of half double crochet below. The yoke gives a flattering fit through the chest while the body drapes in a gentle A-line. Plan for 12 squares at the yoke and about 400 yards of DK yarn for the body.

4. Crop Top Granny Square Pullover

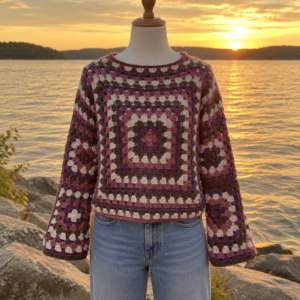
Made for warmer months, this cropped version uses just 9-12 large six-inch squares in a boxy shape that hits above the waist. It includes notes on customizing the crop length and adding optional fringe along the hem. Use a lightweight cotton for a breathable summer top that pairs well with high-waisted jeans.

5. Color Block Pullover

This one uses a different yarn color for every round of each square, for a vivid color-blocked effect across the whole pullover. There’s a color-planning worksheet so you can map your palette first, and a join-as-you-go method that skips the seaming and keeps your ends to a minimum.

6. Hooded Granny Square Pullover

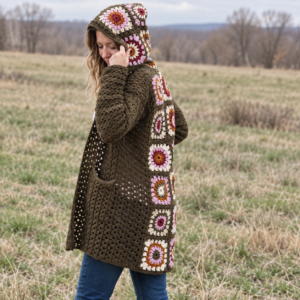
Want a bit more? This hooded variation works the body as a standard 20-square rectangle, then shapes the hood with decreasing granny clusters over 8 more squares. It includes a tutorial for a crocheted-cord drawstring, an ideal layer for cool autumn evenings.

7. Toddler Granny Square Pullover

This kids size is a great intro to garment construction, only 12 small three-inch squares, so it finishes fast. It has a simple boat neckline and ribbed armhole edges, sizes for toddlers 2-4, and uses soft washable acrylic. A good way to practice your joining on a small scale before an adult size.

Joining Techniques for a Seamless Granny Square Pullover

How you join your squares can make or break the finished look. Three methods worth knowing:

Slip Stitch Join

Slip-stitch join. Hold two squares right sides together and slip stitch through both back loops of each stitch pair. It makes a flat, nearly invisible, very strong seam, ideal for most pullovers and garments that’ll see regular wear.

Single Crochet Join

Single-crochet join. Same idea, but with single crochet, which leaves a slightly raised, decorative ridge. Good when you want the seams to read as a design feature instead of disappearing.

Join As You Go (JAYGO)

Join as you go (JAYGO). Connect each new square to the last one during its final round, so there’s nothing to seam at the end. It saves time and cuts down on tails, but the stitch placement takes care, best once you’ve got a few square projects behind you.

Sizing Your Granny Square Pullover

One of the best things about this build is how easily it sizes. The formula is simple: measure your bust, divide by the width of one blocked square, and round up for squares per row. Then measure shoulder to hip and divide by the square height for the number of rows.

For a women’s medium (38-40 inch bust) you’ll usually need 18-24 four-inch squares; for a plus-size fit (48-52 inch) plan on 28-36. Always add two to four extra for ease, a pullover that’s too tight pulls at the armholes and neckline and just isn’t comfortable.

Yarn Recommendations for Your Granny Square Pullover

The yarn you choose affects everything from drape to durability. Here are three excellent options:

  • Cotton blend (e.g., Cotton + acrylic): best for spring and summer pullovers. Provides stitch definition and breathability with minimal stretching.
  • Merino wool blend: ideal for autumn and winter granny square pullovers. Offers warmth, softness, and beautiful stitch memory.
  • 100% acrylic: the most budget-friendly choice and great for your first granny square pullover. Look for a soft premium acrylic to avoid scratchiness.

Cardigan vs Vest PDF Resource

If you like this build and want to branch out, our Cardigan/Vest PDF guide covers open-front versions using the same motif-joining principles, with schematics and stitch diagrams that carry straight over to pullovers. You can find the downloadable collection in our Ravelry store.

Frequently Asked Questions

How many granny squares do I need for a pullover?

It depends on your bust and the size of each finished square. For a women’s medium with four-inch squares, that’s usually 18 to 24. Measure your bust, divide by the width of one blocked square, round up, and add a few extra for ease so the fit is comfortable rather than tight.

What is the difference between a granny square pullover and a granny square cardigan?

A pullover is a closed-front garment, worked in the round or as a seamed rectangle with no opening, while an open-front option like our hexagon cardigan pattern needs closures such as buttons or ties. Cardigans are easier to adjust after the fact; a pullover asks for more upfront planning of the neckline and armholes.

Can beginners crochet a granny square pullover?

It’s generally an intermediate project, but a confident beginner can absolutely manage one by picking a simple pattern with larger squares and minimal shaping. Start with the toddler size or the crop top to practice joining and construction on a smaller scale, and make sure you’re solid on the basic granny square, single crochet, and slip stitch first.

How do I prevent my granny square pullover from stretching?

Stretching usually comes from yarn that’s too heavy for the hook, or from loose tension. Pick a yarn with some wool or cotton for natural memory, and block the finished pullover by pinning it to measurements and steaming or misting. A single crochet or crab-stitch border around the neckline, armholes, and hem also helps it hold shape over time.

What is the best joining method for a granny square pullover?

It comes down to your skill level and the look you’re after. The slip-stitch join is the popular pick, strong, flat, nearly invisible, and durable. Join-as-you-go suits experienced crocheters who’d rather skip seaming. For something decorative, the single-crochet join leaves a subtle raised ridge that adds interest along each seam.

Similar Posts

Leave a Reply

Your email address will not be published. Required fields are marked *