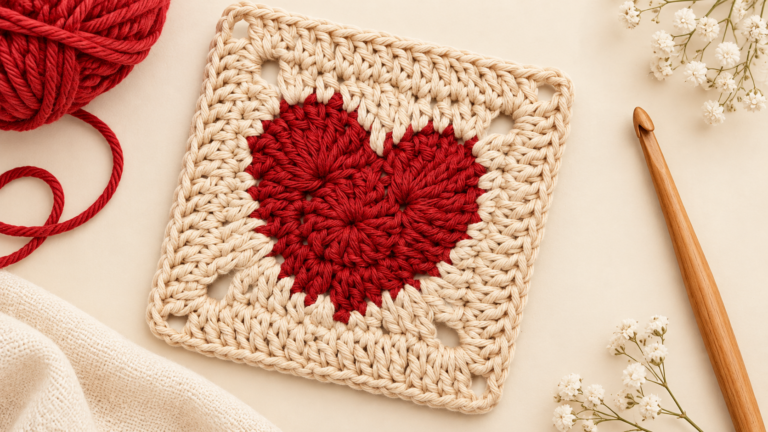
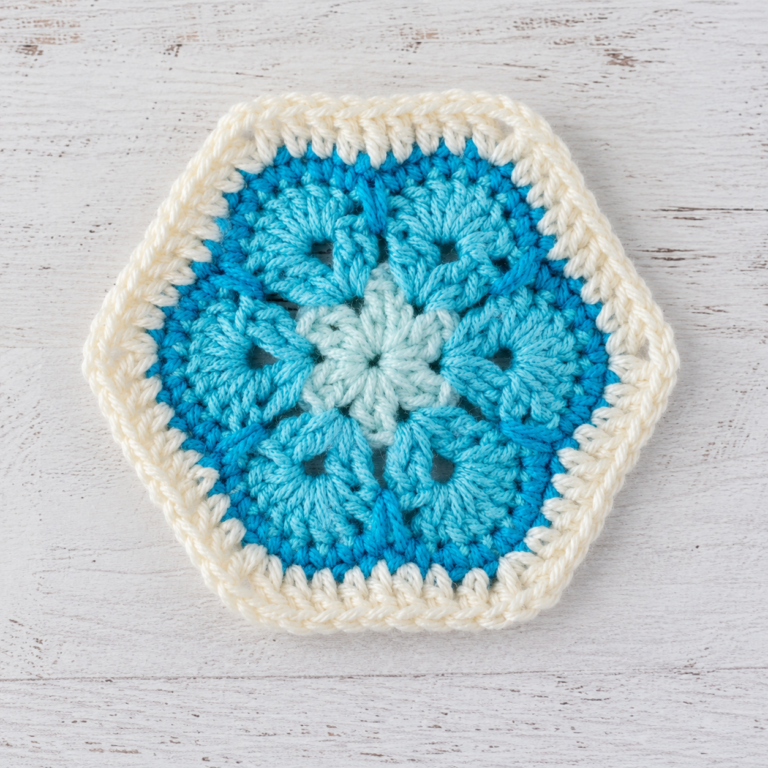
Why Are Granny Squares Different Sizes? 6 Fixes
If your squares keep coming out uneven, our guide on common granny square mistakes covers five quick fixes that will have your motifs lying flat in no time.
You finish your first batch of granny squares, lay them out to join, and notice they’re all slightly different sizes, some wider, some taller, a few more rectangle than square. Sound familiar? Don’t worry, you’re not alone. Every crocheter, beginner or experienced, has hit this at some point.
Quick Info: This post contains free patterns and step-by-step tutorials. All measurements are in both inches and centimeters. Yarn amounts are approximate, always buy an extra skein to be safe!
This guide is for crocheters of any level who want to understand why their squares come out uneven and how to fix it fast. Whether you’re making your first square or your twentieth, the tips below will get you consistent, professional results.
In this guide, you will learn:
- The 7 most common reasons why are my granny squares different sizes: and if your squares look lopsided rather than mismatched, check out our guide on why your granny square might be crooked
- Simple techniques to fix uneven edges and tension issues
- A step-by-step blocking method to perfect your squares
- Pro tips to prevent size differences before they happen
Let us get your granny squares matching perfectly.

Why Are 1. Inconsistent Tension: The #1 Reason Why Are My Granny Squares Different Sizes Important?
Once you sort this out, your projects come together looking much more polished and professional.
Tension is the most common culprit, and it’s completely normal for yours to drift, especially while you’re still learning. Tension is just how tightly you hold the yarn and pull through each stitch. Crochet some squares relaxed and others tired or stressed, and the stitch sizes vary noticeably.
When your tension is too tight, your stitches become smaller and denser, resulting in a smaller square. When your tension is too loose, your stitches spread out and the square grows larger. Even a slight change in how firmly you grip the yarn between squares can add up across 3 or 4 rounds to create a visible size difference. If you struggle with tension overall, check out our guide on how to fix crochet tension for targeted tips.
Signs Your Tension Is Inconsistent
Look for these telltale signs that tension is the culprit behind your uneven squares:
- Squares that start tight and gradually loosen toward the outer rounds
- First few squares of a session look different from the last few
- Stitches feel tight and stiff in some areas and loose and floppy in others
- The double crochet stitches in some squares are visibly larger or smaller than others
How to Fix Inconsistent Tension
Another frequent cause is switching between hook sizes without noticing, more on that below.
Practice keeping a consistent grip on the yarn. Hold the yarn in your non-hook hand with the same wrap around your fingers for every square. If you notice yourself tightening up, pause, take a breath, and consciously loosen your grip. Many crocheters find that using an ergonomic hook from a set of beginner-friendly crochet hooks with a comfortable grip helps maintain consistent tension over longer sessions. According to the Craft Yarn Council, consistent tension is one of the most important skills to develop as a beginner crocheter.
Pro Tip: Crochet all your granny squares in one or two sittings rather than spreading them over several days. Your tension tends to stay more consistent within a single session.
1. Using Different Yarn Weights or Brands
Switching yarn mid-project is a sneaky cause of uneven squares. Even if two yarns are both labeled “worsted” or “4 medium,” different brands and fibers vary in thickness, elasticity, and drape. A 100% cotton behaves very differently from a wool-acrylic blend, and two acrylics from different makers can still give noticeably different stitch sizes.
For example, a skein of Red Heart Super Saver (acrylic, worsted weight) and a skein of Lion Brand Vanna’s Choice (also acrylic, worsted weight) will often yield slightly different gauge even when using the same hook size. The difference might only be a fraction of a millimeter per stitch, but across a granny square pattern with dozens of stitches, it adds up quickly.
Why Yarn Fiber Type Matters
Knowing what causes it helps you head it off next time, largely by counting your stitches carefully.
Each fiber type responds differently to the same stitch:
- Acrylic yarn is forgiving and consistent, making it ideal for beginners practicing granny square crochet patterns
- Cotton yarn tends to grow when wet and shrink when dried, which can cause size variation between squares made on different days
- Wool yarn is the most elastic and can stretch during use, so your squares may look even when finished but change size over time
- Blended yarns (wool-acrylic, cotton-acrylic) combine properties of both fibers and require testing before starting a project
How to Fix Yarn-Related Size Issues
Buy all the yarn you need for a project from the same dye lot and brand before you start. Choosing the best yarn for your skill level also makes a big difference. If you must switch yarns, crochet a test swatch with both yarns using the same hook and compare the resulting gauge. If one yarn produces larger stitches, go down a hook size for that yarn to compensate. The Yarnspirations website recommends always checking gauge when starting a new project, especially when mixing yarns. See our crochet hook size chart for reference.
2. Changing Hook Size Between Squares
More often than not, the answer comes back to inconsistent tension from one round to the next.
This one sounds obvious, but it happens more often than you might think. You start a square with a 5.0mm hook, set it down, and pick up a 5.5mm hook for the next square. The result is one square that is noticeably larger than the other. Even a 0.5mm difference in hook size can change a granny square by 2 to 3 centimeters across multiple rounds.
This mistake is especially common if you have multiple WIPs (works in progress) going at the same time, each using a different hook size. It also happens when you borrow a hook from another project, like switching from your crochet hook sizes for a blanket to a smaller one for amigurumi, and forget to switch back.
Hook Size and Granny Square Size Reference Chart
| Hook Size | Yarn Weight | Typical Granny Square Size (4 rounds) |
|---|---|---|
| 4.0mm (G-6) | DK (3 light) | 8 to 9 cm |
| 5.0mm (H-8) | Worsted (4 medium) | 10 to 12 cm |
| 6.0mm (J-10) | Bulky (5 bulky) | 13 to 15 cm |
| 8.0mm (L-11) | Super Bulky (6 super bulky) | 16 to 18 cm |
How to Prevent Hook Size Mistakes
Use the same hook for every square in your project. Mark your hook with a small piece of tape or a stitch marker so you always know which one belongs to your current project. If you have a hook organizer, keep your project hook in a dedicated slot. For granny square projects, a hook size of 5.0mm (H-8) is standard for worsted weight yarn, but always follow your pattern’s recommendation.
3. Counting Mistakes in Your Stitches
Missing a stitch or adding an extra stitch in a round will change the shape and size of your granny square. In a standard granny square crochet pattern, each corner should have (3 double crochet, chain 2, 3 double crochet) and each side space should have 3 double crochet. If you accidentally put 4 double crochet in one side space or only 2 in another, the square will become lopsided.
Counting mistakes are incredibly common, especially when you are watching TV or chatting while crocheting. The good news is that they are also one of the easiest problems to prevent once you build the habit of counting.
Standard Granny Square Stitch Count by Round
Use this as a quick reference when reading crochet patterns:
- Round 1: 12 double crochet stitches (3 per corner x 4 corners)
- Round 2: 24 double crochet stitches (3 per side space x 4 + 3 per corner x 4)
- Round 3: 36 double crochet stitches (3 per side space x 8 + 3 per corner x 4)
- Round 4: 48 double crochet stitches (3 per side space x 12 + 3 per corner x 4)
How to Fix Counting Mistakes
Count your stitches at the end of every round. A standard granny square after round 3 should have 12 groups of 3 double crochet (36 total double crochet stitches) plus 4 corner chain-2 spaces. Use a stitch marker to mark the first stitch of each round so you know where you started. If you catch a mistake at the end of a round, it is better to undo that round and redo it rather than continuing with an incorrect stitch count.
4. The First Round Foundation Ring Is Too Tight or Too Loose?
The center ring (also called the magic ring or starting chain) sets the foundation for your entire granny square. If your magic ring is pulled too tight, the center of the square will be small and compact, and subsequent rounds will crowd around it, making the overall square smaller. If the ring is too loose, the center will be floppy and the square will stretch out of shape.
Many beginners struggle with the magic ring technique and end up with inconsistent starting ring sizes. Some crocheters prefer the chain-4 method (chain 4, slip stitch to join) instead, which can be more predictable for beginners but still varies in size depending on how tightly you chain.
Magic Ring vs Chain Start: Which Is Better?
Both methods work, but they have different pros and cons:
- Magic ring: Produces a completely closed center with no hole, but requires practice to get a consistent ring size. Best for solid granny square patterns where a tight center matters.
- Chain-4 start: More predictable for beginners and easier to control, but leaves a small hole in the center. Works well for decorative squares.
How to Fix Foundation Ring Issues
Practice your magic ring until you can produce a consistent ring size. The magic ring should be just large enough to comfortably fit 12 double crochet stitches in the first round without crowding. If you use the chain method, try chaining 4 and see if the resulting ring fits your first round comfortably. If not, adjust to chain 3 or chain 5. Moogly has an excellent video tutorial on the magic ring technique that is worth watching if you are struggling with this step.
5. Working Too Fast or When Tired
Speed and fatigue have a direct impact on stitch consistency. When you crochet too quickly, your hands move faster than your brain can maintain consistent tension. When you are tired, your grip weakens and your stitches become looser and less uniform. Both of these scenarios lead to granny squares that look different from one another.
Many crocheters notice that their first few squares of a session are neat and even, but as they speed up or get tired, the later squares start to grow or change shape. This is completely normal and simply means you need to pace yourself.
How Fatigue Changes Your Crochet
There is a real physical reason your squares change when you are tired:
- Hand muscles fatigue after 30 to 60 minutes of continuous crocheting, causing grip to loosen
- Shoulder tension from poor posture can make your stitches tighter without you realizing it
- Rushing through the last few stitches of a round often leads to skipped or extra stitches
- Crocheting while distracted (watching TV, talking) increases counting errors
How to Fix Speed and Fatigue Issues
Slow down. Granny squares are a relaxing project, not a race. If you feel your hands cramping or your tension changing, take a 10-minute break before continuing. Set a comfortable pace where you can maintain awareness of each stitch. If you are making a large number of squares for a blanket, aim for 3 to 5 squares per session rather than trying to power through 10 or more in one sitting. This is one of the most important crochet tips for better-looking projects.
6. Not Blocking Your Finished Squares
Blocking is the process of wetting or steaming your finished crochet pieces and pinning them to shape. Many beginners skip blocking entirely, but it is one of the most effective ways to even out your granny squares. Even if your squares are slightly different sizes before blocking, proper blocking can stretch smaller squares and tighten larger ones to achieve a uniform size.
There are three main blocking methods: wet blocking (submerging in water, pinning to a blocking mat, and letting dry), spray blocking (pinning first, then spraying with water), and steam blocking (using a steam iron held above the fabric without touching it directly). For acrylic yarn, steam blocking works best because acrylic does not respond well to full submersion.
Which Blocking Method Should You Use?
- Wet blocking: Best for wool, cotton, and blended yarns. Fully submerge the square, squeeze out excess water, pin to size, and let dry for 12 to 24 hours.
- Spray blocking: Best for delicate fibers. Pin the square first, then spray with water. Let dry for 12 to 24 hours.
- Steam blocking: Best for acrylic yarn. Hold a steam iron 2 to 3 cm above the fabric, moving slowly. Do not press the iron directly onto acrylic as it can melt the fibers.
How to Block Your Granny Squares (Step-by-Step)
- Finish all your squares and weave in the ends
- Pin each square to a blocking mat or foam board, measuring each side to ensure it matches your target size (for example, 12cm x 12cm)
- Use rust-proof T-pins at each corner and along the edges
- Spray generously with water (for spray blocking) or hold a steam iron 2 to 3 cm above the fabric (for steam blocking)
- Let dry completely, usually 12 to 24 hours
- Remove pins and check that all squares are the same size
How to Join Uneven Granny Squares?
If you already have a batch of uneven granny squares and do not want to redo them, there are still ways to join them so the size difference is not noticeable. One approach is to add an extra round of single crochet around the smaller squares to bring them up to size. Another option is to use the join-as-you-go method with a slightly tighter tension on larger squares to pull them in.
For a quick fix, you can also strategically place slightly smaller squares next to larger ones when laying out your blanket or project. When joined, the slight tension from seaming can help equalize the sizes. However, if the size difference is more than 1 to 2 centimeters, it is better to block or remake the squares rather than trying to force them together.
Quick Fixes for Slightly Uneven Squares
- Add a border round of single crochet to smaller squares to bring them up to size
- Use a slightly tighter tension when joining larger squares to pull them in
- Strategically arrange squares so size differences are less visible in the finished piece
- For blankets, place the most noticeable size differences toward the edges rather than the center
Frequently Asked Questions
Why are my granny squares curling?
Granny squares curl when the edges are tighter than the center. This usually happens when your tension is too tight, especially on the outer rounds. Try going up one hook size for the final round or loosening your tension. Blocking will also help flatten curling squares. For more on this, read our guide on why is my crochet curling.
Why are my granny squares different sizes even with the same yarn?
If you’re using the same yarn and still getting different sizes, tension is the likely culprit, it naturally fluctuates through the day and between sessions. Other possibilities: switching hooks between squares, counting errors, or varying how tight you make the foundation ring. Try crocheting all your squares back-to-back and blocking them together.
Should all my granny squares be the exact same size?
Ideally, yes. For a clean, professional-looking blanket or project, your granny squares should be within 0.5cm of each other in size. Slight variations of 1 to 2mm are usually invisible after joining and blocking. Anything larger than 0.5cm should be corrected by blocking or adding a compensating round.
Can I fix uneven granny squares without blocking?
Yes, but blocking is the easiest method. If you cannot block, you can add an extra round of single crochet to smaller squares to bring them up to size. You can also try re-crocheting the final round of too-large squares with a hook one size smaller.
Does the type of yarn affect granny square size?
Absolutely. Acrylic yarn is more forgiving and responds well to steam blocking. Cotton yarn tends to grow when wet and shrink when dried, so it requires careful blocking. Wool is the most elastic and can be stretched or compressed easily during blocking. Always consider your yarn choice when troubleshooting size issues.
How do I know if my granny square gauge is correct?
Crochet a test swatch using your chosen yarn and hook, then measure the resulting square against your pattern’s gauge specification. Most patterns specify gauge as a measurement (for example, “4 rounds = 10cm x 10cm”). If your square is too large, go down a hook size. If it is too small, go up a hook size. Check our hook size chart for guidance.
Conclusion
If your squares keep coming out uneven, it’s usually one of these 7 causes: inconsistent tension, mixed yarns, changing hook sizes, counting mistakes, a too-tight or too-loose foundation ring, working too fast, or skipping blocking. Once you spot which one applies, you can fix it directly.
The most important habit to build is consistency: use the same yarn, the same hook, and the same tension for every square in your project. Once you have finished all your squares, block them to size and they will join together beautifully. With practice, your granny squares will become perfectly uniform, and you will be able to produce matching squares without even thinking about it.
Ready to start your next granny square project? Check out our beginner granny square tutorial, a perfect quick project for practicing consistent tension and blocking. If you are looking for more easy crochet projects for beginners, we have plenty of free patterns to explore.
Related reading: How to Crochet a Granny Square for Beginners | Why Is My Granny Square Crooked? | How to Fix Crochet Tension | Granny Square Pattern
Sources: Craft Yarn Council Standards | Moogly Magic Ring Tutorial | Yarnspirations Gauge Guide