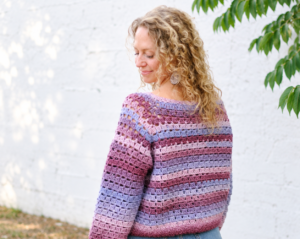
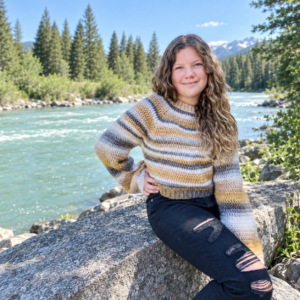
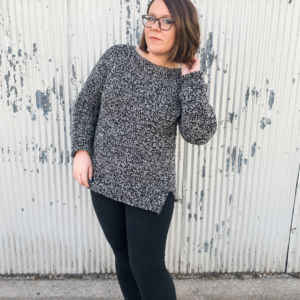
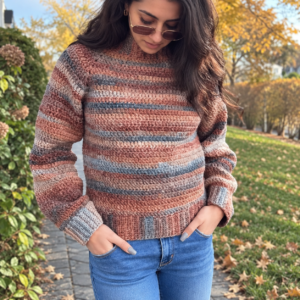
How to Crochet a Raglan Sweater That Actually Fits You

How to Crochet a Raglan Sweater That Actually Fits You

How to Crochet a Raglan Sweater That Actually Fits You

Quick Answer

A crochet raglan sweater is worked from the top down in one seamless piece, which makes it a satisfying intermediate project. The raglan construction shapes the shoulders without any seams. There are more sweater patterns to explore on the blog, too.

Tip: Always make a gauge swatch before starting your crochet raglan sweater, even a small difference in tension can change your finished size by several inches.

At a Glance

  • Skill level: intermediate
  • Time needed: 1-3 weeks depending on size and complexity
  • Best yarn: DK or worsted weight acrylic or cotton blend
  • Hook size: 4.0-5.5 mm depending on yarn weight

Common Mistakes → Quick Fixes

  • Skip the gauge swatch: Always swatch, raglan math depends on exact stitch counts matching your tension
  • Holey raglan increases: Place increases one stitch away from the marker, not directly next to it
  • Uneven sleeves: Count your raglan increase rows carefully and use stitch markers on all 4 sections

Mini Glossary

RS (right side), WS (wrong side), CH (chain), single crochet stitch, HDC (half double crochet), DC (double crochet), ST (stitch), PM (place marker), SLS (slip stitch), INC (increase)

If you’ve been wanting to make your first raglan sweater, you’re in the right place. It’s one of the most rewarding garments to crochet because it’s worked in one piece from the top down, no seams to sew at the end, and the fit is endlessly customizable.

This guide covers everything about the construction method, the math behind raglan increases, a full size chart, step-by-step instructions, and three free patterns to get you started.

What Is a Raglan Sweater?

A raglan sweater is a garment where the sleeves extend in one piece fully to the collar, creating a diagonal seam line from the underarm to the neckline. Named after Lord Raglan, who wore this style of sleeve after losing his arm in the Battle of Waterloo, the design has become a staple in knit and crochet raglan sweater patterns worldwide.

Unlike set-in sleeves or drop-shoulder constructions, a crochet raglan sweater has a smooth, tapered shoulder line that flatters every body shape. The diagonal seam (or increase line in top-down designs) eliminates the bulky shoulder seam found in traditional garments.

Photo: A close-up of the smooth raglan shoulder shaping and stitch texture

Why Top-Down Raglan Is the Best Construction Method?

There are several ways to build a sweater, but the top-down raglan approach stands out for a few reasons:

1. Try It On As You Go

Because a top-down sweater is worked from the neckline downward, you can slip it on at any point during the process. This means you can adjust the length of the yoke, body, and sleeves to fit your unique proportions perfectly.

2. No Seaming Required

Many crocheters find seaming to be the least enjoyable part of garment making. With a top-down raglan sweater, the only finishing you need is weaving in ends and adding ribbing. Everything else is worked in one continuous piece.

3. Easy to Customize

Want a cropped sweater? Stop crocheting the body earlier. Need longer sleeves? Keep working past the wrist. The top-down sweater method gives you complete control over every measurement.

4. Great for All Skill Levels

Once you understand the basic raglan increase formula, you can make any crochet raglan sweater in any size. If you need help with tension issues along the way, check out our guide on how to fix crochet tension.

How to Calculate Raglan Increase Math?

The secret to a well-fitting raglan is the math. Here’s a simple formula you can use for any size:

Step 1: Measure Your Gauge

Work a swatch in your chosen stitch (usually half double crochet or double crochet). Measure how many stitches you get per inch or centimeter.

Step 2: Determine Your Yoke Measurements

Measure around the fullest part of your upper chest, just above the bust. This is your yoke circumference. For a relaxed fit, add 2-4 inches of positive ease.

Step 3: Calculate Your Stitches

Multiply your chest measurement by your stitch gauge per inch. Then divide the total into five sections:

  • Front: ~30% of total stitches
  • Back: ~30% of total stitches
  • Left Sleeve: ~15% of total stitches
  • Right Sleeve: ~15% of total stitches
  • 4 Raglan Increase Stitches: ~10% (these are the 4 stitch-marker lines)

Step 4: Calculate Increase Rows

Subtract your neckline stitches from your total yoke stitches. Divide the remainder by 8 (because each raglan line has 2 increases per row, and there are 4 raglan lines). This gives you the number of increase rows needed.

For example, if your yoke needs 120 stitches and your starting chain is 48 stitches, the difference is 72 stitches. Dividing 72 by 8 gives you 9 increase rows. That means you will work 9 rows of raglan increases before separating the sleeves.

Size Chart With Stitch Counts for XS Through 5XL

Here is a reference chart for a top-down sweater using worsted weight yarn (approximately 4 stitches per inch in half double crochet). All measurements include 2 inches of positive ease.

Size Bust (inches) Yoke Stitches Starting Chain Increase Rows Body Stitches Sleeve Stitches
XS 32 112 44 8-9 72 16
S 36 124 48 9-10 80 18
M 40 136 52 10-11 88 20
L 44 148 56 11-12 96 22
XL 48 160 60 12-13 104 24
2XL 52 172 64 13-14 112 26
3XL 56 184 68 14-15 120 28
4XL 60 196 72 15-16 128 30
5XL 64 208 76 16-17 136 32

These numbers are a starting point. Always make a gauge swatch and adjust based on your personal tension. Refer to the Craft Yarn Council’s yarn weight standards for help choosing the right yarn and hook combination for your raglan sweater.

Photo: A flat-lay view showing how the raglan sleeve lines create a smooth diagonal from neckline to underarm

Step-by-Step Crochet Raglan Sweater Construction

Now let’s walk through each stage of building the sweater from start to finish.

Starting the Yoke

Begin by chaining the number of stitches for your starting chain (see the size chart above). Join with a slip stitch to form a round, being careful not to twist the chain.

Place stitch markers to divide your round into four sections: back, right sleeve, front, and left sleeve. Use a different colored marker for the beginning of the round so you can track your rows easily.

Your first round of the sweater yoke establishes the stitch pattern. Work evenly across each section, placing one stitch in each chain. This becomes your foundation round.

Raglan Increase Rows

This is where the magic happens. In each increase row of your crochet raglan sweater, you will work 2 increases at each raglan line (one before the marker and one after), for a total of 8 new stitches per row.

A common increase in half double crochet is to work 2 HDC in the same stitch. For a neater look, place the first increase one stitch before the marker and the second increase one stitch after the marker.

Continue working increase rows until your yoke measures the desired length from the neckline to the underarm. This is typically 7-9 inches for an average adult size. Try the top-down sweater on periodically to check the fit.

Separating the Sleeves

Once the yoke is complete, it is time to separate the sleeves from the body. Here is how:

  1. Work across the back stitches.
  2. Chain a number of stitches equal to your desired underarm depth (usually 4-8 chains for most sizes). This creates the underarm gap.
  3. Work across the front stitches.
  4. Chain the same number of underarm stitches.
  5. Join to the beginning of the round.
  6. The sleeve stitches are now on hold. You can place them on waste yarn or simply leave them and come back later.

This separation step transforms your raglan sweater from a yoke into two distinct components: the body tube and the two sleeve tubes.

Working the Body

Continue working in rounds on the body stitches only. Do not increase or decrease, simply work even until the body reaches your desired length. For a cropped sweater, aim for 12-14 inches from the underarm. For a tunic length, work 18-20 inches or more.

Work a few rounds of ribbing at the bottom edge for a polished finish. A simple single crochet ribbing (working in the back loop only) works beautifully.

Working the Sleeves

Return to one of the held sleeve sections. Join your yarn at the underarm gap and work across the sleeve stitches. Work even for a few rounds, then begin decreasing every few rounds to taper the sleeve toward the wrist.

A common decrease rate is to work 2 decreases (one at each side of the sleeve) every 4-6 rounds. Continue until the sleeve reaches your desired length, then finish with ribbing to match the body.

Repeat for the second sleeve. This is where many crocheters accidentally create sleeves of different lengths. Count your rows carefully, and your crochet raglan sweater will turn out perfectly symmetrical.

Neckband and Cuffs

The final touches are the neckband and cuffs. A good neckband frames the face and keeps the neckline from stretching out over time.

Work a round of single crochet around the neckline, then work 1-2 inches of ribbing. For the cuffs, work 1-2 inches of matching ribbing in the round.

If you need help choosing the right crochet hook sizes for ribbing, remember that going down one or two hook sizes creates a tighter, more elastic ribbing that holds its shape better.

Best Yarns for Crochet Raglan Sweaters

The yarn makes a big difference in how the finished sweater looks, feels, and wears. A few good options for every budget:

1. DK Weight Yarns (Recommended)

DK weight yarn (also called light worsted) strikes the perfect balance between drape and structure for a top-down sweater. It creates a fabric that is lightweight enough for layering but substantial enough to hide gaps between stitches. Look for cotton blends, merino blends, or high-quality acrylics.

2. Worsted Weight Yarns

Worsted weight is the most common choice for a raglan sweater because it works up quickly and is widely available. It creates a warmer, denser fabric ideal for fall and winter garments.

3. Budget-Friendly Options

If you are new to garment crochet, you do not need to spend a fortune on yarn. Check out our guide to the best yarn for beginner crochet projects for affordable recommendations that still produce beautiful results.

Whatever yarn you choose, always buy all skeins from the same dye lot to avoid color variations in your finished sweater.

3 Free Crochet Raglan Sweater Pattern Recommendations

Ready to start? Here are three free top-down raglan patterns on Ravelry, each with its own take on the construction:

1. The Everyday Raglan

This is a classic, no-fuss crochet raglan sweater pattern designed for everyday wear. It features a simple half double crochet body with raglan increases worked in the back loop only for a subtle textured line. The pattern includes sizes XS through 5XL and uses approximately 800-1600 yards of DK weight yarn depending on size. It is an ideal first garment project because the straightforward construction lets you focus on mastering the raglan technique.

2. The cropped Boho Raglan

For a more fashion-forward look, this cropped top-down sweater features an open lace yoke that transitions into a solid half double crochet body. The lace panels at the shoulders add visual interest without complicating the construction. It is designed to hit at the natural waist and looks beautiful layered over dresses or high-waisted pants. The pattern uses worsted weight yarn and includes detailed photo tutorials for the lace sections.

3. The Oversized Weekend Raglan

If you love the cozy, slouchy sweater trend, this oversized raglan sweater works well for you. It features dropped shoulders, a wide neckline, and 4-6 inches of positive ease for maximum comfort. The pattern uses bulky weight yarn so it works up fast, and the simple construction makes it a great weekend project. You can browse all of these patterns and thousands more on Ravelry.

For more garment inspiration, be sure to explore our collection of crochet sweater pattern ideas and tutorials right here on KnotToYarn.

Frequently Asked Questions

Is a crochet raglan sweater suitable for beginners?

A basic raglan is generally an intermediate project, but ambitious beginners can absolutely manage it. Start with a simple worsted-weight pattern, take your time with the gauge swatch, and try the sweater on as you go. The top-down build is forgiving because you can adjust the fit at any point.

How long does it take to crochet a raglan sweater?

Most people finish a raglan in 1 to 3 weeks, depending on size, yarn weight, and how much time you put in daily. A cropped DK sweater in a standard size might be 15-20 hours of active crocheting; a bulky oversized one could be done in a weekend.

What is the difference between a raglan and a set-in sleeve?

A raglan has a diagonal line running from the neckline to the underarm, made by increases (or decreases) along four raglan lines. A set-in sleeve has a horizontal shoulder seam with a separately shaped, curved armhole. Raglans are easier to make cleanly; set-in sleeves give a more tailored fit.

Can I use any stitch pattern for a crochet raglan sweater?

Yes, you can use almost any stitch pattern, but the math works best with stitches that have a consistent, predictable gauge. Half double and double crochet are the usual choices. For a more complex stitch, make a large gauge swatch and recalculate your increase rate.

Why does my crochet raglan sweater have holes at the raglan lines?

Holes along the raglan increase lines are one of the most common issues. They usually happen when the increases sit too close to the markers, leaving a gap. Place your increases a stitch or two away from the marker instead, or work an invisible increase (lifting the horizontal bar of the previous stitch) for a neater look.

Similar Posts

Leave a Reply

Your email address will not be published. Required fields are marked *