How to Crochet an Axolotl: Free Easy Chibi Pattern
Quick Answer
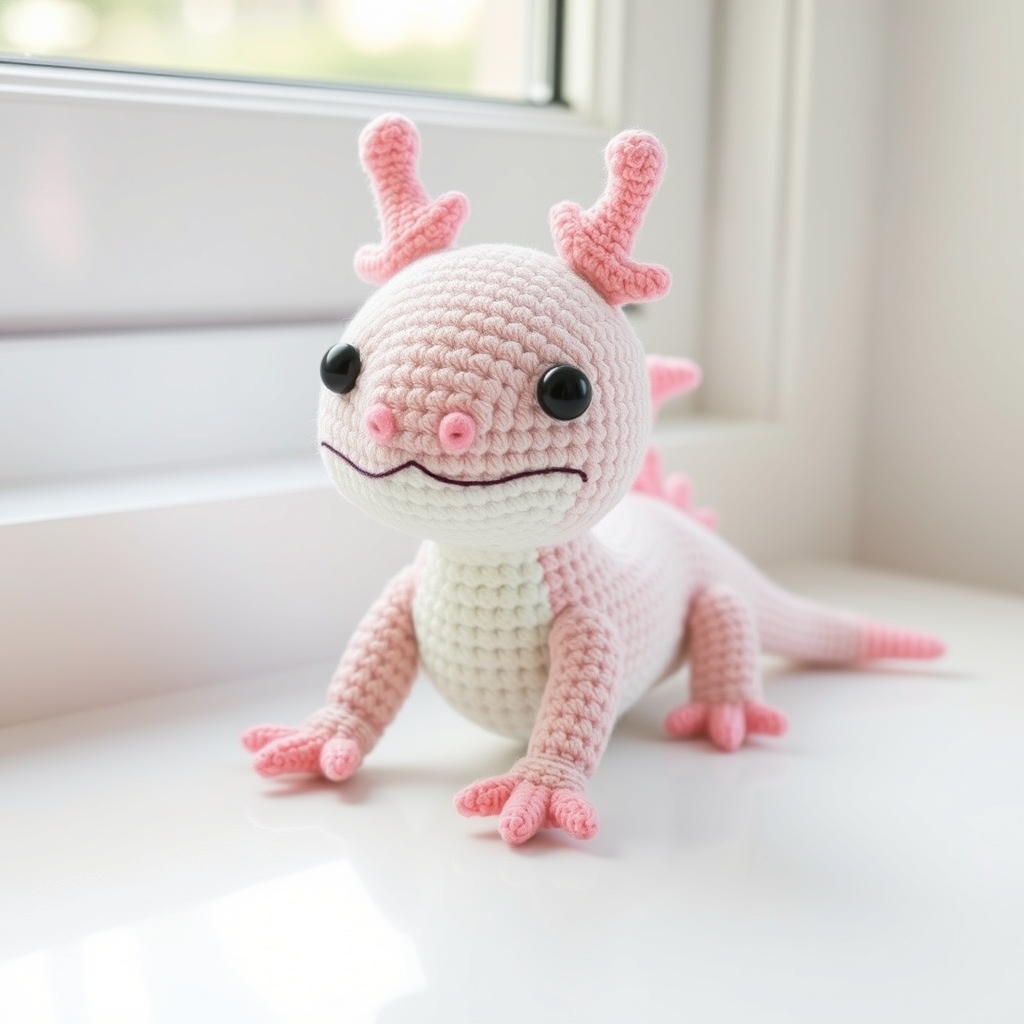
A crochet axolotl is a small stuffed amigurumi toy shaped like the popular Mexican walking salamander. You can make one using basic stitches such as single crochet and the magic ring technique, along with safety eyes, polyester fiberfill, and medium-weight yarn. The whole project typically takes just two to four hours.
Tip: Start with a lighter yarn color so you can easily see your stitches and keep your axolotl’s shape neat and even.
At a Glance
- Skill level: beginner to intermediate
- Time needed: 2 to 4 hours
- Best yarn: worsted-weight acrylic or cotton blend
- Hook size: 3.5 mm (E-4) or 4.0 mm (G-6)
Common Mistakes to Quick Fixes
- Loose stuffing: Add fiberfill in small batches and pack firmly for a smooth shape.
- Uneven gills: Count your stitches on each frill and use stitch markers to stay consistent.
- Curling tail: Insert a pipe cleaner before stuffing so the tail holds its curve.
Mini Glossary
sc (single crochet), inc (increase), dec (decrease), mr (magic ring), BLO (back loop only), FO (fasten off), ss (slip stitch)
Featured Free Pattern: Chibi Axolotl
This is KnotToYarn’s own original pattern, free to use, and you’re welcome to sell what you make from it.
The internet’s favorite amphibian, simplified to its essentials: one body piece, six little gill bobbles, four stub legs, and a flat tail. Every part is beginner geometry. Complete pattern below.
Materials
- Worsted weight yarn in pink (or any axolotl fantasy color), about 40 g; darker pink scraps for gills
- 3.5 mm (US E) crochet hook
- 8 mm safety eyes (or embroidery)
- Fiberfill, stitch marker, yarn needle
Finished size: About 14 cm (5.5 in) nose to tail
Skill level: Confident beginner
Abbreviations (US terms): ch (chain), sc (single crochet), hdc (half double crochet), dc (double crochet), inc (2 sc in one st), dec (sc 2 together), sl st (slip stitch), st(s) (stitch/es)
Instructions
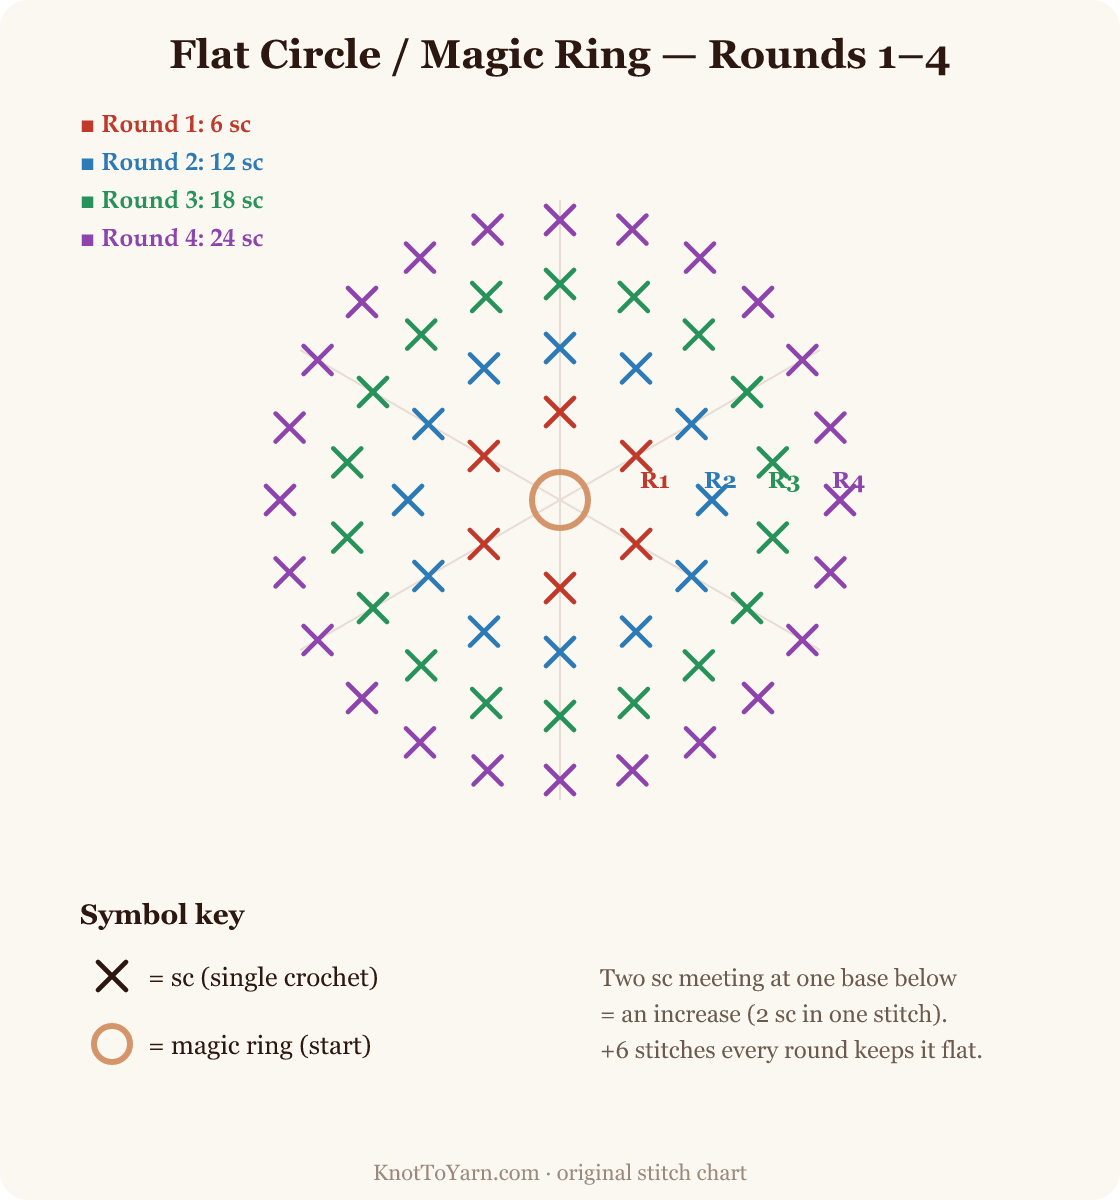
The Body (one piece, nose to tail-base, spirals)
Round 1: 6 sc in a magic ring: 6 sts.
Round 2: Inc around: 12 sts.
Round 3: (Sc 1, inc) around: 18 sts.
Round 4: (Sc 2, inc) around: 24 sts.
Rounds 5-9: Sc around: 24 sts (the head). Eyes between Rounds 5 and 6, seven sts apart, axolotl eyes sit wide and low, and the wide spacing is what makes the face read ‘axolotl smile’.
Round 10: (Sc 4, dec) around: 20 sts.
Rounds 11-16: Sc around: 20 sts (the body). Stuff the head firmly now, the body medium.
Round 17: (Sc 2, dec) around: 15 sts.
Round 18: (Sc 1, dec) around: 10 sts. Finish stuffing.
Round 19: Dec around: 5 sts. Cinch closed.
The Gills (make 6, darker pink)
Ch 3, then work 3 dc in the 3rd ch from the hook, ch 2, sl st in the same ch, one tiny frilly fan. Fasten off with a tail. (Six of these take fifteen minutes total.)
The Legs (make 4)
Round 1: 5 sc in a magic ring. Rounds 2-3: sc around: 5 sts. No stuffing. Pinch flat, sc through both layers to close, leave a tail.
The Tail (flat, worked in rows)
Row 1: Ch 7, sc in the 2nd ch and each ch across: 6 sts. Ch 1, turn.
Rows 2-5: Dec at the start of each row, sc to the end, 5, 4, 3, 2 sts. Row 6: sc both together, the point. Edge the whole tail with one round of sc and a (sl st, ch 1) at the tip.
Finishing
Sew three gills to each side of the head, fanned between Rounds 4 and 7, the gill frills are 90 percent of axolotl identity, so angle them outward and slightly back. Legs: two under Round 11, two under Round 15, stubby and proud. Tail: sew the straight edge to the cinched body end, vertical like a rudder. Embroider a wide shallow smile two rounds below the eyes.
Made this? We’d love to show off your work, send a photo through our contact page and we’ll feature it here with credit to you.
Tip: Make the gills before the body and clip them to your work bag. They are the fiddliest part, and six finished frills waiting patiently is better motivation than six unmade chores at the end.
If you have been searching for the cutest amigurumi project, a crochet axolotl is the perfect choice. These tiny water-dwelling creatures have stolen the hearts of crafters around the world, and making your own is easier than you might think. In this guide, you will find seven free patterns, beginner-friendly tips, and everything you need to create a charming handmade amigurumi from scratch.
Why Make a Crochet Axolotl?
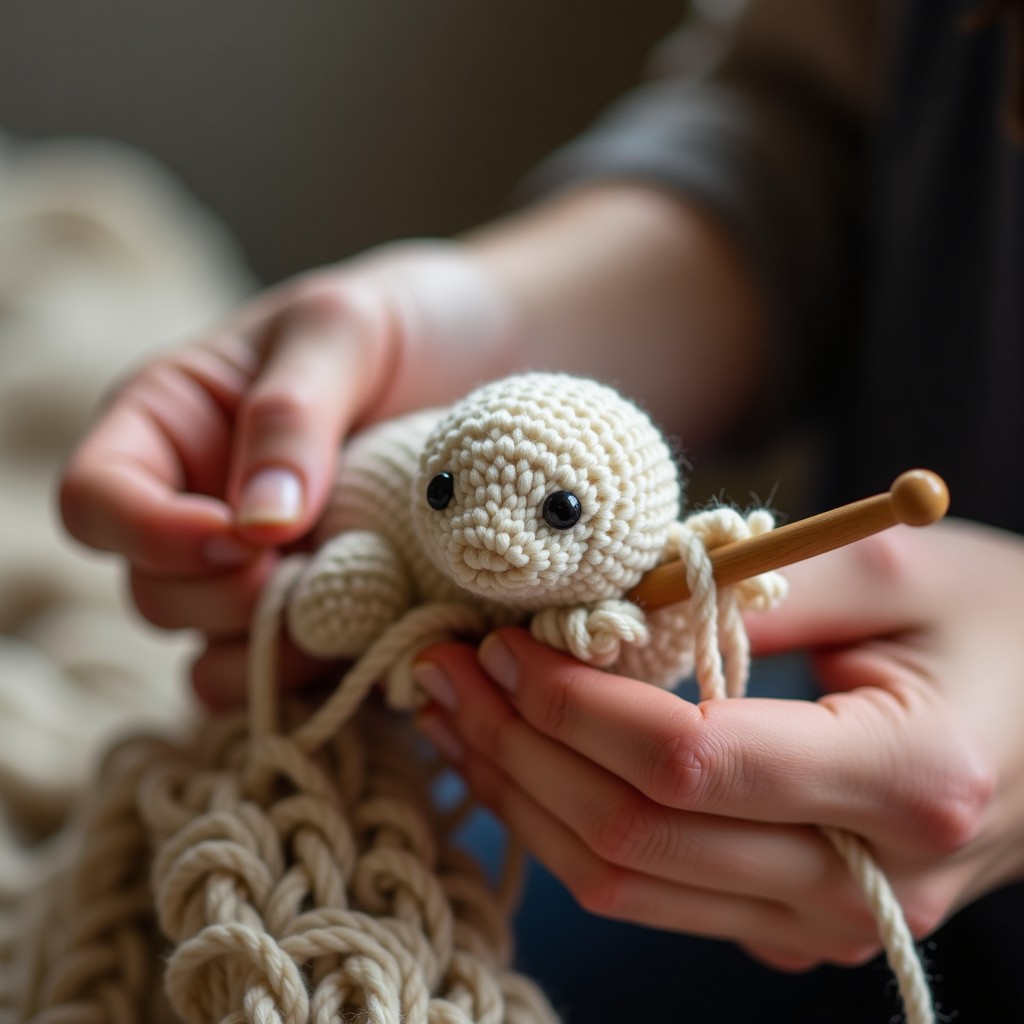
The axolotl, often called the “Mexican walking fish”, has become one of the most beloved animals on the internet. Its permanently smiling face and frilly external gills translate beautifully into yarn art. A crochet axolotl makes a wonderful gift for kids, a desk buddy for adults, or a charming addition to any amigurumi collection.
Because axolotls have a simple tubelike body with a few distinctive features, gills, a long tail, and tiny limbs, they are an ideal project even if you are fairly new to amigurumi. The basic construction relies on the magic circle crochet technique and the single crochet stitch, both of which are covered in our detailed guides here on KnotToYarn.
Materials You Will Need
Before you start your first crochet axolotl, gather these supplies:
- Yarn: Worsted-weight (category 4) acrylic or cotton blend in pink, white, or pastel shades. If you are unsure which fiber to choose, check our best yarn for beginner crochet guide.
- Crochet hook: 3.5 mm (E-4) or 4.0 mm (G-6), go one size smaller than the yarn label recommends so stuffing does not show through.
- Safety eyes: 6 mm or 8 mm with safety backs (or embroidered eyes for baby-safe versions).
- Stuffing: Polyester fiberfill.
- Tapestry needle: For sewing pieces together and weaving in ends.
- Stitch markers: To track rounds in continuous spiral crochet.
- Pipe cleaner (optional): To give the tail a bendable shape.
For standardized yarn weight and hook size information, the Craft Yarn Council is an excellent reference.
7 Free Crochet Axolotl Styles
Below are seven wonderful free patterns for crafting your own crochet axolotl. Each one offers a slightly different style, from minimalist to highly detailed, so you can pick the look that fits your taste.
1. Classic Pink Axolotl
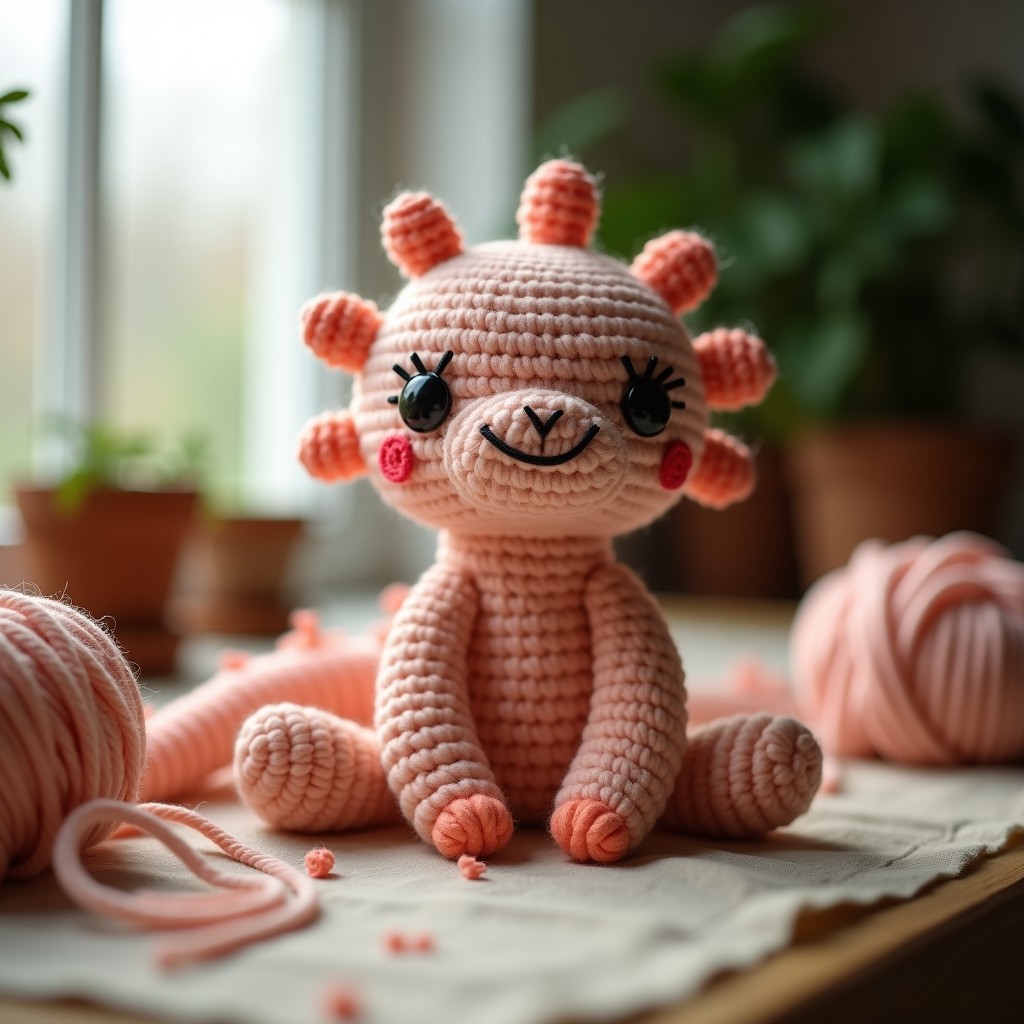
This is the most popular style and a great starting point for beginners. The pattern uses a simple round-based body, three pairs of gills attached to the head, and a sweet little smile. Most crafters can finish this axolotl in about two to three hours.
2. Mini Pocket-Size Axolotl
Want a tiny companion that fits in your palm? This miniature amigurumi axolotl pattern uses a 2.5 mm hook and fingering-weight yarn to create a keychain-sized version. It is a fantastic scrap-buster project.
3. Axolotl with a Removable Cape
Add a playful twist to your amigurumi with this pattern that includes a little superhero cape. The amigurumi body stays the same, but the costume makes it extra fun. Kids especially love this variation.
4. Coastal Blue Axolotl
While most crafters choose pink, real axolotls come in several colors including mottled brown, golden, and blue-grey. This pattern uses soft blue tones to mimic the rare leucistic variety, giving your finished piece a unique and realistic look. The blue-grey palette works beautifully in nurseries or as a subtle desk companion, and you can easily swap between pastel and deeper shades depending on the aesthetic you want.
5. Axolotl Baby Lovey
A lovey (also called a comfort blanket) combines a small little axolotl head with a flat granny-square blanket body. It makes an unforgettable handmade baby shower gift. Safety eyes should be replaced with embroidered features for children under three.
6. Sitting Axolotl with Curly Tail
This pattern includes a built-in pipe cleaner armature so the tail stays curled and holds its shape over time. It sits upright on its own without any support, making it a perfect desk or shelf decoration. The armature is lightweight and child-safe when fully covered by yarn layers, so you can display it anywhere in your home.
7. Holiday Axolotl Set
Celebrate the seasons with a tiny axolotl wearing hats, scarves, or bunny ears. This collection of seasonal accessories works with any basic axolotl body pattern and gives you year-round crafting inspiration.
Step-by-Step Tips for Your First Crochet Axolotl
If this is your first time making a crochet axolotl, here are some tips that will help you get professional-looking results:
1. Master the magic ring first. Almost every amigurumi pattern, especially the axolotl, starts with a magic ring (magic circle). If you are not comfortable with this technique, read our magic circle crochet guide before you begin.
2. Use a stitch marker. Because amigurumi is worked in continuous spirals, it is very easy to lose your place. Place a stitch marker in the first stitch of every round to keep your count accurate.
3. Stuff as you go. Do not wait until the end to stuff your axolotl. Add small amounts of fiberfill as you close each section, this gives you a smoother, more even shape.
4. Invest in good safety eyes. The eyes bring your little friend to life. Choose eyes that are proportionate to the head size, and always use the safety backs so they stay securely in place.
5. Pin before you sew. When attaching the gills, limbs, and tail, use straight pins to hold each piece in position. Check the symmetry from every angle before you stitch anything down.
Connecting With the Amigurumi Community
Making one is even more fun when you share your progress with fellow crafters. The crochet amigurumi community on KnotToYarn is full of makers who love swapping tips and showing off their finished projects. You can also browse thousands of axolotl amigurumi pattern variations on Ravelry for more inspiration.
If you enjoy making animal amigurumi, be sure to try our crochet octopus free pattern next, it uses many of the same techniques and is just as adorable.
Frequently Asked Questions
How long does it take to make a crochet axolotl?
Most beginner-friendly amigurumi axolotl patterns take between two and four hours to complete. If you are experienced with amigurumi, you may finish in under two hours.
Is a crochet axolotl a good beginner project?
Yes! A little axolotl is one of the best beginner amigurumi projects because the body shape is simple and requires only basic stitches like single crochet, increases, and decreases.
What is the best yarn for a crochet axolotl?
Worsted-weight acrylic or cotton blend yarn works best. Acrylic is affordable and soft, while cotton gives a slightly sturdier finish. Both hold their shape well for a axolotl.
Can I sell items I make from free patterns?
It depends on the designer’s license. Many free crochet axolotl patterns allow you to sell finished items as long as you credit the original designer. Always check the pattern page for specific terms.
How do I attach the gills to my crochet axolotl?
Most patterns have you crochet the gills separately and sew them onto the sides of the head. Use your tapestry needle, pin each gill in place first, and stitch through both layers using matching yarn.
What Are the Best Yarn Colors for a Crochet Axolotl?
Choosing the right colors brings your axolotl to life. Real axolotls come in several naturally occurring color morphs, and each one translates beautifully into yarn colors for your amigurumi project.
The most iconic axolotl color is leucistic pink. This is the white-bodied, pink-gilled variety that most people picture when they think of axolotls. For this look, use a soft pink yarn for the body and a darker pink or magenta for the feathery external gills and tail fin.
Wild-type axolotls are dark brown or mottled olive-green with speckled patterns. Use a medium brown yarn for the body and add darker brown or black embroidery details for the natural speckling. This version looks especially realistic and makes a wonderful gift for axolotl enthusiasts who appreciate accuracy.
Golden albino axolotls have a warm golden-yellow body with shiny gold gills. Use a bright yellow or gold yarn for the body and a darker gold or orange for the gill accents. This cheerful colorway is a favorite among children and makes an eye-catching shelf decoration.
For a whimsical touch, do not be afraid to use fantasy colors. Pastel blue, lavender, or mint green axolotls are not realistic, but they are incredibly charming and make unique, personalized gifts. Use whatever color combination makes you happy.
How Do You Attach Safety Eyes to an Amigurumi Axolotl?
Safety eyes are the easiest way to give your amigurumi axolotl a professional, polished look. These eyes have a post on the back that snaps into place with a washer, keeping them securely attached. They are available in many sizes, colors, and styles, including eyes with pupils that shift for a kawaii effect.
To attach safety eyes, insert the post through the fabric from the inside of the head at your marked position. Place the washer over the post on the inside and press firmly until it snaps into place. The washer prevents the eye from pulling back through the fabric. Always attach safety eyes before stuffing the head, as you need access to the inside for the washer.
If you are making the axolotl for a baby or toddler under three years old, skip the safety eyes entirely and embroider the eyes instead with black yarn and a yarn needle. A simple French knot makes a cute, safe eye. Safety eyes can become a choking hazard if they work loose, so embroidered eyes are the only safe option for young children.
What Are the Most Common Mistakes When Making a Crochet Axolotl?
- Gills are too long or too floppy: The external gills are the most distinctive feature of an axolotl, and getting them right is important. If your gills droop or look limp, try using a smaller hook size or adding a strand of embroidery floss alongside your yarn for extra structure. Six short, perky gills look much better than four long, droopy ones.
- Body is overstuffed and lumpy: Stuffing your axolotl too firmly creates a hard, ball-like shape that does not look natural. Add stuffing gradually, focusing on getting a smooth, rounded shape. Use the eraser end of a pencil or a stuffing tool to push filling into small areas like the tail and face.
- Head and body proportions are off: The head should be slightly wider than the body, and the body should taper smoothly into the tail. If your axolotl looks too round or too elongated, check your stitch counts and increase placement. Comparing your work to reference photos of real axolotls helps you get the proportions right.
- Facial features are placed unevenly: Crooked eyes or a smile that tilts to one side can make the whole axolotl look off. Use stitch markers to mark eye placement before attaching anything. Measure carefully from the nose to each eye position to ensure symmetry.
How Can You Customize Your Crochet Axolotl?
Customization is one of the most fun parts of amigurumi. Here are several ways to personalize your little axolotl pattern:
Add accessories like a tiny crochet top hat, a bow tie, or a flower crown. These small additions give your axolotl personality and make it a genuinely one-of-a-kind creation. A little crown made from gold or yellow yarn turns your axolotl into a royal character well suited to gift giving.
Give it a different expression by changing the mouth shape. A small V-shape creates a worried expression. A curved line makes a smile. A tiny O-shape makes a surprised face. Each expression changes the character completely with just a few stitches.
Make a miniature version by using a 2.0 mm hook and fingering weight yarn. Mini amigurumi axolotls are adorable as keychain charms, bag decorations, or holiday ornaments. The construction is the same, just on a smaller scale.
How Should You Care for Your Crochet Axolotl?
Handmade amigurumi needs gentle care to stay looking its best. Keep your axolotl away from direct sunlight for extended periods, as UV light can fade yarn colors over time. Display it on a shelf or desk rather than a sunny windowsill for the longest-lasting color.
If your axolotl gets dusty, gently brush it with a clean, soft toothbrush or lint roller. For a deeper clean, hand wash in cool water with mild soap, squeeze out excess water without wringing, and reshape while damp. Lay flat to dry completely, which may take 24 to 48 hours depending on the yarn and stuffing thickness.
Store your axolotl in a clean, dry place. A small box or cloth bag protects it from dust and pet hair while keeping it safe from being crushed. If you are giving the axolotl as a gift, include a small care card so the recipient knows how to keep it looking its best.
If you enjoyed this guide, you might also love our tutorial on Crochet Washcloth Patterns. For each design below you’ll find an overview of the construction, the stitches it uses, and tips to make your own version.