Crochet Top Pattern: Cross V-Stitch Design in 3 Sizes
Crochet Top Pattern at a Glance
- Topic: crochet top pattern
- Skill level: beginner to intermediate
- Main goal: help the reader crochet a beautiful cross V-stitch summer top in 3 easy sizes
- Related topics: crochet crop top, crochet summer top, cross V stitch, easy crochet clothing, crochet wearables for beginners
Quick Answer
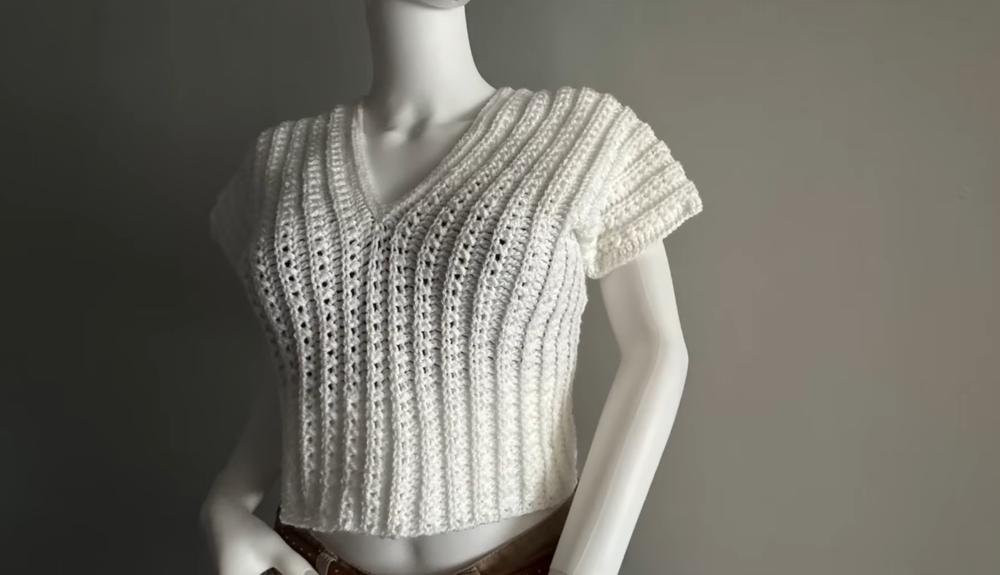
A crochet top pattern is one of the most rewarding garment projects you can make — this cross V-stitch design uses only two repeating rows and works up quickly with double knitting yarn and a 4mm hook. At KnotToYarn.com, we love this pattern because it is beginner-friendly, incredibly comfortable to wear, and easy to customize for a perfect fit.
\nTip: Always finish your last repeat on a double crochet row before starting the neck opening — this keeps your stitch count accurate.
At a Glance
- Skill level: beginner to intermediate
- Time needed: 4-6 hours for medium size
- Best yarn: double knitting (DK) acrylic or cotton blend, 100g/330m
- Hook size: 4mm (G/6)
Common Mistakes to Quick Fixes
- Stitch count keeps changing: count your stitches at the end of every double crochet row and adjust before starting the cross V-stitch row
- Neck opening too wide or narrow: place your stitch markers exactly at the correct DC count for your size before chaining the neck gap
- Seams look uneven: always seam through back loops only on both panels for a clean, invisible join
Mini Glossary
DC (double crochet), HDC (half double crochet), ch (chain), BLO (back loop only), sl st (slip stitch), sc (single crochet), sp (space)
This crochet top pattern is the perfect project for anyone looking to make their first wearable garment. Whether you are a confident beginner or an intermediate crocheter, this cross V-stitch design delivers a gorgeous result with surprisingly simple construction. The entire top uses only two repeating rows, making it easy to memorize and relaxing to work on. You will love how soft, stretchy, and comfortable this crochet top pattern feels when worn — the openwork stitch creates beautiful drape and breathability, ideal for warm weather layering.
 KnotToYarn
Subscribe to KnotToYarn!
Get the best free crochet patterns, tutorials & tips delivered straight to your inbox. Join our growing community!
The construction method is worked side-to-side, which means your foundation chain determines the length of your crochet top pattern and the number of rows determines the height. This approach makes sizing adjustments incredibly simple — just add or subtract chains from your foundation to make your top longer or shorter. The pattern includes three sizes (Small, Medium, and Large), and each size is clearly written with exact stitch counts and measurements so you never have to guess.
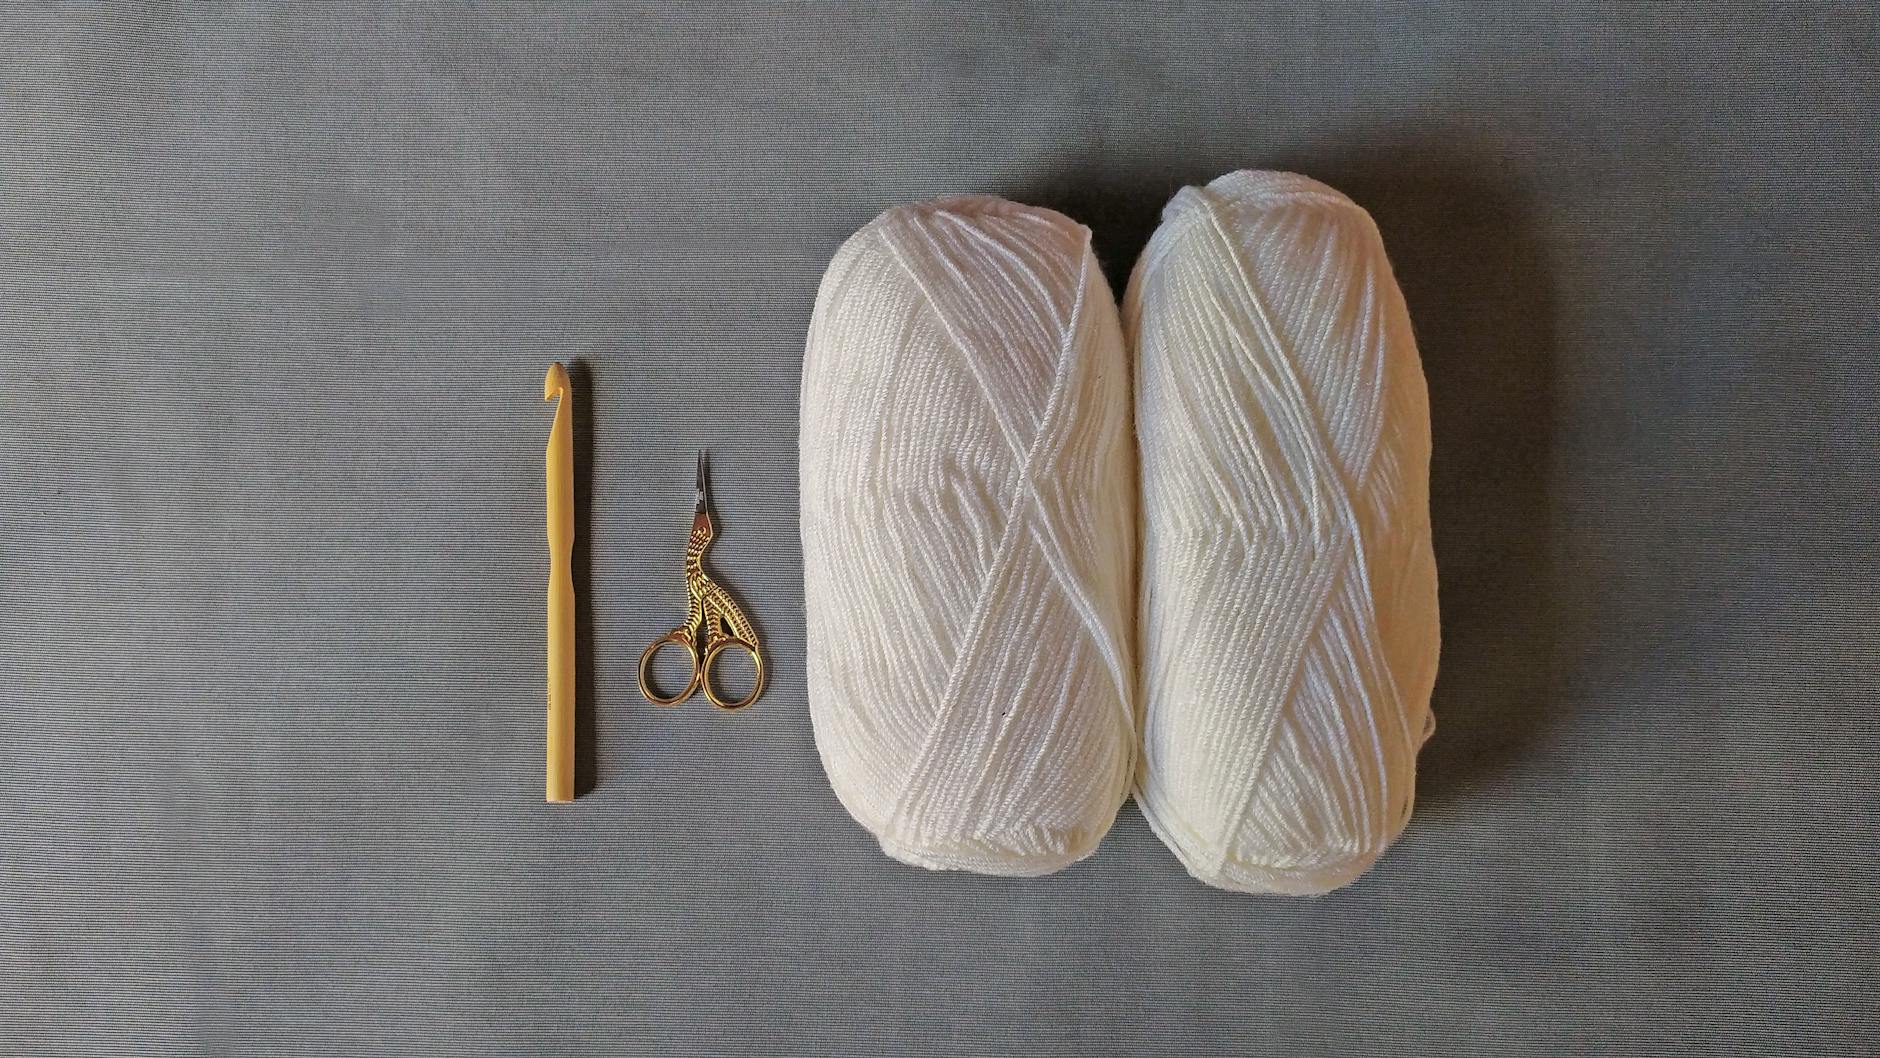
What Materials Do You Need for This Crochet Top Pattern?
Before starting this crochet top pattern, gather all your materials so you can work through the project smoothly. Having everything ready before your first chain will save you time and help you maintain consistent tension throughout.
- Yarn: Double knitting (DK) weight yarn — 2 balls (100g/330m each) for Medium size. The original uses white acrylic DK yarn with a recommended hook size of 4mm. Cotton blends also work beautifully for a lighter, more breathable finish. For standard yarn weight classifications, see the Craft Yarn Council guidelines.
- Crochet hook: 4mm (G/6) aluminum hook
- Stitch markers: At least 2 stitch markers for marking the neck opening
- Measuring tape: For checking your gauge and tracking your progress
- Yarn needle (tapestry needle): For seaming the sides and weaving in ends
- Scissors: For cutting yarn
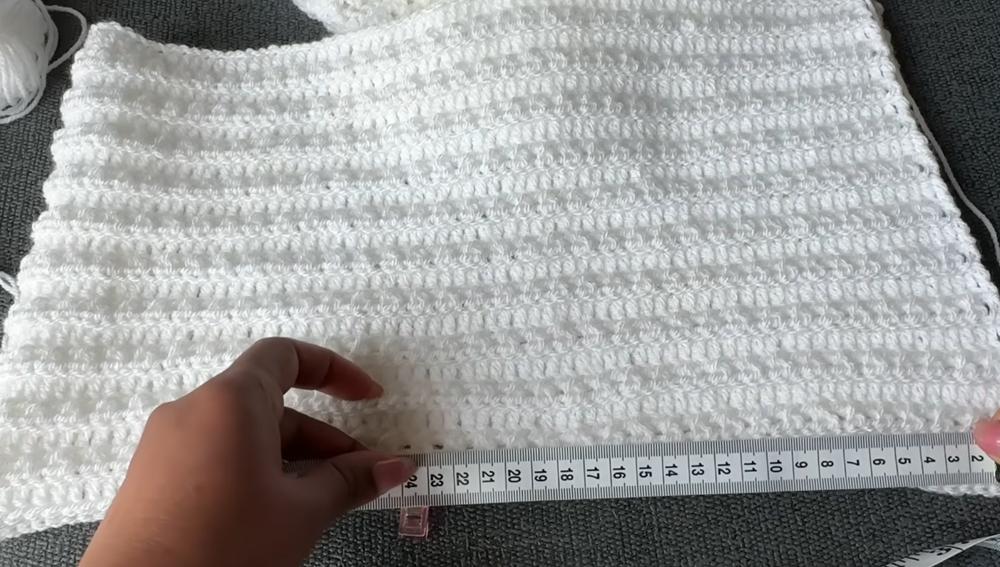
What Are the Sizing Measurements for Sizing Chart for This Crochet Top Pattern?
This crochet top pattern is written in three sizes with exact measurements for the foundation chain, total width, and finished height. Use the chart below to find your size and choose the correct starting chain count.
| Size | Foundation Chain | Width (After Row 1) | Total Length | Total Length (inches) | Rows per Side | Finished Height | Yarn Needed |
|---|---|---|---|---|---|---|---|
| Small | 136 ch | 134 DC | 80 cm | 31.5″ | 17 rows | ~20 cm | 1.5 balls |
| Medium | 142 ch | 140 DC | 86 cm | 34″ | 21 rows | 25 cm | 2 balls |
| Large | 148 ch | 146 DC | 92 cm | 36″ | 25 rows | ~30 cm | 2.5 balls |
Important note: Your foundation chain multiple is 2 + 4. This means you can make a custom size by chaining any even number and adding 4. For example, if you want an extra-small or extra-large fit, simply adjust your chain count while keeping the multiple of 2 + 4 formula.
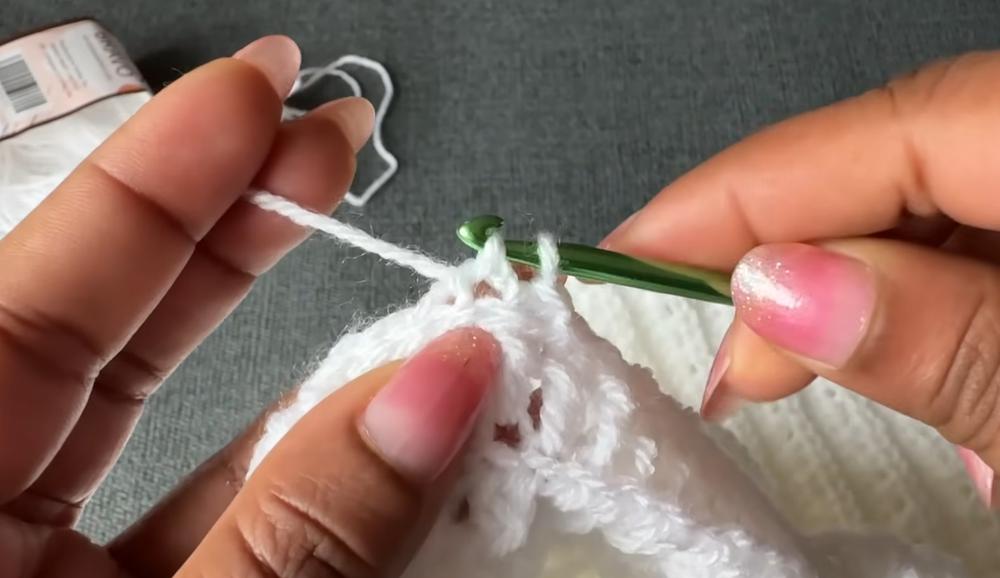
What Should You Know About the Cross V-Stitch?
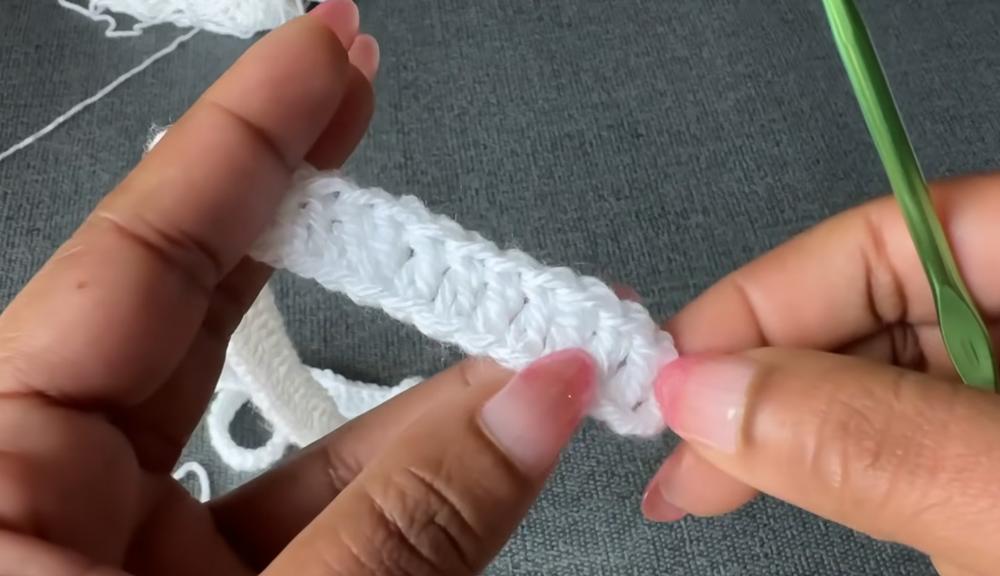
The star of this crochet top pattern is the cross V-stitch — a beautiful textured stitch that creates a series of small X-shapes with open gaps between them. This stitch is what gives the top its stretchy, breathable quality and elegant drape. Despite its sophisticated appearance, the cross V-stitch is surprisingly simple once you understand the basic motion.
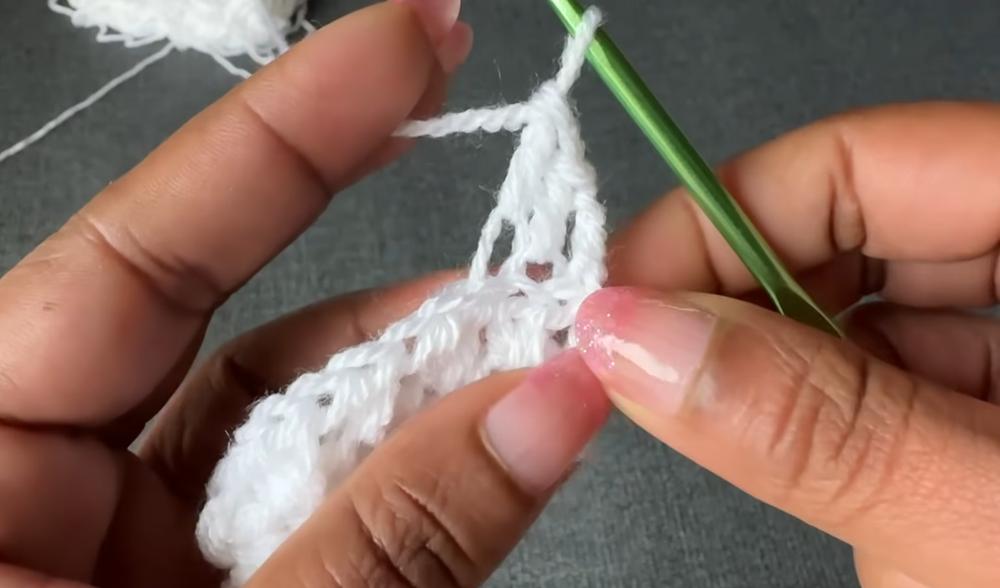
The cross V-stitch works by skipping one stitch, working a half double crochet (HDC) into the next stitch, then going back and working another HDC into the stitch you skipped. This crossing motion creates the X-shape that defines this crochet top pattern. The row between cross V-stitch rows is a simple double crochet row worked in the back loop only (BLO), which creates a subtle ridged texture and keeps the fabric flat and even.
Pattern multiple: 2 + 4 (for the foundation chain)
Repeat rows: Only two rows to repeat — the cross V-stitch row and the BLO double crochet row. This makes this crochet top pattern incredibly easy to memorize and work on while watching your favorite show.
How Do You Step-by-Step Crochet Top Instructions?
Row 1 — Foundation Double Crochet Row
Start by making a slip knot and chaining the required number for your size (see the sizing chart above). This crochet top pattern is worked side-to-side, so your foundation chain will become the total length of the top that wraps around your body.
- Chain the required number for your size (S: 136, M: 142, L: 148)
- Turn the chain to the back side (the ridge side facing you)
- Skip the first 3 chains (these count as your first double crochet)
- Work 1 double crochet (DC) into the 4th chain from the hook
- Work 1 DC into each remaining chain across the entire row
- Count your DC stitches — you should have: S: 134 DC, M: 140 DC, L: 146 DC

Troubleshooting: If your stitch count is off by 1-2 stitches, check that you did not accidentally skip a chain at the beginning or end of the row. An accurate count on Row 1 is critical for this crochet top pattern because all subsequent rows depend on it.
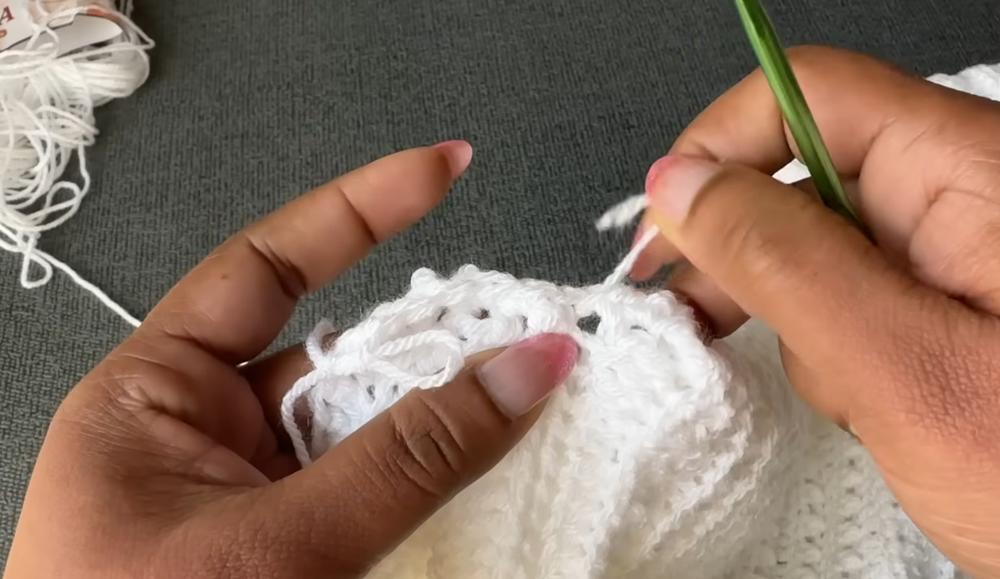
Row 2 — Cross V-Stitch Row (Repeat Row A)
Chain 2, turn your work. This row creates the beautiful cross V-stitch pattern that defines this crochet top pattern. Follow these steps carefully for the first few repeats, and you will find it becomes second nature quickly.
- Chain 2 (does NOT count as a stitch)
- Turn your work to the other side
- Skip the first DC
- Work 1 half double crochet (HDC) into the next DC using both loops
- Work 1 HDC into the DC you just skipped (go back and insert your hook into the skipped stitch)
- This completes one cross V-stitch
- Repeat: *Skip 1 DC, HDC in next DC, HDC in skipped DC*
- Continue this repeat all the way across the row
- At the end: when you have 3 stitches remaining, skip 1 DC, HDC in next DC, HDC in skipped DC, then work 1 HDC into the very last DC
You should have: S: 66 cross V-stitches, M: 69 cross V-stitches, L: 72 cross V-stitches at the end of this row.
Row 3 — Double Crochet in Back Loop Only (Repeat Row B)
Chain 3, turn your work. This row fills in the crosses with a solid double crochet fabric, working only into the back loop of each stitch. This back-loop-only technique creates a subtle horizontal ridge on the right side of the fabric, which adds beautiful texture to your crochet top pattern.
- Chain 3 (counts as your first DC)
- Turn your work to the other side
- Work 1 DC into the back loop only (BLO) of the first stitch
- Work 1 DC into the BLO of each stitch across the entire row
- When you reach the chains from the previous row’s turning chain, work 1 DC into each chain space
- Count your stitches — you should have the same count as Row 1: S: 134 DC, M: 140 DC, L: 146 DC
If you need a more detailed walkthrough of working in back loops, check out our guide on how to read crochet patterns for helpful diagrams.
Continue Repeating Rows 2 and 3
Now simply alternate between Row 2 (cross V-stitch) and Row 3 (DC in BLO). Keep repeating these two rows until you reach the required number of total rows for your size. Remember, Row 1 counts as your first row, so you need to work Rows 2 and 3 repeatedly to reach your target.
- Small: Work a total of 17 rows (Row 1 + 16 rows of repeats = 8 full repeat sets)
- Medium: Work a total of 21 rows (Row 1 + 20 rows of repeats = 10 full repeat sets)
- Large: Work a total of 25 rows (Row 1 + 24 rows of repeats = 12 full repeat sets)
CRITICAL: Make sure your final row (the last row before the neck opening) is a DC row (Row 3). This is essential for the crochet top pattern to work correctly when you shape the neckline in the next step. If you finish on a cross V-stitch row, add one more DC row before proceeding.
Creating the Neck Opening
After completing the required number of rows for your first side (the front panel), you will create the neck opening. This is the most important shaping step in this crochet top pattern, so take your time placing your stitch markers accurately.
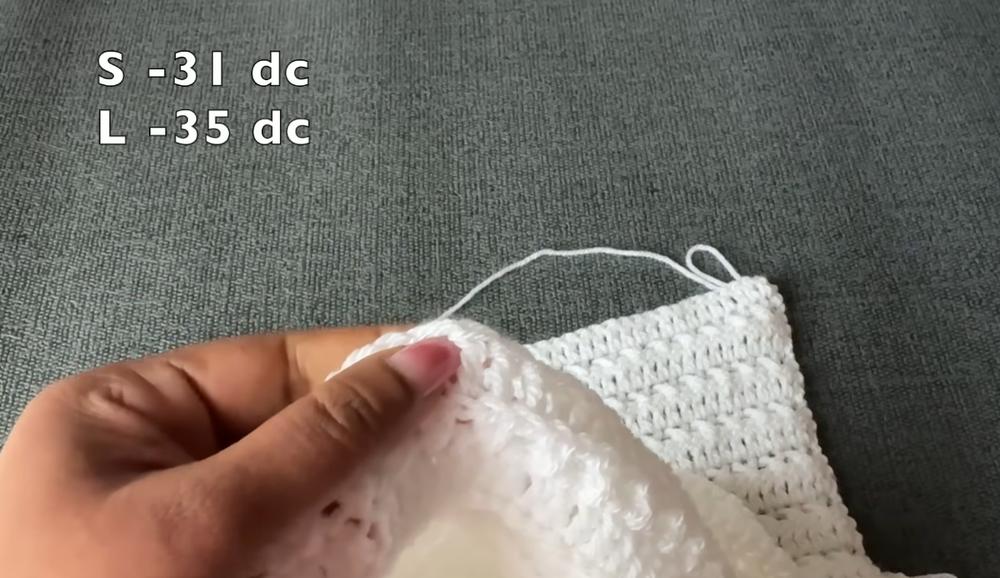
Step 1: Mark Your Stitch Markers
On your last completed row, count from the RIGHT edge and place a stitch marker after the following number of DC stitches:
- Small: 31 DC from each end
- Medium: 33 DC from each end
- Large: 35 DC from each end
The stitches between your two markers will become the neck opening. The stitches outside the markers are the shoulder sections that will continue on each side.
Step 2: Work the Neck Opening Row (Cross V-Stitch Row)
- Chain 2, turn your work
- Work the cross V-stitch pattern normally from the right edge all the way to your FIRST stitch marker (this covers the right shoulder section)
- Once you reach the first marker, chain the required number for the neck opening: S: 72 chains, M: 74 chains, L: 76 chains
- Skip all stitches between the two markers (the neck section)
- Resume the cross V-stitch pattern at the SECOND stitch marker and work to the end of the row (this covers the left shoulder section)
Step 3: DC Across the Neck Chain (DC Row)
- Chain 3, turn your work
- Work 1 DC into the BLO of each stitch across the shoulder section (up to the first marker)
- Work 1 DC into each chain of the neck opening chain — you should have: S: 72 DC, M: 74 DC, L: 76 DC across the neck chain
- Continue working 1 DC in BLO of each stitch across the second shoulder section to the end
- Your total DC count should match Row 1: S: 134 DC, M: 140 DC, L: 146 DC
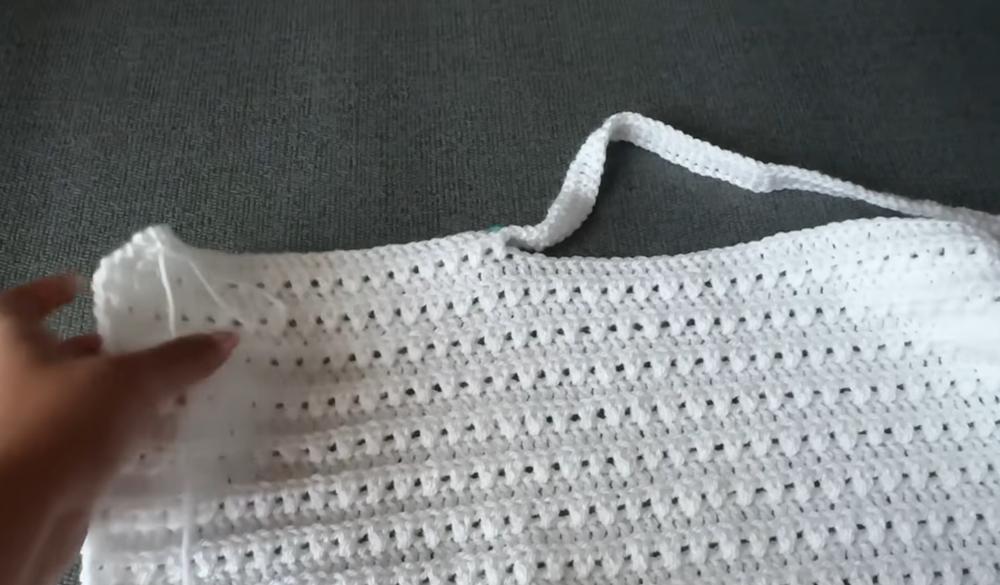
Congratulations — you have now created the neck opening for your crochet top pattern! The front panel and back panel are connected through the shoulder sections on each side, and the neck gap is in the middle.
Complete the Second Side (Back Panel)
Now continue repeating Rows 2 and 3 (cross V-stitch and DC in BLO) for the same number of rows as your first side. The pattern is identical — just keep alternating the two repeat rows.
- Small: Work 17 more rows (total 21 rows on this side including the neck opening DC row)
- Medium: Work 21 more rows
- Large: Work 25 more rows
CRITICAL: Just like with the first side, make sure you finish on a DC row (Row 3). This ensures both panels end on the same type of row for clean seaming later. Cut your yarn, leaving a tail about 30-40 cm (12-16 inches) long for seaming.
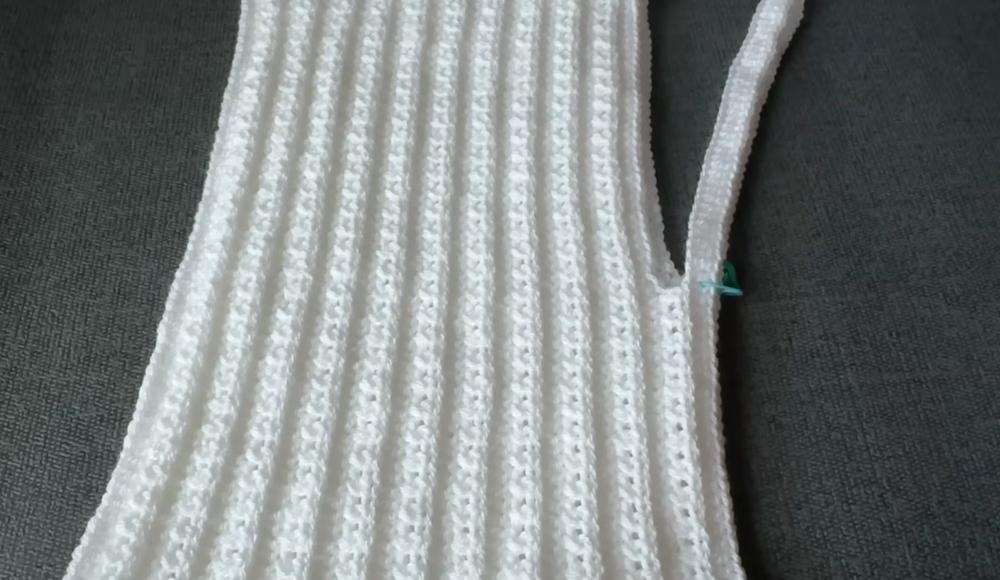
What Is Seaming the Sides?
After completing both sides of your crochet top pattern, you will have a flat rectangle with a neck opening in the middle. Now you need to fold and seam the sides to create the finished garment shape.
Step 1: Fold the Top
Fold your piece so that the foundation chain edge meets the last row edge (the edge where you just finished the back panel). The neck opening should be at the TOP of the folded piece, and the folded bottom should form the hem of your top.
Step 2: Mark the Sleeve Openings
Try the top on (or measure against your body) and mark where you want the sleeve openings. For the standard sizes:
- Small: Leave approximately 19 cm (7.5″) open from the top for each sleeve
- Medium: Leave approximately 23 cm (9″) open from the top for each sleeve
- Large: Leave approximately 25 cm (10″) open from the top for each sleeve
Place a stitch marker at the bottom edge of each sleeve opening on both sides. Make sure both sides are marked at the same measurement for a balanced, symmetrical fit.
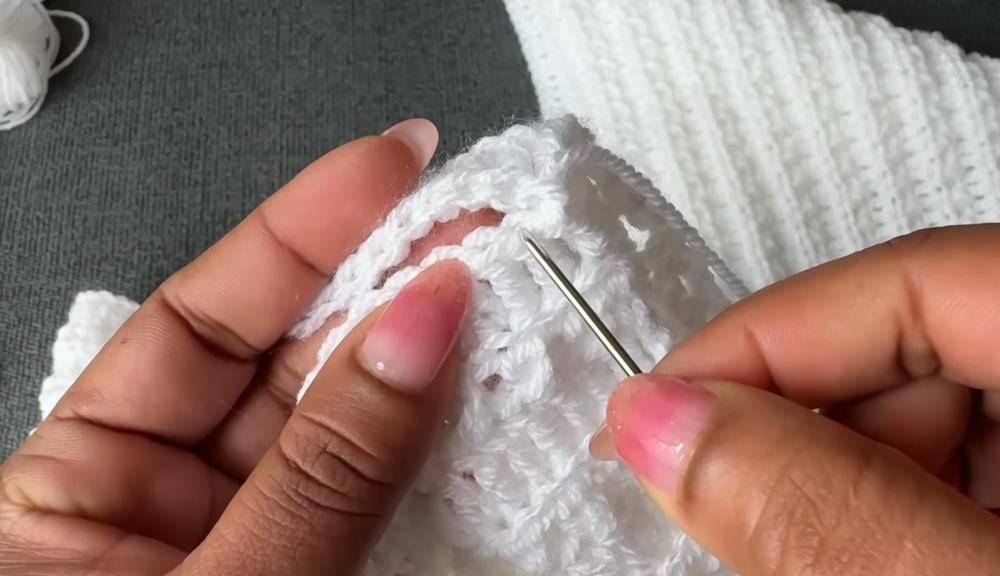
Step 3: Seam with a Yarn Needle
Thread your yarn tail onto a yarn needle. You will join the two side edges using the following seaming technique for a clean, professional finish:
- Start at the bottom corner — insert your needle through the back loop of the last stitch on one side AND the back loop of the corresponding stitch on the other side
- Pull the yarn through both loops gently — do not pull too tight or the seam will pucker
- Continue working through both back loops, one stitch at a time, moving up toward your stitch marker
- Stop when you reach the stitch marker (this is where the sleeve opening begins)
- Tie a small knot to secure the seam — do not make it too bulky
- Repeat the same process on the other side

Pro tip: Seaming through back loops only creates a nearly invisible join that looks like a continuous row of stitches. This technique elevates the finished look of your crochet top pattern significantly compared to regular whip stitch.
KnotToYarn
Subscribe to KnotToYarn!
Get the best free crochet patterns, tutorials & tips delivered straight to your inbox. Join our growing community!
What Is Finishing Edges?
The finishing touches are what make this crochet top pattern look polished and professional. You will add edging rounds to the neckline and the sleeve openings.
Neck Edging — 5 Rounds of Slip Stitch
The neckline gets a refined finish with 5 rounds of slip stitch, with decreases worked at each corner (where the neck meets the shoulder seams) to create a smooth, rounded edge.
- Round 1: Join your yarn at any point along the neckline. Chain 1. Work 1 slip stitch (sl st) in each stitch around the entire neck opening. At each of the 4 corner points, work a decrease by inserting your hook through the current loop AND the next loop, then pulling the yarn through all 3 loops. Join with a sl st to the first chain-1.
- Rounds 2-5: Chain 1, work 1 sl st in each sl st from the previous round. Continue decreasing at each corner (2 stitches together) just like Round 1. Join with a sl st at the end of each round.
- After 5 rounds, cut the yarn and pull the tail to the inside of the work.
Customization: If you prefer a thicker, more pronounced neckline edging, add additional rounds. You can also use single crochet instead of slip stitch for a slightly different texture.
Sleeve Edging — 1 Round of Single Crochet
The sleeve openings get a simple single crochet border that provides a clean finish and helps the openings hold their shape.
- Join your yarn at any point along the sleeve opening
- Chain 1
- Work 1 single crochet (sc) in each stitch around the entire sleeve opening
- At the underarm corner, work 1 extra sc to help the corner lay flat
- Continue around both sleeve openings
- Cut the yarn and weave in all ends
What Are the Best Tips for a Perfect Crochet Top Pattern Result?
These tips will help you get the best possible result from this crochet top pattern, especially if this is your first garment project.
- Check your gauge: Before starting, crochet a small swatch (about 15 cm square) using the cross V-stitch and DC in BLO pattern. Measure to make sure your tension matches the sizing chart. If your swatch is too loose, try a smaller hook; if it is too tight, go up a hook size.
- Count your stitches: At the end of every DC row, count your stitches. It is much easier to fix a missed or extra stitch immediately than to discover the problem several rows later. Consistent stitch counts are the foundation of a well-fitting crochet top pattern.
- Use stitch markers: Beyond marking the neck opening, use additional stitch markers every 20-25 stitches along your rows. This makes counting faster and helps you catch mistakes early.
- Block your finished top: After completing all the edging and seaming, wet-block your top by soaking it in cool water, gently squeezing out excess water, and pinning it flat to dry. Blocking evens out your stitches and gives the garment a professional, polished appearance. Check our tips for making crochet projects look expensive for more blocking advice.
- Customize the length: Want a longer tunic-style top? Simply add more chains to your foundation (keeping the multiple of 2 + 4). Want a shorter crop? Subtract chains. The row count stays the same regardless of length.
- Try different yarns: While the original uses white acrylic DK, this crochet top pattern looks gorgeous in any color. Cotton yarn creates a lighter, more breathable top perfect for summer, while a wool blend adds warmth for cooler evenings. Browse thousands of crochet top patterns on Ravelry for more inspiration.
Frequently Asked Questions
Is this crochet top pattern really beginner-friendly?
Yes, absolutely! This crochet top pattern uses only basic stitches — double crochet and half double crochet — arranged in a simple two-row repeat. Even if you have never made a garment before, the step-by-step instructions walk you through every stage. If you are comfortable making a simple blanket, you can definitely make this top.
Can I make this crochet top pattern in plus sizes?
Yes! Because this crochet top pattern uses a multiple of 2 + 4, you can easily size up by adding more chains to your foundation. For each additional 2 chains you add, your top will be approximately 1.2 cm wider. Measure your bust circumference, add about 5-8 cm of ease, and divide by 2 to get the length of one panel. Then work out your chain count from there.
How do I care for my finished crochet top?
If you used acrylic yarn (as in the original pattern), machine wash on a gentle cycle in cold water and lay flat to dry. For cotton or wool blend yarns, hand wash in cool water and reshape while damp. Always store your crochet top pattern piece folded, not hung, to prevent stretching.
What if my stitch count keeps changing?
This is the most common issue with this crochet top pattern, and it is usually caused by accidentally adding or missing a stitch at the beginning or end of a row. Count your stitches at the end of every DC row (Row 3). If you find an extra stitch, the easiest fix is to work 2 stitches together (decrease) in the next row. If you are missing a stitch, simply work 2 stitches into one stitch (increase) to get back on track.
How long does it take to crochet a top?
Most crocheters can complete this crochet top pattern in about 4 to 6 hours for a medium size, depending on your skill level and working speed. Beginners may take closer to 8 hours, while experienced crocheters might finish in as little as 3-4 hours. Breaking the project into manageable sessions of 1-2 hours makes it easy to complete within a week.
This crochet top pattern is a fantastic addition to your summer wardrobe and a satisfying project that builds your garment-making confidence. The cross V-stitch creates a unique, eye-catching texture that looks far more complicated than it actually is, and the side-to-side construction makes sizing adjustments effortless. Enjoy making your beautiful new top!
You Might Also Like
- How to Weave in Ends in Crochet: 7 Essential Proven Tips
- Crochet Gauge: 7 Essential Tips Every Beginner Needs
- Corner to Corner Crochet: 7 Easy Essential Tips
- Crochet Socks: 5 Easy Gorgeous Patterns for Beginners
- Crochet Amigurumi: 7 Easy and Gorgeous Patterns for Beginners
You Might Also Like
- How to Weave in Ends in Crochet: 7 Essential Proven Tips
- Crochet Gauge: 7 Essential Tips Every Beginner Needs
- Corner to Corner Crochet: 7 Easy Essential Tips
If you enjoyed this guide, you might also love our tutorials on Crochet Rug Pattern, and Crochet Shell Stitch Patterns. Each one comes with free patterns and step-by-step instructions perfect for crocheters of all skill levels.