Granny Square Cushion: 7 Ideas + a Free Button-Back Pattern

Granny Square Cushion: 7 Ideas + a Free Button-Back Pattern

Quick Answer

A granny square cushion pattern is a crochet project that transforms individual granny square motifs into a decorative cushion cover. Typically, you will join 4 to 9 squares to create the front panel, work a plain panel for the back, and seam them together around a cushion insert. Tip: always measure your cushion insert before starting and make your cover 1 inch smaller on each side for a snug, professional fit.

Tip: Use a zipper closure instead of seaming the entire cushion shut: this makes the cover removable and washable, extending the life of your handmade creation.

At a Glance

  • Skill level: beginner to intermediate
  • Time needed: 4-8 hours per cushion
  • Best yarn: worsted weight cotton or durable acrylic
  • Hook size: 5.0 mm (H-8)

Common Mistakes → Quick Fixes

  • Cover too loose on the insert: measure your insert precisely and subtract 1 inch from each dimension before calculating your square count
  • Squares different sizes: block all squares before joining and use the same tension throughout, if needed, adjust hook size for larger or smaller squares
  • Corners not aligning: place stitch markers at each corner of every square and align them carefully before seaming

Mini Glossary

Cushion insert (also called pillow form), granny cluster (3 DC group), chain space (ch-sp), slip stitch join, single crochet (SC), double crochet (DC), back loop only (BLO), invisible decrease

This is KnotToYarn’s own original pattern, free to use, and you’re welcome to sell what you make from it.

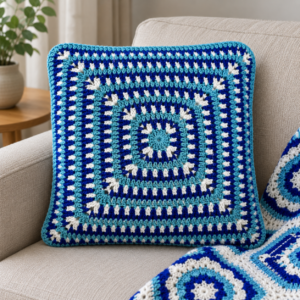
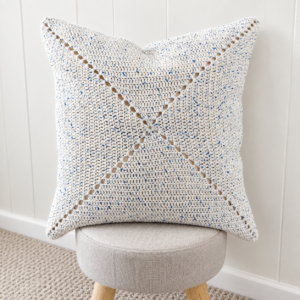
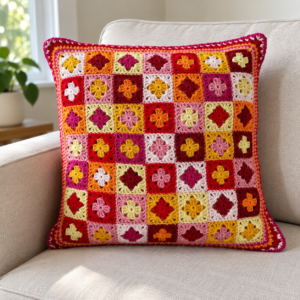
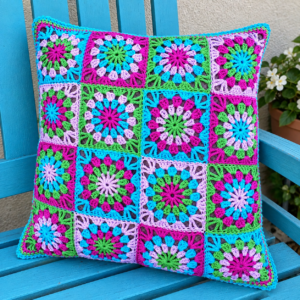
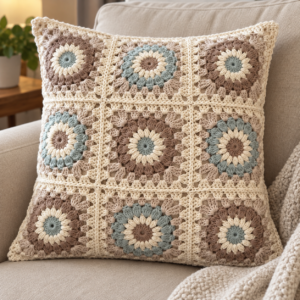
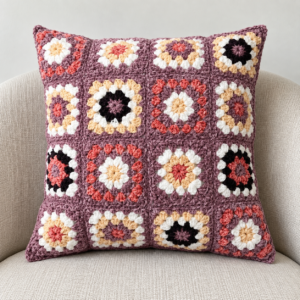
A cushion cover is the perfect home for two great granny squares, and the button-back version here means no zips to sew. Complete pattern for a standard 40 cm pillow form.

Materials

  • Worsted weight yarn, about 200 g total (great stash-buster, mix colors freely on the front square)
  • 5.0 mm (US H) crochet hook
  • Three 25 mm buttons
  • 40 cm (16 in) pillow form
  • Yarn needle, scissors

Finished size: Fits a 40 x 40 cm (16 x 16 in) pillow form
Skill level: Confident beginner
Abbreviations (US terms): ch (chain), sc (single crochet), dc (double crochet), sl st (slip stitch), sp (space)

Instructions

Stitch chart for a classic granny square, rounds 1 to 3, showing 3-double-crochet groups and chain-2 corners
Granny square stitch chart (rounds 1-3): three double crochet posts per side, chain-2 spaces at each corner. Original KnotToYarn chart.

Front and Back Squares (make 2)

Work the classic granny square: ch 4, sl st to ring; Round 1: ch 3, 2 dc, ch 2, (3 dc, ch 2) x3 in the ring, join. Every round after: (3 dc, ch 2, 3 dc) in each corner sp, 3 dc in each side sp, join.

Work until each square measures 40 cm, about 15 rounds. The cover should match the form exactly or run 1 cm small; granny fabric stretches and a tight cover looks plump and professional.

Make the front square colorful; a solid-color back square hides wear and frames the front.

The Button Band

On ONE side of the back square, work 2 rows of sc across the full edge (these become the button flap foundation).

Buttonhole row: Sc 8, *ch 3, skip 3 sts, sc 14;* repeat once more, ch 3, skip 3, sc to the end. Final row: sc across, 3 sc in each ch-3 sp.

Finishing

Place the squares wrong sides together and sc through both layers around three sides, leave the button-band side open. Sew the three buttons to the inside edge of the FRONT square, aligned with the holes. Insert the form and button it shut. The crocheted join ridge frames the cushion like piping.

Made this? We’d love to show off your work, send a photo through our contact page and we’ll feature it here with credit to you.

Tip: Cushion covers live longer crocheted one hook size down, tighter fabric resists the constant stretching, and the pillow form won’t grin through the gaps between clusters.

A granny square cushion is one of the more rewarding home decor projects you can make with a hook. There’s something satisfying about turning a few skeins into a beautiful, useful piece that brightens a room. Decorating a reading nook, adding personality to a guest room, or making handmade gifts, these cushions give you both style and comfort.

They’re practical, too. You control the size, color, and design, so it’s easy to match your room’s palette exactly. Crochet fabric holds up well to daily use, and most patterns include a zipper or button closure so the cover comes off for washing.

For standardized crochet terminology and stitch guides, visit the Craft Yarn Council website, which is the gold standard reference for crochet and knitting standards in the United States. Browse Pinterest crochet cushion boards for color scheme inspiration and layout ideas from fellow crafters.

Why Choose a Granny Square Cushion Pattern?

Unlike a plain crocheted cover, a granny square version adds interest through the mix of motifs, each square feeds into an overall patchwork effect that’s charming and full of character. That makes these a natural fit for cottagecore, boho, and eclectic interiors.

The modular build is another plus. Since you work one square at a time, it’s easy to crochet on the go, toss a few squares in your bag for the commute, appointments, or in front of the TV. That portability makes it ideal if you’re busy but still want to make something nice.

Cushions are also great for skill-building, one project teaches working motifs, color changes, joining, seaming, and finishing. If you’ve got the basics down and want to level up, a granny square cushion is a good next step; our crochet tips help you get a professional finish.

What Size Should Granny Square Cushions Be?

Before starting any cushion project, you need to know your target dimensions. Here is a quick reference for standard cushion sizes:

Standard Cushion Sizes

  • Throw pillow (front of sofa): 18″ × 18″, typically requires 9 squares (3×3 grid) or 4 large squares (2×2)
  • Bed accent pillow: 16″ × 16″, typically requires 4 medium squares (2×2 grid)
  • Floor cushion: 24″ × 24″, typically requires 16 squares (4×4 grid)
  • Lumbar support pillow: 12″ × 18″, requires 2×3 or 3×4 arrangement of small squares
  • Boudoir pillow: 12″ × 16″, requires 2×3 arrangement of medium squares

To determine how many squares you need, first crochet a gauge swatch using your chosen yarn and hook. Measure the finished square, then divide your target cushion dimension by the square size. Round to the nearest whole number. For example, if your squares measure 6 inches and your cushion is 18 inches, you need 3 squares per side (18 ÷ 6 = 3), for a total of 9 squares.

Essential Materials and Tools?

Yarn Selection

For cushions that will see daily use, durability is key. Cotton yarn is the top choice because it is sturdy, holds its shape through washing, and produces excellent stitch definition. Good cotton yarns for cushions include Lily Sugar’n Cream, Bernat Handicrafter, and Lion Brand 24/7 Cotton. If you prefer acrylic for its softer feel and lower price point, choose a premium quality acrylic like Red Heart With Love or Caron Simply Soft.

Inserts and Stuffing

You will need a cushion insert (also called a pillow form) to fill your finished cover. Pre-made inserts are available in standard sizes at craft stores and online. Look for inserts with a good fill weight, polyester fiberfill inserts are affordable and machine-washable, while down-alternative inserts offer a more luxurious feel. For eco-friendly options, consider inserts filled with recycled polyester or natural materials like buckwheat hulls.

7 Stunning Free Granny Square Cushion Patterns

Pattern 1: Classic Four-Square Cushion

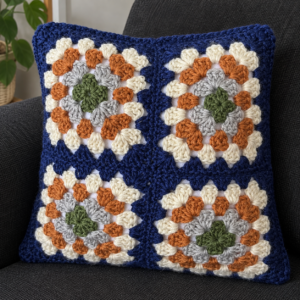
This beginner-friendly version uses just four granny squares in a 2×2 grid. The front has a simple color scheme with a contrasting border round to tie the squares together, and the back is a single large square worked to match. It’s a perfect first cushion and comes together in a few hours.

Pattern 2: Nine-Square Patchwork Cushion

Pattern 3: Solid Square Monogram Cushion

This elegant design features a large solid granny square with a crocheted monogram or initial worked in a contrasting color using the tapestry crochet technique. The result is a personalized cushion that makes a wonderful housewarming or wedding gift. The solid square construction provides a smooth, even surface for the letter appliqué.

Pattern 4: Sunflower Garden Cushion

This cheerful cushion combines sunflower granny squares with solid-colored squares in an alternating pattern. The sunflower motifs bring a touch of nature indoors and work beautifully in living rooms, sunrooms, and covered porches. A green border round completes the garden-inspired look.

Pattern 5: Geometric Mosaic Cushion

This intermediate-level pattern uses mosaic crochet squares with geometric patterns to create a sophisticated, modern cushion. The mosaic technique produces a dense, durable fabric well suited to high-traffic areas. Choose bold contrasting colors like black and white or navy and cream for maximum visual impact.

Pattern 6: Granny Square Bordered Cushion

This pattern features a single large granny square as the main panel, bordered by multiple rounds of decorative crochet stitches. The border is the star of this design, incorporating shells, picots, and post stitches to create an ornate, lacy frame. This cushion works well for formal living spaces and bedroom decor.

Pattern 7: Textured Bobble Square Cushion

Bobble stitches add wonderful three-dimensional texture to this granny square cushion pattern. Each square features a grid of bobbles in the center, surrounded by traditional granny clusters. The textured squares create a cushion that is as fun to touch as it is to look at. Use a single color for a subtle, sophisticated texture or alternate colors for a bolder statement.

Assembly Techniques for Professional Results

The assembly process is where a good cushion becomes a great one. Start by laying out all your squares on a flat surface and arranging them in your desired pattern. Use locking stitch markers to pin the squares together at the corners and midpoints of each edge. This prevents shifting during seaming.

For the seaming itself, the whip stitch and mattress stitch are both excellent options. The mattress stitch creates a nearly invisible seam when worked correctly, while the whip stitch is faster and adds a decorative raised line between squares. Whichever method you choose, work with a length of yarn no longer than 24 inches to prevent tangling and fraying.

Adding Closures: Zippers, Buttons, and Envelope Backs

A removable cover is essential for practical cushions. The zipper closure is the most professional option and is easier to install than you might think. Simply work a row of single crochet along the opening edge, then use a yarn needle to stitch a zipper tape behind the crochet edge. Button closures and envelope-style backs (where one panel overlaps the other) are also popular alternatives that do not require any special hardware.

Care and Maintenance

To keep your cushion looking good, spot-clean small stains promptly and machine wash the cover (inside out, gentle cycle) when it needs a deeper clean. Lay it flat to dry to hold the shape. Cotton covers can be ironed on low with a pressing cloth. Store cushions somewhere cool and dry, and keep them out of long stretches of direct sun so the colors don’t fade.

What Are the Best Tips for Your Cushion Project?

It’s also a great way to use up leftover yarn from other projects.

Before you start, lay your squares out on a flat surface and plan the color arrangement.

The square-based approach lets you make cushions in any size, from small throw pillows to big floor cushions.

In a pastel palette, one makes a soft, comforting accent for a baby nursery that coordinates with any crib bedding.

Made in cotton, a cushion cover lasts for years and tends to soften nicely with each wash.

A removable cover makes seasonal decor swaps quick and easy.

Working one is good practice for consistent gauge and careful stitch counting.

Cushions are consistently popular at craft fairs, drawing buyers who appreciate handmade decor.

Always measure your cushion insert first and plan your square count from there.

The modular build makes it a perfect on-the-go project you can work on anywhere.

For a professional finish, add a zipper or button closure rather than seaming the cover shut.

In red, green, and white, a holiday version brings festive cheer to your living room.

The square shape suits cushion construction naturally, with minimal shaping required.

A fabric lining keeps the insert from showing through the crochet stitches.

It’s an achievable first project that builds confidence and leaves you with something useful.

Each one you finish strengthens your joining, seaming, and overall crochet skills.

It works in just about any room, from the living-room sofa to a bedroom reading nook.

A good pattern includes a schematic, gauge info, and step-by-step assembly instructions.

Frequently Asked Questions

How many granny squares do I need for an 18-inch cushion?

For a standard 18-inch throw cushion, you typically need 9 granny squares arranged in a 3×3 grid, assuming each square measures approximately 6 inches when finished. If your squares are larger (around 9 inches), you would need just 4 squares in a 2×2 arrangement. Always crochet a gauge square first and measure before calculating your total.

Should I stuff my cushion or use an insert?

Using a pre-made cushion insert is generally recommended over loose stuffing for granny square cushions. Inserts provide consistent, even firmness and are much easier to remove when washing the cover. Loose stuffing can clump and shift over time, creating lumpy, uneven cushions. However, stuffing is fine for small decorative cushions or ornaments.

How do I make my cushion cover removable?

The easiest method is to create an envelope-style back where one panel overlaps the other by 3 to 4 inches. Alternatively, you can install a zipper along one edge using a yarn needle and matching thread. Button closures with crocheted button loops are another attractive option. All three methods allow you to remove the cover for washing.

What is the best yarn for crochet cushions?

Cotton yarn is the best overall choice for crochet cushions because it is durable, holds its shape through washing, and provides excellent stitch definition. For a softer feel, a cotton-acrylic blend is a great compromise. If you prefer pure acrylic, choose a premium quality brand with tight twist to ensure your cushion holds up to regular use.

How do I keep my cushion squares all the same size?

Consistent gauge is the key. Use the same hook and yarn for every square, count your stitches carefully, and block all squares to the same dimensions before joining. If some squares turn out larger or smaller despite consistent gauge, adjust your hook size for those specific squares or add an extra border round to smaller squares.

Similar Posts

Leave a Reply

Your email address will not be published. Required fields are marked *