Crochet Velvet Pillow: 3 Stunning Cushion Covers
Quick Answer
A crochet velvet pillow is a luxurious handmade decorative pillow made with plush velvet yarn and finished with a frilly ruffled border. These beginner-friendly crochet velvet pillow projects can be completed in a weekend using just a few skeins of velvet yarn, a crochet hook, and a pillow insert. Visit KnotToYarn.com for more free crochet patterns for beginners.
Tip: Go up one hook size from the yarn label recommendation when working with velvet yarn for softer, more flexible stitches.
At a Glance
- Skill level: beginner to intermediate
- Time needed: 4-8 hours per pillow
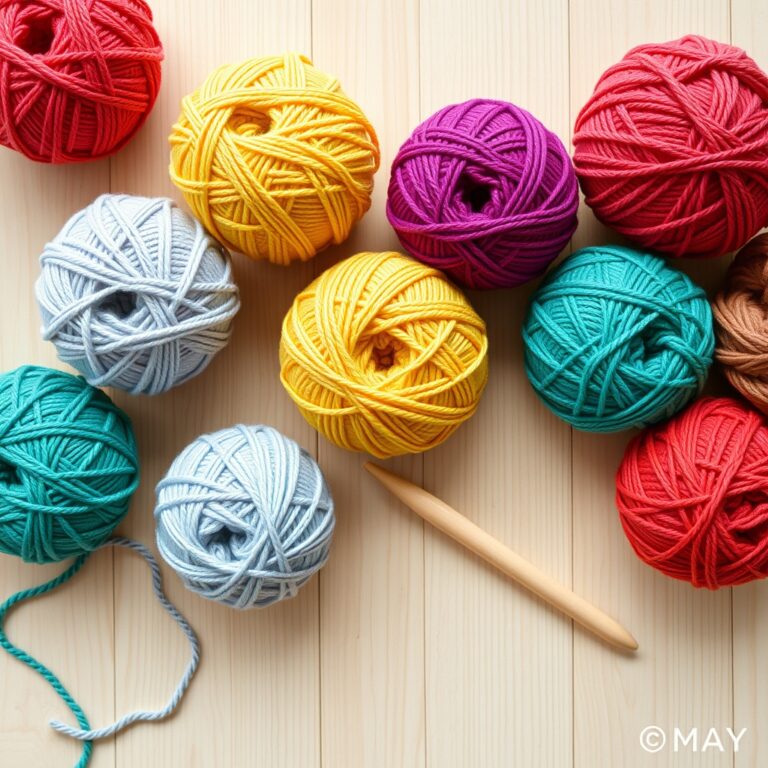
- Best yarn: velvet yarn (category 5-6) in your preferred colors
- Hook size: 5mm-6mm (one size up from yarn label)
Common Mistakes to Quick Fixes
- Velvet yarn splitting: use a smooth aluminum or ergonomic hook and work slowly to avoid catching the plush fibers
- Ruffle looks uneven: maintain consistent tension and count your stitches around the entire perimeter
- Pillow panels don’t match: make a gauge swatch first and count rows carefully for both panels
Mini Glossary
CH (chain), SC (single crochet), HDC (half double crochet), DC (double crochet), SL ST (slip stitch), FO (fasten off), BLO (back loop only)
Crochet velvet pillows have taken the home decor world by storm, combining the plush softness of velvet yarn with the artistry of crochet. Whether you are a complete beginner or an experienced crocheter looking for a relaxing project, these frilly pillow patterns offer the perfect blend of elegance and simplicity. In this guide, we will walk you through seven stunning velvet pillow designs that will transform your living space into a cozy, handcrafted haven.
What makes velvet yarn so special for pillows? The answer lies in its incredible texture. Velvet yarn creates a rich, luxurious fabric that looks like it belongs in a high-end boutique. When combined with a frilly, ruffled edge, the result is a pillow that feels as amazing as it looks. The video tutorial by thisfairymade demonstrates just how accessible these projects are, even for those who have never picked up a crochet hook before. If you are brand new to the craft, our how to crochet for beginners guide is a great place to start.
Why Choose Velvet Yarn for a Crochet Velvet Pillow?
Before diving into the patterns, let us explore why velvet yarn is the ideal choice for crochet pillows. Unlike traditional acrylic or cotton yarn, velvet yarn has a unique sheen and softness that gives your finished project a professional, polished appearance. The yarn glides smoothly through your fingers, making each stitch feel effortless and enjoyable.
Velvet yarn also holds its shape remarkably well, which is essential for pillows that need to maintain their structure over time. The slightly thicker gauge means your project will work up faster than you might expect, and the finished fabric has a beautiful drape that makes it perfect for decorative pillows. Additionally, velvet yarn comes in a stunning range of colors, from soft pastels like blush pink and baby blue to bold jewel tones like emerald and burgundy, allowing you to customize your pillows to match any room decor.
Another advantage of velvet yarn is its forgiving nature. Minor tension inconsistencies that might be visible with smoother yarns are hidden by the plush texture, making it an excellent choice for beginners who are still perfecting their technique. The yarn also creates tight, dense stitches that provide wonderful structure for pillow covers, ensuring your finished piece looks neat and professional.
Materials You Will Need
Getting started with velvet crochet pillows requires only a few basic supplies. Having everything prepared before you begin will make the process smooth and enjoyable. Here is what you need to gather:
- Velvet yarn in your chosen colors (2-4 skeins depending on pillow size) — see our best yarn for beginner crochet guide for choosing the right yarn
- Crochet hook in the recommended size for your yarn (typically 4mm-6mm)
- Pillow insert or stuffing in your desired size (12-inch, 14-inch, or 16-inch work well)
- Scissors and a yarn needle for weaving in ends
- Stitch markers (optional but helpful for keeping track of rounds)
- Tape measure for checking gauge and finished dimensions
- Reference the Craft Yarn Council yarn weight standards to match your velvet yarn to the correct hook size
Pro tip: When working with velvet yarn, go up one hook size from what the yarn label recommends. Velvet yarn tends to be denser than other yarns, and a slightly larger hook will make your stitches easier to work and give your finished pillow a softer, more flexible feel.
7 Stunning Frilly Velvet Pillow Patterns
1. The Classic Ruffle Edge Pillow
This is the foundational pattern featured in the video tutorial. The classic ruffle edge pillow uses simple single crochet stitches for the front and back panels, with a beautiful ruffled border added at the end. The ruffle is created by working multiple stitches into each stitch around the edge, creating a naturally wavy, frilly border that frames the pillow beautifully. This pattern is perfect for absolute beginners because it only requires knowledge of the chain stitch and single crochet.
To create the ruffle, you will work 2-3 single crochet stitches into each stitch around the perimeter of your joined panels. As you work, the fabric will naturally begin to wave and ruffle. The key is to maintain consistent tension and not pull too tightly. The resulting edge has a soft, organic look that adds a touch of whimsy to any room.
2. The Color Block Velvet Pillow
Take your pillow to the next level by incorporating multiple colors. The color block design uses two or more complementary shades of velvet yarn to create a striking geometric pattern. You can work horizontal stripes, vertical sections, or even a checkerboard effect depending on your skill level and preference. The video demonstrates how to seamlessly change colors without creating unsightly gaps or loose stitches.
When changing colors in velvet yarn, there is a helpful trick: carry the unused color along the inside of your work by crocheting over it. This eliminates the need to weave in dozens of ends later and creates a neat, clean finish on the inside of your pillow cover. Popular color combinations include blush pink with cream, navy with gold, and sage green with ivory.
3. The Double Ruffle Pillow
For those who want extra drama and texture, the double ruffle pillow features two layers of ruffles, one on the outer edge and one inset slightly from the first. This creates a beautiful layered effect that gives the pillow incredible dimension and visual interest. The technique is similar to the single ruffle but requires working two rounds of increases around the border.
The first ruffle round uses 2 stitches per stitch, while the second round uses 3 stitches per stitch. The combination creates a cascading ruffle effect that looks absolutely stunning in velvet yarn. This design works particularly well with contrasting colors for each ruffle layer, such as a light blue pillow with a white inner ruffle and a darker blue outer ruffle.
4. The Scalloped Edge Pillow
If you prefer a more structured, decorative edge, the scalloped design is a beautiful alternative to the free-form ruffle. Scallops are created by working a series of double crochet stitches and chain spaces in a repeating pattern around the pillow edge. The result is a perfectly uniform, elegant border that looks like it was made by a professional.
Scalloped edges work beautifully with velvet yarn because the plush texture fills in the spaces between stitches, creating a rich, full-looking border. This pattern is slightly more advanced than the basic ruffle but is still very achievable for confident beginners. The key is to count your stitches carefully and maintain consistent tension throughout the border round.
5. The Picot Trim Pillow
Picot stitches add a delicate, decorative touch to any crochet project, and they look especially lovely on velvet pillows. A picot is essentially a tiny loop created by chaining a few stitches and joining them back into the same stitch. When worked around the edge of a pillow, picots create a dainty, lace-like border that adds sophistication without overwhelming the design.
For this pattern, work a round of single crochet around the edge first to create a clean base, then add picots at regular intervals in the next round. You can space them evenly every few stitches for a uniform look or cluster them in groups for a more organic feel. Velvet yarn makes picots look especially plush and three-dimensional compared to smoother yarns.
6. The Granny Square Pillow
Combine the timeless appeal of granny squares with luxurious velvet yarn for a pillow that bridges classic and contemporary styles. This pattern involves creating multiple small granny square motifs and joining them together to form the pillow front. The ruffled edge is added last to frame the assembled squares beautifully.
The beauty of this approach is its versatility. You can use a single color for a monochromatic look or mix multiple colors for a vibrant, bohemian vibe. Each granny square can also feature a different color pattern, making this an excellent project for using up leftover velvet yarn from other projects. When assembled, the combination of textured squares and the ruffled edge creates a truly unique pillow.
7. The Heart Motif Pillow
For a romantic touch, the heart motif pillow features small crocheted hearts appliqued onto the pillow front. The hearts can be arranged in a pattern, scattered randomly, or placed in a wreath-like circle. A coordinating ruffled edge in a contrasting color ties the whole design together beautifully.
This pattern is an excellent way to practice both flat crochet for the pillow panels and motif crochet for the hearts. The hearts are made separately using simple increases and decreases, then sewn onto the finished pillow front before adding the ruffled border. Velvet yarn gives the hearts a wonderful puffy, dimensional quality that makes them really pop against the pillow background.
Step-by-Step: Making Your First Velvet Pillow
Now that you have seen the different pattern options, let us walk through the basic process of creating a velvet pillow from start to finish. The video tutorial provides excellent visual guidance, but here are the key steps to follow:
Step 1: Make a gauge swatch. Before starting your actual project, crochet a small square using your chosen yarn and hook. Measure it to ensure your stitches match the recommended gauge. This step is especially important with velvet yarn because its thickness can vary between brands. If your swatch is too small, try going up another hook size.
Step 2: Crochet the front panel. Chain the required number of stitches for your pillow width, then work in rows of single crochet until your panel matches the height of your pillow insert. Place stitch markers at the beginning and end of each row to help you count accurately. Remember to keep your tension relaxed to maintain the soft, plush feel that velvet yarn is known for. A crochet velvet pillow makes a stunning accent piece for your sofa.
Step 3: Crochet the back panel. Repeat the same process for the back panel. For a decorative touch, you can use a different stitch pattern for the back, such as half double crochet or even a simple texture stitch. Some crafters like to add a button closure or zipper to the back panel so the cover can be removed for washing. Handmade crochet velvet pillow always carry a personal touch.
Step 4: Join the panels. Place the front and back panels together with the right sides facing out. Working through both layers, single crochet around three sides, leaving the fourth side open for inserting the pillow form. If you are adding a closure, work all four sides and leave a gap in the back panel for the button or zipper.
Step 5: Add the ruffled edge. Once the panels are joined, work around all four edges, placing 2-3 single crochet stitches in each stitch. This will create the beautiful frilly ruffle that frames your pillow. Work all the way around, join with a slip stitch, and fasten off. The ruffle will naturally wave and curl, creating that gorgeous dimensional effect. You can customize your crochet velvet pillow in any color you prefer.
Step 6: Insert your pillow form. Gently stuff your pillow insert through the opening. If you left an opening, use your yarn needle and remaining yarn to sew the gap closed using a mattress stitch or whip stitch. Weave in any remaining ends, and your pillow is complete!
What Are the Best Tips for Working with Velvet Yarn on Your Crochet Velvet Pillow?
Working with velvet yarn comes with its own set of quirks and techniques that are worth knowing before you start. Here are some essential tips that will help you get the best results from your crochet velvet pillow projects:
First, velvet yarn can be slippery, so make sure your hook has a comfortable grip. An ergonomic hook with a rubberized handle will give you better control and prevent hand fatigue during longer sessions. If your hands tend to get sweaty while crafting, a small amount of hand cream before starting can improve your grip on the yarn.
Second, velvet yarn does not frog easily, meaning it is difficult to undo your stitches and rework them. The plush texture tends to tangle and mat when pulled through previously worked stitches. For this reason, it is especially important to count your stitches carefully and check your work frequently. If you do need to undo stitches, go slowly and gently to minimize tangling.
Third, block your finished panels before assembling the pillow. Blocking involves lightly misting your crochet pieces with water, shaping them to the correct dimensions, and allowing them to dry flat. This step helps even out your stitches and gives your panels a professional, finished appearance. Velvet yarn responds beautifully to blocking, and the difference in the final result is remarkable.
Finally, when choosing colors for your velvet pillow, consider the overall color scheme of the room where the pillow will be displayed. Neutral tones like cream, beige, and gray are versatile and timeless, while bold colors can serve as accent pieces that tie a room together. The video tutorial shows beautiful examples of both approaches, with soft blue and pink pillows that look effortlessly chic.
Caring for Your Crochet Velvet Pillow
Proper care will keep your velvet crochet pillows looking beautiful for years to come. Here is what you need to know about maintaining your handcrafted creations:
Velvet yarn pillows should be hand washed in cold water using a gentle detergent. Avoid wringing or twisting the fabric, as this can distort the shape of your stitches and damage the ruffled edge. Instead, gently squeeze out excess water and lay the pillow flat on a clean towel to dry. Reshape the ruffle while damp to ensure it maintains its beautiful wave pattern.
If your pillow gets a lot of use, consider making a removable cover with a button or zipper closure. This way, you can remove the cover for washing without having to wash the entire pillow. Spot clean any stains promptly using a damp cloth and mild soap. For deeper cleaning, remove the pillow insert before washing the cover.
Store your velvet pillows in a cool, dry place away from direct sunlight, which can cause the colors to fade over time. If storing for an extended period, place them in a breathable cotton bag rather than plastic, which can trap moisture and lead to mildew. Fluff and reshape your pillows regularly to maintain their full, plush appearance.
Frequently Asked Questions
A crochet velvet pillow with frilly edges is one of the most rewarding home decor projects you can make. They are quick enough to complete in a weekend, impressive enough to display proudly, and versatile enough to match any style of room decor. Whether you choose the classic ruffle, the elegant scallop, or the playful heart motif, each pillow will be a unique handcrafted piece that adds warmth and personality to your space.
The tutorial by thisfairymade demonstrates just how accessible these projects are, even for those with limited crochet experience. With just a few skeins of velvet yarn, a crochet hook, and a pillow insert, you can create stunning decorative pillows that look like they came from a designer home store. So grab your favorite colors and start stitching. Your future favorite pillow is just a few skeins away!