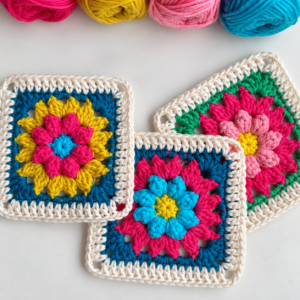
Floral granny square crochet pattern finished piece in yellow, white, and green

Floral Granny Square: Free Pattern with a 6 Step-by-Step Tutorial

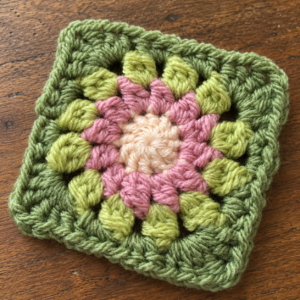
This floral granny square pattern is worth reaching for if you want something that looks like an actual crocheted flower rather than the usual stacked rounds. A bright sunburst center sits inside two layers of interlocking petals, framed by a clean solid border, so it reads as a daisy or dahlia first and a granny square second. It’s a good way to use up small amounts of yarn in four colors, and the layered petals make even a random stash combination look intentional.

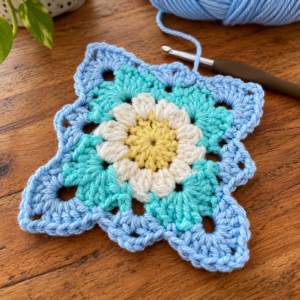
Floral granny square crochet pattern finished piece in yellow, white, and green
The finished floral granny square: a golden sunburst center framed by white, dark green, and light green petals.

Why You Will Love This Floral Granny Square

What sets this one apart is how it builds its petals in two separate layers from the same base round. Round 3 works a set of shell stitches into half of the stitches left by Round 2, and Round 4 reaches back into the stitches Round 3 skipped, anchoring a second set of petals right at the base so they nestle between the first. The result looks like two rows of petals stacked on top of each other, even though both layers actually grow from the same ring. The last two rounds round the circle out into a square, so the flower ends up sitting inside a tidy frame instead of floating on its own.

Since the petals use two contrasting colors, plus a different color again for the center and border, this is a good stash-buster for leftover sock or DK weight yarn. Pair it with our diamond granny square or star granny square pattern if you want a blanket that mixes geometric and floral motifs square by square.

Materials You Will Need

  • Yarn: Four colors in a light (#3) weight yarn, such as DK weight. Color A forms the sunburst center (yellow in the photographed example), Color B forms Round 2 and the outer border (white in the photographed example), Color C forms the first petal layer (dark green), and Color D forms the second petal layer (light green).
  • Crochet hook: A 3.00 mm hook. Sizing up or down will change your finished square size, so keep your hook consistent if you are making multiples for a joined project.
  • Tapestry or darning needle: For weaving in the many color-change ends this motif produces.
  • Stitch marker or marking clip: Helpful for keeping track of your first stitch, especially in Rounds 3 and 4 where the petals are worked into alternating stitches.
  • Scissors: For trimming yarn between the four color changes.

Gathering these materials ahead of time makes this floral granny square much faster to work through, since you will not be hunting for a stitch marker or a fresh bobbin mid-round.

According to the Craft Yarn Council, light (#3) weight yarns are typically recommended with hooks between 3.0 mm and 4.5 mm, so a 3.00 mm hook on the smaller end of that range will keep your petal stitches dense and well-defined.

Gauge and Finished Size

Worked with light (#3) weight yarn and a 3.00 mm hook, this floral granny square finishes at approximately 4.5 inches (11.5 cm) across. As with most granny square motifs, exact gauge is not critical as long as your tension stays consistent from square to square. If you want a larger finished square, switch to a worsted (#4) weight yarn with a 5.00 mm hook, or add an extra solid round in Color B after Round 6.

Abbreviations

  • ch: Chain stitch
  • sl st: Slip stitch (used to join each round)
  • sc: Single crochet
  • dc: Double crochet
  • tr: Treble crochet
  • st(s): Stitch(es)
  • sk: Skip the next stitch
  • rep: Repeat the instructions that follow
  • sp: Space

Step-by-Step Floral Granny Square Instructions

This works in six rounds with four color changes. Rounds 1 and 2 lay down the sunburst center and a base ring in Color A and Color B, Rounds 3 and 4 build the two layered petal rings in Color C and Color D, and Rounds 5 and 6 round the motif into a square with a solid border in Color B. Keep the stitch chart below open alongside the written instructions, it’s especially helpful for seeing exactly which stitches of Round 2 the Round 4 petals anchor back into.

Floral granny square crochet stitch chart diagram
Stitch chart for the floral granny square: orange shows Round 1, dark green shows Round 3, light green shows Round 4, and gray shows the Round 5-6 border.

Round 1: Magic Ring Sunburst

Start with a magic ring in Color A. This round lays down 12 double crochet spokes that fan out evenly, giving every later round a symmetrical base to build from.

Instructions: Make a magic ring. Chain 3 (counts as your first double crochet), work 11 more double crochet into the ring (12 dc total). Join with a slip stitch to the top of the starting chain 3. Fasten off Color A and weave in your ends.

Round 2: Base Ring

This round doubles your stitch count, which gives Round 3 and Round 4 enough stitches to share between two separate layers of petals.

Instructions: Join Color B in any stitch. Chain 3 (counts as first double crochet), work 1 more double crochet in the same stitch, then work 2 double crochet in each remaining stitch around (24 dc total). Join with a slip stitch to the top of the starting chain 3. Fasten off Color B and weave in your ends.

Round 3: First Petal Layer

This round forms the first, slightly shorter layer of petals by working a small shell into every other stitch of Round 2 and skipping the rest, which leaves the skipped stitches free for Round 4 to use. This is the round where your floral granny square first starts to look like a flower rather than a plain circle.

Instructions: Join Color C in any stitch of Round 2. Work (1 dc, ch 1, 2 dc) in the same stitch, sk 1 stitch, this forms one petal. Rep [3 dc shell in next stitch, sk 1 stitch] 11 more times around (12 petals total). Join with a slip stitch to the first stitch of the round. Fasten off Color C and weave in your ends. You should have 12 stitches of Round 2 still unused, sitting between your new petals.

Round 4: Second Petal Layer

This is the round that gives the motif its layered look. Instead of building on top of Round 3, each petal here anchors directly into one of the 12 stitches that Round 3 skipped, so the new petals emerge from the same base ring as the first layer and nestle between them rather than on top of them.

Instructions: Join Color D in one of the unused Round 2 stitches between two Round 3 petals. Work 1 dc in the same stitch, then work (1 dc, ch 1, 1 dc) in that same unused stitch to form a small fan, sk to the next unused Round 2 stitch and rep in each of the remaining 11 unused stitches (12 petals total). Join with a slip stitch to the first stitch of the round. Fasten off Color D and weave in your ends. Your piece should now show two interlocking rings of petals around the sunburst center, which is when the floral granny square actually starts to look like its name.

Round 5: Rounding the Flower into a Square

Now we switch back to Color B and begin turning the rounded flower into four even square corners, using taller treble clusters at the corners and shorter double crochet groups along the sides.

Instructions: Join Color B in the top of any petal. Work (3 tr, ch 2, 3 tr) in that stitch, this forms one corner. Work 3 dc evenly across the petals to the next corner point. Rep [(3 tr, ch 2, 3 tr) in the corner point, 3 dc across to the next corner] 3 more times to complete all four sides. Join with a slip stitch to the top of the first treble crochet. Your piece should now look like a rounded square with all four petal-ring colors visible inside.

Round 6: Solid Square Border

The final round adds a classic solid granny border, which squares off the edges completely and frames the floral center cleanly.

Instructions: Join Color B (or continue if already attached) in any corner chain-2 space. Chain 3 (counts as first dc), work 1 dc, chain 2, work 2 dc, all in the same corner space. Work 15 dc evenly along the side to the next corner. In the next corner chain-2 space, work (2 dc, ch 2, 2 dc). Repeat [15 dc along the side, (2 dc, ch 2, 2 dc) in the corner] two more times to complete all four sides. Join with a slip stitch to the top of the starting chain 3. Fasten off and weave in all remaining ends.

Tips for Perfect Results

A few small adjustments make a big difference in how clean your finished floral granny square looks, especially around the two petal layers.

  • Keep your Round 2 stitches loose. Round 4 needs to anchor directly into the skipped stitches of Round 2, so working that round a little looser than usual makes it much easier to find and crochet into those stitches later.
  • Count your petals before moving on. After Round 4, you should have exactly 24 petals total (12 from Round 3, 12 from Round 4) evenly alternating around the ring. If your count is off, it is much easier to fix before you start Round 5’s corner shaping.
  • Block your finished square. A light steam or spray block will even out the petal layers and square up the corners so the border frames the flower symmetrically.
  • High contrast petal colors read best. Two clearly different greens (or any two contrasting shades) make the two petal layers easy to tell apart from across the room, the way the dark and light green do in the photographed example.

Frequently Asked Questions

Can I make this floral granny square bigger?
Yes. After completing Round 6, keep adding standard solid granny rounds: 3 dc along each side and (3 dc, ch 2, 3 dc) in each corner, to grow the square to whatever size you like for a blanket panel.

Is this pattern beginner-friendly?
This pattern works best for confident beginners who already know chain, slip stitch, double crochet, and treble crochet, and who are comfortable working in the round. The main skill this floral granny square teaches is working a stitch back into an earlier round rather than the most recent one, which is a useful technique to have once you are past your first few granny squares.

Why does Round 4 anchor into Round 2 instead of Round 3?
Anchoring into the unused Round 2 stitches keeps the Round 4 petals at the same base height as the Round 3 petals, so the two layers sit side by side rather than one stacked on top of the other. If Round 4 were worked into Round 3 instead, the second layer of petals would sit higher up and the flower would look domed rather than flat.

Do I have to use four different colors?
No, you can work the whole square in fewer colors if you’d rather have a more tonal look. Using the same color for both petal layers hides the two-layer construction a little, but the shaping and finished size stay exactly the same either way.

Love granny squares? Explore our complete Granny Square Patterns guide: 25+ free designs plus joining, blocking, and project ideas.

Similar Posts

Leave a Reply

Your email address will not be published. Required fields are marked *