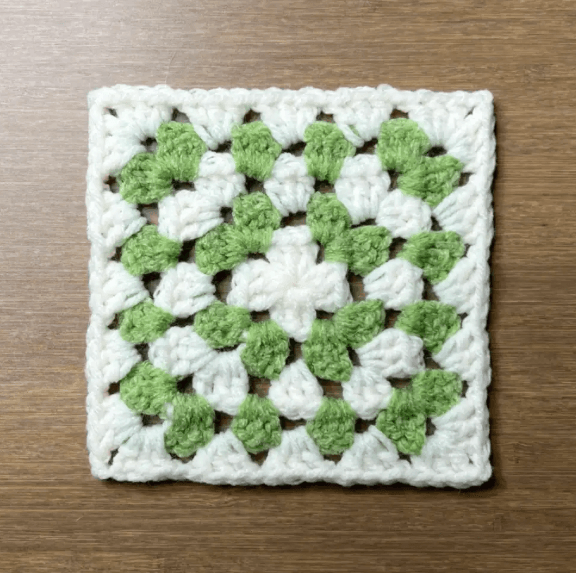
Kitty Granny Square Pattern in 5 Steps (Free)
This kitty granny square puts a sweet white cat face right in the middle of a classic granny block: perky ears that stand up off the fabric, a tiny wrapped bow, an embroidered nose and whiskers that sweep out across the border. And if this particular combination of white face and little bow reminds you of a certain world-famous kitty, well, that’s the charm of the look. The construction is all ours and all standard granny skills: one circle, one squaring round, one clever use of back loops.

The trick that makes it work: the squaring round is worked into the back loops only, which leaves a ring of free front loops standing on the face. The ears are crocheted straight into those loops later, no sewing and no guessing where they go.
Why You’ll Love This Kitty Granny Square
- No-sew ears. They grow out of leftover front loops, positioned by the stitch count, so both ears land symmetrically every time.
- 5 short steps. Face circle, squaring round, granny border, ears, face details.
- Stacks like a normal square. Apart from the ears and bow the block is flat, so it joins into blankets and cushions cleanly.
- Scrap-friendly. The face takes one small ball of white; border, bow and features use leftovers.
Kitty Granny Square at a Glance
- Skill level: Confident beginner
- Time needed: about 1 hour per square
- Finished size: about 11 cm with worsted yarn and a 4.0 mm hook
Materials
- Worsted weight (#4) yarn: white for the face, one contrast color for the border, plus small scraps of pink (nose and inner ears), black (eyes and whiskers) and red if you want the optional bow
- 4.0 mm (US G/6) hook
- Yarn needle, scissors, 4 stitch markers
Any weight works if you resize the hook with the Craft Yarn Council standards. DK yarn with a 3.5 mm hook makes a daintier 9 cm square.
Abbreviations (US Terms)
- MR: magic ring
- ch: chain
- sl st: slip stitch
- sc: single crochet
- hdc: half double crochet
- dc: double crochet
- inc: 2 sc in the same stitch
- dec: 2 stitches worked together
- BLO / FLO: back loops only / front loops only
- (…) xN: repeat the bracket N times
Kitty Granny Square Pattern: Step by Step
Step 1: The Face Circle (white)
Every kitty granny square starts as a plain single crochet circle, worked in joined rounds so the edge stays tidy for the squaring round. Ch 1 at the start of each round and join with a sl st to the first sc.
R1: MR, 6 sc. (6)
R2: inc x6. (12)
R3: (1 sc, inc) x6. (18)
R4: (2 sc, inc) x6. (24)
Before moving on, place 4 stitch markers in Round 4, spaced every 6th stitch. These four marked stitches become the corners of your square.

Step 2: The Squaring Round, in Back Loops (white)
This whole round is worked into the back loops only of Round 4. The front loops you skip are the ears’ foundation, so resist the urge to work through both loops.
R5 (BLO): Ch 3 (counts as dc). In each marked corner stitch work (2 dc, ch 2, 2 dc). Between corners, work the 5 stitches as: dc, hdc, sc, hdc, dc. The graduated stitch heights are what flatten the circle into straight sides. Join to the top of the ch 3. (4 corners with ch-2 spaces, 7 stitches per side)

Step 3: The Granny Border (contrast color)
R6: Join the contrast color in any corner ch-2 space. Ch 3, then (1 dc, ch 2, 2 dc) in the same space. Dc in every stitch along each side, and work (2 dc, ch 2, 2 dc) in each corner space. Join. (11 stitches per side)
R7: Sl st to the corner space. Repeat Round 6, working dc in every stitch and (2 dc, ch 2, 2 dc) in each corner. Join and fasten off. (15 stitches per side) Want a bigger kitty granny square for a cushion front? Just keep repeating this round.
Step 4: The Ears, in the Leftover Front Loops (white)
Turn the square so one straight edge is the top. On Round 4’s free front loops, count from the top-left corner marker position: the right ear sits in the 4 front loops just right of the top-right corner, the left ear in the 4 front loops just left of the top-left corner.
Each ear, worked flat in rows:
Row 1: Join white in the first front loop, ch 1, sc in all 4 loops, turn. (4)
Row 2: Ch 1, dec, dec, turn. (2)
Row 3: Ch 1, dec. (1) Ch 1, then sc evenly down the ear’s side and sl st into the face. Fasten off.
The little triangles stand upright on the face’s edge because the front loops hold them at an angle. Pinch each tip to sharpen the point.

Step 5: Bow and Face Details
The inner ears (pink): Two or three short straight stitches fanned inside each ear give the kitten look from our photos. Ten seconds per ear, big payoff.
The optional bow (red or pink): Our cover square goes without, but if you want one: ch 5. Rows 1 to 4: ch 1, sc 4, turn. You’ll have a tiny rectangle. Cut the yarn with a long tail, wrap the tail tightly around the rectangle’s middle 5 or 6 times so it cinches into a bow shape, then use the same tail to attach it below one ear or between the ears, wherever it makes you smile.

The nose (pink): With the yarn needle, embroider a small satin stitch triangle at the lower center of the face: start with one wide horizontal stitch and stack three or four progressively shorter ones below it, so the shape tapers to a point.
The eyes (black): One French knot, or three tiny stitches worked over the same spot, on each side of the nose, one round higher.
The whiskers (black): Three long straight stitches per side, starting beside the nose and fanning outward so the tips land on the contrast border. Thread all three on one side, compare angles with the other side, then knot off on the back.
Tips for a Better Kitty Granny Square
- Count to the markers, don’t eyeball. The whole kitty granny square depends on the four corner stitches being 6 apart. Marker first, crochet second.
- Keep the BLO round relaxed. Back loop stitches tighten the fabric slightly; if your circle cups, go up half a hook size for Round 5 only.
- Ears before everything decorative. Ear position anchors the whole face, so crochet both ears first, then place nose, eyes and any bow relative to them.
- Whiskers last. They cross from face onto border, so every other element needs to be finished and blocked flat before the whiskers lock the layers visually together.
Build out the menagerie: our cat granny square guide collects seven more feline blocks, the dinosaur granny square handles the prehistoric wing of the nursery blanket, and the granny square hub has 25+ more designs to mix in.
Kitty Granny Square FAQ
Why back loops in the squaring round?
Round 5 in BLO leaves Round 4’s front loops free and standing, which is where the ears are crocheted later. No sewing, and the ears land symmetrically by stitch count.
What colors work best?
White face, any strong contrast border, pink details. The face reads best when the border is clearly darker or brighter than white.
What can I make with these squares?
Blankets, cushion fronts, bag panels, or a single square as a lovey. The block is flat apart from ears and bow, so it joins cleanly.
How do I keep the whiskers even?
Lay all three on one side before knotting anything, compare against the other side, then secure on the back.
If you hook up this kitty granny square, send a photo through the contact page and we’ll feature reader blocks right here. Happy crocheting!