Crochet Hoodie Pattern: Oversized, Cozy & Free for Fall
Crochet Hoodie Pattern at a Glance
This crochet hoodie pattern uses DK weight yarn and a 5 mm hook to create an oversized, color-blocked hoodie with textured stitch panels, a warm hood, and a kangaroo pocket. The pattern is written in 5 sizes (XS through XL) using a simple 2-row repeat of half double crochet and single crochet rows, making it a satisfying project for intermediate crocheters who want a wearable garment with a polished finish.
As an Amazon Associate we earn from qualifying purchases: some supply links in this post are affiliate links, at no extra cost to you.
Tip: Always swatch in the textured stitch pattern before starting your panels: even a small difference in gauge will compound across four full panels and throw off your sizing.
At a Glance
- Skill level: intermediate
- Time needed: 30-45 hours depending on size
- Best yarn: DK weight (category 3) acrylic or cotton blend
- Hook size: 5 mm (H-8)
Common Mistakes → Quick Fixes
- Wrong gauge: swatch 4″ x 4″ in the stitch pattern and adjust hook size before cutting yarn
- Uneven panel edges: count your stitches at the end of every row and use stitch markers every 20 stitches
- Visible seaming: use a yarn needle and whip stitch through back loops only for nearly invisible seams
Mini Glossary
HDC (half double crochet), SC (single crochet), CH (chain), SL ST (slip stitch), ST/STS (stitch/stitches), RS (right side), WS (wrong side), BLO (back loop only), FO (fasten off), PM (place marker), REP (repeat)
Choosing the right crochet hoodie pattern can feel overwhelming with so many options online. This free crochet hoodie pattern gives you everything you need to complete a wearable, cozy garment. If you have been searching for the perfect design, you are in the right place to make a cozy oversized hoodie from scratch. The design features a textured two-row stitch repeat, color blocking between cream and mauve (or any two colors you love), a warm lined hood with drawstrings, a functional kangaroo pocket, and ribbed cuffs and hem. The entire hoodie is built from four flat panels that you seam together, which keeps the construction straightforward and easy to customize. Whether this is your first or tenth hoodie, the panel method keeps things manageable.
Size Chart and Finished Measurements
This hoodie is written in five sizes. The oversized fit means the finished garment measures 10-16 inches larger than your actual bust measurement, so choose your size based on how roomy you want the hoodie to feel. All measurements are taken after seaming with the garment laying flat.
| Size | To Fit Bust | Finished Bust | Body Length | Sleeve Length | Yards Needed (each color) |
|---|---|---|---|---|---|
| XS | 28″-30″ | 42″ | 28″ | 19″ | 900 / 600 |
| S | 32″-34″ | 46″ | 29″ | 19″ | 1000 / 650 |
| M | 36″-38″ | 50″ | 30″ | 19″ | 1100 / 700 |
| L | 40″-42″ | 54″ | 31″ | 19″ | 1200 / 750 |
| XL | 44″-46″ | 58″ | 32″ | 19″ | 1300 / 800 |
The first yardage number is for your main color (body panels) and the second is for your contrast color (sleeves, hood, and pocket). If you want extra roominess, go up one size from your usual choice. The best hoodie pattern accounts for ease and drape. For more guidance on garment fit, check out our how to fix crochet tension guide since consistent gauge is essential for garments.
Materials Needed?
Before starting your pattern, gather all of your materials so you can work through the project without interruptions. Having everything organized ahead of time also makes it easier to maintain consistent tension across all four panels.
Yarn: DK weight (category 3), approximately 1,800-2,100 yards total. Use a smooth acrylic, cotton blend, or wool-acrylic blend that holds stitch definition well. The cream and mauve combination shown here uses two complementary tones, but you can substitute any colors that speak to you. Our best yarn for beginner crochet guide covers fiber types in more detail.
Hooks: 5 mm (H-8) crochet hook for the main body. You may also want a 4.5 mm hook for the ribbing if you prefer a tighter rib. Always check your gauge and adjust hook size up or down as needed.
Other supplies: Yarn needle (bent tip needles make seaming much easier), stitch markers, measuring tape, scissors, and removable stitch markers for holding panels during assembly.
Gauge and the Textured Stitch
Before you chain a single stitch, you must swatch. Swatching is even more important than usual here because gauge differences multiply across four full panels. Gauge is measured over the 2-row textured stitch repeat described below. Using your 5 mm hook and DK yarn, chain 25 and work the textured stitch pattern for at least 16 rows. Block your swatch (spray with water, shape, and let dry flat) and then measure.
Gauge: 15 stitches and 14 rows = 4″ x 4″ in the textured stitch pattern. If you have too many stitches per 4 inches, go up a hook size. If you have too few, go down. Matching gauge is non-negotiable for a garment that fits properly, and even a half-stitch difference per inch will cause significant sizing issues across full panels.
The Textured Stitch (2-Row Repeat)
The textured fabric is one of the reasons this hoodie stands out, and it comes from alternating two simple row types that together create a rich, woven appearance. The beauty of this pattern is that both rows use basic stitches you likely already know, so you can focus on relaxing and enjoying the process.
Row A (RS. Right Side): HDC in the 3rd CH from hook (or first ST), CH 1, skip next ST. Repeat (HDC, CH 1, skip 1 ST) across. End with 1 HDC in the last ST, CH 2, turn.
Row B (WS. Wrong Side): SC in the first HDC of the previous row, SC in the CH-1 space (working over the chain), SC in the next HDC. Repeat (SC in each HDC and in each CH-1 space) across. End with 1 SC in the turning chain space from the previous row. CH 2, turn.
When you alternate Row A and Row B, the chain spaces from Row A create a subtle open texture, while Row B fills them in with single crochet for stability. The result is a thick, cozy fabric with a beautiful ridged appearance on the right side. This is the same stitch pattern used throughout every panel of the hoodie, so once you memorize the rhythm, the project flies by.
Back Panel
The back panel is the largest and most straightforward piece of your design and sets the width for the entire garment. It is worked from the bottom ribbing upward in turning rows.
Ribbing
With your 4.5 mm hook and main color (cream), CH the number of chains for your size: XS: 69, S: 75, M: 81, L: 87, XL: 93.
Row 1: SC in the 2nd CH from hook and each CH across, CH 1, turn. [68, 74, 80, 86, 92]
Row 2: SC through both loops of the first ST, BLO SC in each ST across to the last ST, SC through both loops of the last ST, CH 1, turn. Repeat Row 2 for a total of 10 ribbing rows. Do not fasten off.
At the end of the last ribbing row, CH 1 (this counts as your first SC of the body). You will now switch to your 5 mm hook and begin the textured stitch pattern across the top edge of the ribbing.
Body of Back Panel
Switch to your 5 mm hook. Working across the top edge of the ribbing, place 1 SC in the end of each ribbing row. You should have approximately: XS: 68, S: 74, M: 80, L: 86, XL: 92 STS.
Row 1 (RS): Work Row A of the textured stitch pattern across. [68, 74, 80, 86, 92 STS]
Row 2 (WS): Work Row B of the textured stitch pattern across. [68, 74, 80, 86, 92 STS]
Repeat Rows 1 and 2 until your back panel measures 17″ (XS/S), 17.5″ (M), 18″ (L/XL) from the top of the ribbing, ending after a Row B (WS row). Fasten off and weave in ends.
Front Panel
The front panel is worked identically to the back panel but includes a shorter row section at the top to create the neckline opening. Work the ribbing and body the same way as the back panel, repeating Row A and Row B until the panel measures 14″ (XS/S), 14.5″ (M), 15″ (L/XL) from the top of the ribbing, ending after a Row B.
Neckline Shaping
Row 1 (RS): Work Row A across the first 24 (26, 28, 30, 32) STS, CH 2, turn. Leave remaining STS unworked.
Row 2 (WS): Work Row B across. [24, 26, 28, 30, 32 STS]
Repeat Row 1 and Row 2 for 4 more rows (5 total neckline rows on each side). Fasten off.
Rejoin your yarn at the neck edge on the other side with the RS facing. CH 2, work Row A across the remaining 24 (26, 28, 30, 32) STS, CH 2, turn.
Repeat for 5 total neckline rows on this side to match. Fasten off and weave in all ends.
Sleeves (Make 2)
Both sleeves are identical. When working through any hoodie, the sleeves are often the quickest panels to complete. The sleeves use your contrast color (mauve) and are worked flat in the textured stitch pattern, then tapered at the cuff end.
With your 5 mm hook and contrast color, CH for your size: XS: 43, S: 45, M: 47, L: 49, XL: 51.
Row 1 (RS): Work Row A of the textured stitch pattern across. [42, 44, 46, 48, 50 STS]
Row 2 (WS): Work Row B across. [42, 44, 46, 48, 50 STS]
Repeat Rows 1 and 2 for 35 rows total (the sleeve should measure approximately 19″ long). Do not fasten off.
Sleeve Ribbing (Cuff)
Switch to your 4.5 mm hook. You will now work a ribbed cuff across the bottom edge of the sleeve.
Row 1: SC in the first ST, BLO SC in each ST across, CH 1, turn. [42, 44, 46, 48, 50 STS]
Repeat this row 8 more times (9 total ribbing rows). At the end of the last row, fold the ribbing upward toward the sleeve and SL ST through both layers to join, working through the starting CH edge and the last row of ribbing. Fasten off and weave in ends. Repeat for the second sleeve. Completing both sleeves means you are more than halfway through this hoodie.
Kangaroo Pocket
The pocket is worked in your contrast color as a flat rectangle, then sewn onto the front panel.
With your 5 mm hook and contrast color, CH 33.
Row 1: SC in the 2nd CH from hook and each CH across, CH 1, turn. [32]
Rows 2-24: SC in each ST across, CH 1, turn. [32]
Fasten off and weave in ends. The pocket measures approximately 8″ wide x 7″ tall. To attach, center the pocket on the front panel approximately 4″ below the neckline opening. Pin in place with stitch markers, then use your yarn needle to whip stitch around all four sides through the back loops of the pocket stitches only.
Hood
The hood is worked flat in your contrast color, then folded and seamed along the curved top edge. This is the showpiece detail of your hoodie pattern and what makes it feel like a real hoodie rather than just a sweater, so take your time getting the shaping right.
With your 5 mm hook and contrast color, CH for your size: XS: 53, S: 55, M: 57, L: 59, XL: 61.
Row 1 (RS): Work Row A of the textured stitch pattern across. [52, 54, 56, 58, 60 STS]
Row 2 (WS): Work Row B across. [52, 54, 56, 58, 60 STS]
Repeat Rows 1 and 2 for 28 rows total.
Hood Decreases
Row 29 (RS): Work Row A across the first 40 (42, 44, 46, 48) STS, CH 2, turn. Leave remaining STS unworked.
Row 30 (WS): Work Row B across the same number of STS. [40, 42, 44, 46, 48]
Row 31 (RS): Work Row A, skipping the first and last ST (decrease 2 STS). [38, 40, 42, 44, 46]
Row 32 (WS): Work Row B across. [38, 40, 42, 44, 46]
Row 33 (RS): Work Row A, skipping the first and last ST. [36, 38, 40, 42, 44]
Row 34 (WS): Work Row B across. Fasten off.
Seaming the Hood
Fold the hood panel in half with the RS facing inward. Using your yarn needle and contrast color yarn, whip stitch along the top edge from the center point down to the first row on each side, creating the curved hood shape. Turn the hood RS out and press gently. The hood base should measure approximately 26-30″ depending on your size, which matches the neckline opening of your body panels.
Drawstrings
With your main color and 5 mm hook, CH 121. Fasten off. Repeat for a second drawstring. Using your yarn needle, thread each drawstring through the hood opening, starting from opposite sides and meeting in the center. Tie knots at both ends to prevent them from pulling through. For a polished look, you can add small tassels to the drawstring ends by cutting 6″ strands of yarn, folding them in half, and pulling the loop through the last chain with your hook.
Assembly
Assembly is where your hoodie transforms from flat panels into a finished garment you can actually wear. Lay all pieces flat and use stitch markers to pin everything in place before you begin seaming. This extra step prevents misalignment and saves time in the long run.
Step 1: Shoulder Seams
Place the front and back panels together with the RS facing each other. Using your yarn needle and main color yarn, whip stitch across both shoulder seams, matching the neckline edges. The neckline opening should measure approximately 16-20″. Many crocheters find this step of their pattern to be the most satisfying part when both shoulders are seamed.
Step 2: Attach the Hood
With the WS of the body facing out, align the base of the hood with the neckline opening. Pin in place with stitch markers, distributing any extra width evenly around the curve. Starting at one shoulder seam, whip stitch the hood to the neckline all the way around. Take care not to stretch the neckline as you work.
Step 3: Attach Sleeves
Place each sleeve panel against the armhole opening with the RS of the sleeve facing the WS of the body. Pin the center of the sleeve top to the shoulder seam, then pin the underarm edges. Whip stitch around the entire armhole, easing in any fullness evenly. Repeat for the second sleeve. If you are newer to following a written design, take each section one at a time. If you find garment construction challenging, our how to read a crochet pattern guide has helpful tips for following assembly instructions.
Step 4: Side and Underarm Seams
With the WS facing out, align the front and back panels together at the side edges. Starting at the bottom ribbing, whip stitch up the side seam and continue around the underarm seam in one continuous stitch. This creates a clean, professional finish. Repeat on the other side. Fasten off and weave in all remaining ends.
Step 5: Body Hem Ribbing
Work a ribbing band around the bottom edge of the body (same as the back panel ribbing) by working SC in BLO across the bottom edge. Work 8-10 rows of ribbing, then fold up and SL ST through both layers to join. This matches the sleeve cuffs and creates a cohesive, polished look throughout the garment.
Customization Ideas for Your Crochet Hoodie
Once you have completed the basic version of this hoodie, there are many ways to personalize it and make it your own. The panel construction method is incredibly forgiving when it comes to modifications, so do not be afraid to experiment.
Add stripes: Instead of clean color blocking, introduce horizontal stripes by changing colors every 4 rows on the body panels. Carry the unused color up the side edge to avoid weaving in dozens of ends. For more colorwork techniques, our crochet crop top patterns often feature creative color combinations you can adapt.
Add a zipper: For a more structured look, sew a separating zipper into the front opening instead of leaving it as an open pullover. You will need to create a border of single crochet along both front edges first, then hand-sew the zipper tape behind the crochet border.
Crop it: Shorten the body panels by 6-8 inches for a trendy cropped hoodie that pairs beautifully with high-waisted jeans. The pocket placement will need to shift up accordingly.
Add pockets: Instead of one kangaroo pocket, add two separate patch pockets on either side of the front panel for a more utilitarian look.
How Do You Crochet Hoodie Care Instructions?
To keep your finished hoodie looking its best for years to come, proper care is essential. If you used acrylic yarn, machine wash on a gentle cycle in cold water and lay flat to dry. Cotton blends can be machine washed on cold and tumble dried on low. Wool blends should always be hand washed in cool water with a gentle wool wash and laid flat to dry on a clean towel.
Avoid hanging your hoodie on a hanger, as the weight of the wet fabric will cause stretching and distortion. Instead, reshape it gently and lay it flat on a drying rack or clean towel. If your hoodie develops pills (those annoying little fuzz balls), a fabric shaver or a gentle pass with a sweater stone will restore the smooth texture. This simple step keeps your hoodie looking brand new wash after wash. For more project care tips, the Craft Yarn Council has excellent resources on yarn care and maintenance.
Frequently Asked Questions
How difficult is this crochet hoodie pattern?
This pattern is rated intermediate because it requires working multiple panels, seaming garment pieces together, and following row-by-row shaping instructions. However, every stitch used is a basic stitch (HDC, SC, CH, SL ST), so confident beginners who have completed projects like a crochet cardigan or simple blanket will find this pattern approachable. If you are new to garment crochet, start with the XS size to practice construction. You might also want to review our crochet sweater pattern guide for additional garment-making tips before committing to a larger size.
Can I use a different weight yarn?
You can substitute worsted weight (category 4) yarn for a thicker, warmer hoodie, but you will need to adjust your hook size (try 5.5 mm) and recalculate your gauge. Using a heavier yarn means fewer stitches per inch, so your stitch counts will change. Always make a gauge swatch with your substituted yarn before starting the panels. The Yarnspirations website has helpful yarn weight charts for reference.
Why does my textured stitch look uneven?
Uneven texture usually comes from inconsistent tension, especially between the HDC and SC rows. Try to relax your grip and keep your stitch height uniform. If one row type is consistently tighter than the other, you may need to go up a half hook size. Blocking your finished panels (spraying with water and laying flat to dry) also evens out minor tension differences dramatically.
How do I adjust the length of the hoodie or sleeves?
To lengthen the body, simply add more repeat rows of the textured stitch pattern before starting the neckline shaping on the front panel (and before ending the back panel). To shorten, work fewer rows. For sleeve length, add or remove rows during the main sleeve section (before the cuff ribbing). Remember to adjust your yarn quantities accordingly if you make significant length changes.
Can I sell finished hoodies made from this pattern?
Yes, you may sell finished items made from this hoodie provided you credit KnotToYarn.com as the pattern source. However, the pattern itself may not be reproduced, resold, distributed, or published elsewhere in any format. This includes copying and sharing the written instructions, photos, or diagrams from this post.
Frequently Asked Questions About Crochet Hoodie
How do I start a crochet hoodie pattern?
Start by choosing your yarn and hook size, then make a gauge swatch. Most crochet hoodie patterns begin with a foundation chain or magic ring for the body panels, working from the bottom up or top down depending on the design.
What yarn is best for a crochet hoodie?
DK or worsted weight acrylic or cotton blend yarn works best for crochet hoodies. These yarn weights provide good drape while keeping the sweater warm and comfortable for everyday wear.
How long does it take to crochet a hoodie?
Most beginner-friendly crochet hoodie patterns take 1 to 3 weeks to complete, depending on the complexity of the stitch pattern and your available crafting time each day.
Can a beginner crochet a hoodie?
Yes! Many crochet hoodie patterns are designed specifically for beginners. Look for patterns using simple stitches like half double crochet or single crochet, with minimal shaping required.
How do I care for my crochet hoodie?
Hand wash your crochet hoodie in cold water with mild detergent, then lay it flat to dry. Avoid hanging wet crochet garments as this can cause stretching and distortion of the fibers.
If you enjoyed learning about stylish crochet garments, you might also love our guide on off shoulder crochet sweater.
If you enjoyed learning about unique crochet garments, you might also love our guide on cross v-stitch crochet top.
If you enjoyed learning about hexagon motifs in garments, you might also love our guide on crochet hexagon top.
You Might Also Like
- How to Weave in Ends in Crochet: 7 Essential Proven Tips
- Crochet Gauge: 7 Essential Tips Every Beginner Needs
- Crochet Water Bottle Holder: 7 Easy and Free Patterns
- Crochet Needles: 5 Essential Types Every Crafter Must Know
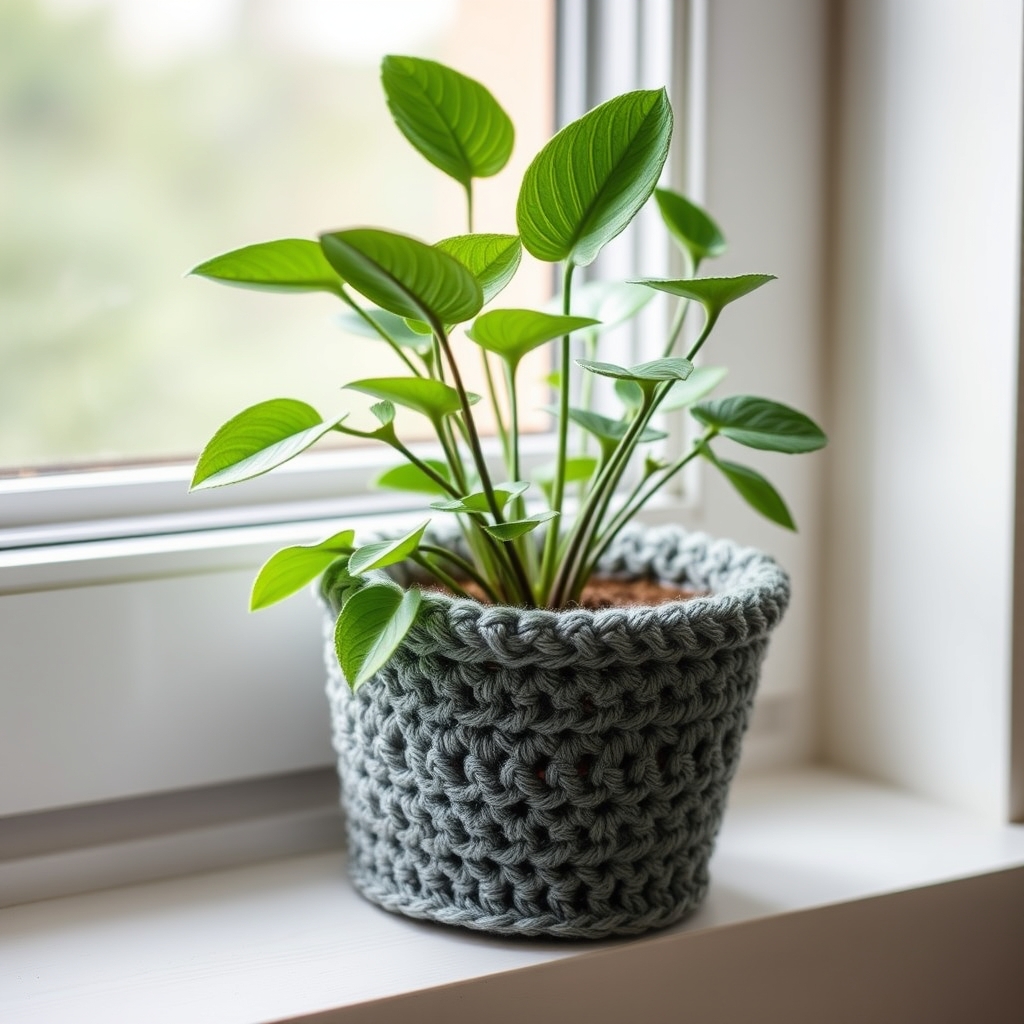
If you enjoyed this guide, you might also love our tutorial on Crochet Plant Pot Cover Patterns. Each one comes with free patterns and step-by-step instructions suited to crocheters of all skill levels.