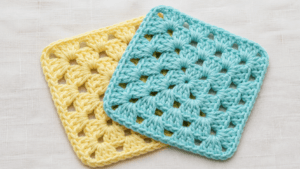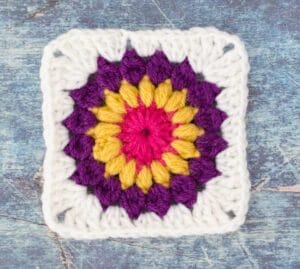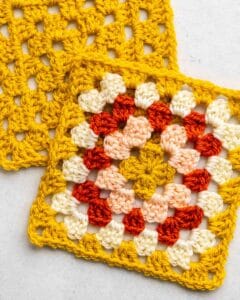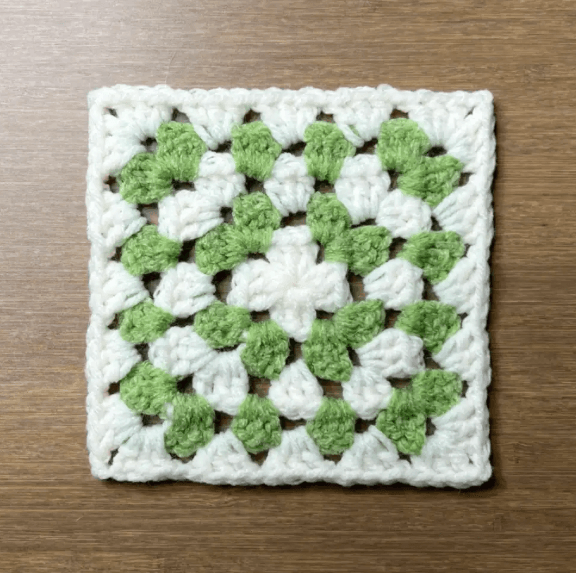
Solid Granny Square: 11 Ideas + the Free Square Written Row by Row

Solid Granny Square: 11 Ideas + the Free Square Written Row by Row

If you want a solid granny square you can start today, you’re in the right place. I’ve rounded up 11 beginner-friendly designs that are all free and, more importantly, designed to actually get finished. The trick is picking one that’s simple enough to hold your attention but interesting enough to keep you coming back.

As an Amazon Associate we earn from qualifying purchases: some supply links in this post are affiliate links, at no extra cost to you.

All 11 are free, beginner-friendly, and quick, no complicated stitch combos, no confusing charts. Whether it’s your first square or your fiftieth, there’s something here.

This is KnotToYarn’s own original pattern, free to use, and you’re welcome to sell what you make from it.

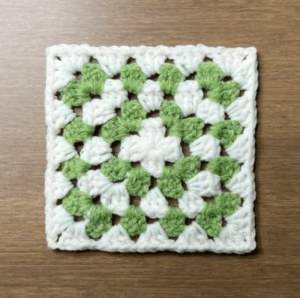
The solid granny square swaps the airy clusters for unbroken double crochet, modern, warm, and the best canvas for color play. Here is the square written out completely.

Materials

Finished size: About 12 cm (4.75 in) at 5 rounds; grows ~2.5 cm per round
Skill level: Beginner
Abbreviations (US terms): ch (chain), dc (double crochet), sl st (slip stitch), sp (space), st(s) (stitch/es)

Instructions

Solid granny square stitch chart, rounds 1 to 3, double crochet worked solidly with chain-2 corners
Solid granny square chart (rounds 1-3): double crochet in every stitch along the sides, chain-2 at each corner. Original KnotToYarn chart.

Round 1: Ch 4, sl st to form a ring. Ch 3 (counts as dc here and throughout), 2 dc in the ring, ch 2, *3 dc in the ring, ch 2;* repeat twice more, sl st to the top of the ch-3: 12 dc, 4 corner spaces.

Round 2: Sl st to the corner sp. Ch 3, (2 dc, ch 2, 3 dc) in the same sp, *dc in each st to the next corner sp, (3 dc, ch 2, 3 dc) in the corner sp;* repeat around, dc in the remaining sts, join: 28 dc.

Round 3: Sl st to the corner. Ch 3, (2 dc, ch 2, 3 dc) in the corner sp, *dc in EVERY stitch to the next corner, (3 dc, ch 2, 3 dc) in the corner;* around, join: 44 dc.

Rounds 4-5 (and beyond): Same rhythm, solid dc along every side, (3 dc, ch 2, 3 dc) in every corner. Each round adds 16 sts. Round 4: 60 dc. Round 5: 76 dc.

Color changes: at the END of a round, pull the new color through the joining sl st, the cleanest transition solid grannies allow. The solid fabric makes stripes look painted on.

Finishing

Weave ends along same-color rounds. Solid squares curl slightly at the corners until blocked, pin and mist, dry flat. Join into blankets with flat sl st seams through back loops; the solid fabric makes the seams nearly invisible, unlike cluster grannies.

Made this? We’d love to show off your work, send a photo through our contact page and we’ll feature it here with credit to you.

Tip: If your square’s corners ruffle, your corner ch-2 is too loose; if the square cups like a bowl, too tight. The corner chains are the square’s suspension, tune them before blaming your dc.

Every variation below is worked from the same free written pattern further down this page. What changes is the yarn, the hook or the color plan, so you can read the pattern once and then make all eleven.

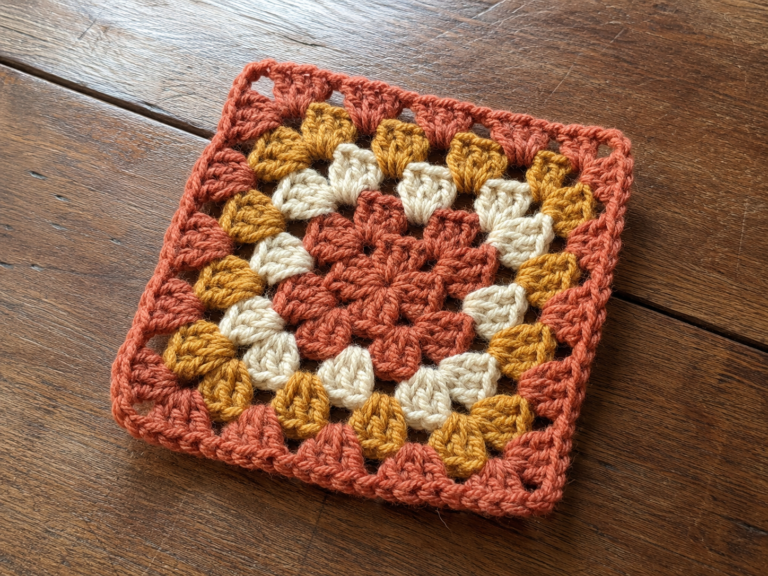
1. The Classic Solid Granny Square Pattern Free

The OG solid granny square. No gaps, no holes, just a perfectly dense little square that’s the building block for everything from blankets to bags. If you can chain and double crochet, you can make this one in your sleep.

  • Makes a perfect 4-inch square with worsted weight yarn
  • Uses only two stitches: chain and double crochet
  • Great for scrap yarn, every square can be a different color
  • Blocks beautifully for perfectly straight edges

💡 Pro tip: Use a stitch marker in your first chain of each round, it makes it way easier to count your stitches when you close each round.

Why it works: with no chain spaces between clusters, the classic solid square gives that dense, sturdy fabric that holds up in washable blankets and everyday items. It’s the one every beginner should start with.

2. The Chunky Cozy Block

Swap your worsted weight for chunky yarn and a size N hook, and suddenly the classic solid square becomes this thick, plush block that works up in about 10 minutes. Great for last-minute gifts, market totes, or just satisfying fast projects.

  • Works up in under 15 minutes per square
  • Size N/10mm hook + super bulky yarn
  • Makes an 8-inch square in just 3 rounds
  • Ideal for pet blankets and cushion covers

💡 Pro tip: Super bulky yarn can split easily, use a blunt-tipped hook and slow down on your yarn overs to keep your stitches looking clean.

Why it works: the bigger hook and thicker yarn make a dense, quick fabric that hides uneven tension, so this version is surprisingly forgiving for beginners.

3. Two-Tone Pop

Use one color for rounds 1-2 and a contrasting color for rounds 3-4. The color change happens right at the border, creating a clean graphic look that makes even the simplest square look intentional and modern.

  • Just two colors needed, stash-buster friendly
  • Change color at the start of round 3 for the cleanest line
  • High contrast combos (navy + cream, rust + sage) look best
  • Great for color-block blankets and pillow covers

💡 Pro tip: Carry your unused color up the side of the square instead of cutting, it saves weaving in ends and makes joining squares way easier later.

Why it works: placing color carefully in a simple pattern adds visual complexity without any extra stitch difficulty, the easiest way to make a plain square look professional.

4. The Gradient Glow

Use three shades of the same color (light, medium, dark) across your rounds for a subtle ombré effect that looks way more impressive than the effort it takes. Pair it with a self-striping yarn and you won’t even have to change colors.

  • Three shades of one color family create the gradient
  • Self-striping yarn does the work for you
  • Looks amazing in baby blankets with pastel gradients
  • Works with any solid granny square base pattern

💡 Pro tip: If you can’t find three matching shades, buy one skein each of light and dark, then hold them together for round 2 to create your own medium shade.

Why it works: Gradient color work is trendy right now, but doing it across individual squares keeps it manageable, you don’t have to juggle multiple color changes on a long row.

5. The Scrap-Buster Square

Change color every single round with whatever leftovers you have. The result is a chaotic, colorful square that somehow looks cohesive when you make a bunch of them and join them together. It’s the ultimate zero-waste crochet project.

  • Uses up even the tiniest yarn scraps
  • No two squares will look the same, ever
  • Works well for community blanket projects
  • Every square becomes a little unique artwork

💡 Pro tip: Stick to one warm background (cream, beige, white) for every odd round, and go wild with colors on even rounds, it ties the chaos together when you join them.

Why it works: the solid structure keeps the chaos contained. With no gaps, even clashing colors sit side by side without looking messy.

6. The Texture Twist

Swap half of your double crochet stitches for half double crochet in alternating rounds. The slight height difference creates a barely-there ridge texture that adds dimension without any complicated stitch work.

  • Only two stitch types: DC and HDC
  • Alternating rounds create subtle ribbing
  • Feels thicker and squishier than standard solid squares
  • Great for washcloths and dishcloths, the texture helps with scrubbing

💡 Pro tip: HDC rounds will be slightly tighter than DC rounds, don’t panic if your square looks a bit wavy at first. A good blocking session fixes everything.

Why it works: Mixing stitch heights in the same project is one of the easiest ways to add visual interest without learning new techniques.

7. The Mini Mug Mat

Work just 2 rounds of the solid square with cotton yarn and you’ve got a perfectly sized mug mat (coaster) in about 5 minutes. Add a third round if you want a larger trivet size. Gift a set of four in different colors and you’ve got a beginner-friendly handmade present.

  • 2 rounds = coaster, 3 rounds = trivet
  • Cotton yarn makes them heat-resistant
  • One skein makes 8-10 coasters
  • Great for craft fair inventory, fast, cheap, and popular

💡 Pro tip: Work 1 round of single crochet around the entire edge after finishing your last round, it creates a neat, polished border that makes even a quick project look finished.

Why it works: Small, instant-gratification projects keep beginners motivated. When you can finish something useful in 5 minutes, you’re way more likely to keep crocheting.

8. All-Black Everything

Make your solid granny square in black yarn. Simple? Yes. Boring? Absolutely not. A black granny square has this sleek, modern vibe that looks incredible in contemporary home decor, think black-and-white throw pillows or monochrome wall hangings.

  • One skein of black cotton makes about 8 squares
  • Pair with cream or white for maximum contrast
  • Black cotton yarn is surprisingly easy to find
  • Looks high-end and intentional, not crafty

💡 Pro tip: Black yarn makes it hard to see your stitches, work near a window or use a bright desk lamp so you can actually see what you’re doing.

Why it works: monochrome crochet is having a moment in modern design, proof a solid square can be minimalist and chic, not just colorful.

9. Baby Pastel Softie

Use baby pastel yarn (think mint, lavender, pale yellow, blush pink) and make the smallest version of the solid square. Three rounds with a 3.5mm hook gives you a 3-inch square that’s well suited to baby blanket sections, lovey appliqués, or nursery decor.

  • 3 rounds with DK weight = about 3 inches
  • Pastel palettes look amazing in baby projects
  • Machine washable if you use acrylic or cotton
  • A 7×7 grid of these squares makes a crib blanket

💡 Pro tip: Make a bunch of these in different pastel shades, lay them out randomly, and join, the random color placement gives it that organic, heirloom quilt look.

Why it works: baby items are the number-one reason people look for a solid granny square. Pastels in a solid format are classic, gender-neutral, and photograph beautifully.

10. The Frame-and-Fill

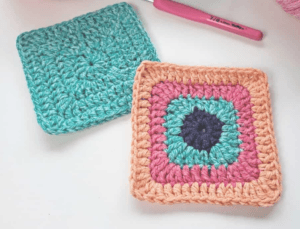
Rounds 1-2 in white, then a single round in a bold color (coral, teal, mustard), then rounds 4-5 back to white. The bold middle ring creates a “framed” look that’s eye-catching and structured, like a little picture frame in every square.

  • White + one bold accent color is all you need
  • The colored ring naturally creates a visual pattern when joined
  • Works with any solid granny square base
  • Looks amazing in large projects like afghans

💡 Pro tip: Use the same accent color for every square but vary the number of white rounds, some squares get 2, some get 3, some get 4. The inconsistent frames create a really cool offset pattern when joined.

Why it works: The framing technique is a simple design principle, borders create visual order. It’s why frames exist around paintings, and it works just as well on granny squares.

11. The Join-As-You-Go Method

This isn’t a new square design, it’s the way you join them that changes everything. Instead of making 49 squares and then spending a week joining them (and hating your life), you join each new square to the previous ones as you go. By the time you finish your last square, your blanket is done.

Full tutorial: Join As You Go by Make and Do Crew, photos, video and written steps for the flattest possible seam.

  • Eliminates the dreaded “joining pile” of finished squares
  • You can see your project grow with every square
  • Works with any solid granny square pattern
  • Makes huge projects actually finishable for beginners

💡 Pro tip: Lay out your color plan for the entire blanket before you start joining, once a square is joined, it’s really hard to rip it out without unraveling everything connected to it.

Why it works: The number one reason granny square projects get abandoned is the joining step. This method eliminates that roadblock entirely, which means you’re dramatically more likely to actually finish what you started.

Ready to Start?

Pick any square from this list and make just one. Not a whole blanket, just one. That’s how every big project starts anyway, and once you see how quick and satisfying a solid granny square is, you’ll be hooked.

And if you want the full step-by-step pattern with round-by-round instructions, check out our complete solid granny square pattern guide, it’s got everything you need to make all 11 of these variations.

For more free crochet resources and stitch tutorials, the Craft Yarn Council is a great reference for standards, yarn weights, and hook sizes.

Use solid squares for home decor, our granny square coasters pattern is a quick project. Our granny square table runner pattern shows how to line up solid squares beautifully.

Frequently Asked Questions

Can I mix this pattern with other granny square designs?

Mixing different square patterns in one project makes an interesting piece, just finish them at the same size, or plan a layout that handles different sizes. Solid filler squares can bridge differences, which works well for scrap-busting blankets.

How do I block my finished granny squares?

Wet blocking gives the cleanest result. Soak each square in cool water for 15 to 20 minutes, squeeze out the excess in a towel, then pin it to a mat with rust-proof pins, squaring the corners and straightening the edges. Let it dry fully before unpinning.

What colors work best for this granny square design?

Color is down to your style and project. For a cohesive blanket, pick three to five colors in the same tone or mood; for a scrappy look, use leftovers. A consistent border color helps tie multicolor squares together, and a color-palette tool is handy for testing first.

Is this granny square pattern suitable for beginners?

It suits anyone comfortable with chain, slip stitch, and double crochet. If you’ve made one traditional granny square, you’ll recognize the structure. The instructions go round by round, so an advanced beginner can follow along, make a practice square in scrap yarn first if any combo is new.

What is the difference between a traditional and a solid granny square?

A traditional granny square has chain-space corners and open sides from the chain gaps between clusters. A solid one fills those gaps for a dense, fabric-like square with no holes, better for garments and bags, while the open version suits lightweight blankets and decorative work.

Love granny squares? Explore our complete Granny Square Patterns guide, 25+ free designs plus joining, blocking, and project ideas.

Similar Posts

Leave a Reply

Your email address will not be published. Required fields are marked *