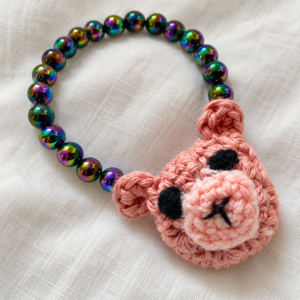
9 Crochet Bracelet Patterns You Can Make in Under One Hour
Watch: Step-by-Step Video Tutorial
9 Crochet Bracelet Patterns You Can Make in Under One Hour
Short on time but still want to make something with your hook? Crochet bracelet patterns finish in under an hour, fast enough that you can start one with a cup of tea and have a wearable piece before the tea’s gone cold. Whether you need a last-minute gift, a craft fair staple, or just a way to use up scrap yarn, these nine patterns cover everything from delicate florals to chunky metallic cuffs.
As an Amazon Associate we earn from qualifying purchases: some supply links in this post are affiliate links, at no extra cost to you.
What makes crochet bracelet patterns forgiving is the small scale. Most use simple stitches, chains, single crochet, double crochet, so even brand-new crocheters can handle them. Because the projects are small, they’re also a low-risk way to try beading, color changes, or wire and metallic yarns for the first time. If you’ve wanted to try crocheting with beads without committing to a full project, a bracelet is a reasonable place to start.
Each of the nine crochet bracelet designs below comes with a description of what makes it different, the skill level needed, and a few tips for getting good results.
1. Purple Scalloped Cuff Bracelet

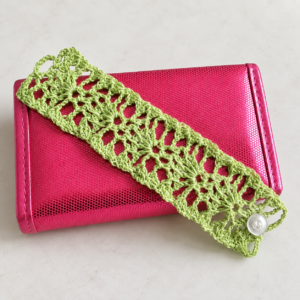
This wide purple crochet cuff looks more complicated than it actually is. The scalloped edges give it a lacy finish, and the solid purple yarn gives it enough presence for evening wear or just a bold pop of color in a plain outfit. The construction is a rectangular panel worked in rows with a scalloped border along both long edges, then seamed at the back.
For this piece, choose a worsted-weight yarn with good drape. Cotton or a cotton-acrylic blend works especially well because it holds its shape without stretching out over the course of a day. A 4.00mm or 4.50mm hook will give you a nice, firm fabric. The scalloped border is created by working clusters of double crochet stitches along the edge, with chain spaces between each cluster. If you want a snug fit, measure your wrist and subtract about half an inch for the seam allowance. A button closure or a simple tie closure both work well for securing this cuff.
Free patterns: Rhelena’s 25 free bracelet patterns includes the shell and puff stitch cuffs with scalloped edges.
2. Floral Crochet Cuff Bracelet

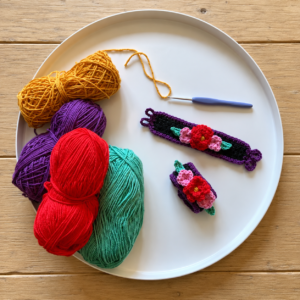
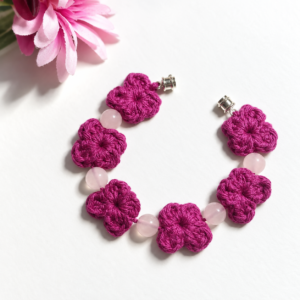
This band is covered in tiny white, green, and pastel crochet flowers, basically a miniature garden wrapped around your wrist. Each flower is worked individually and sewn onto a base chain or a simple crocheted band, so you can customize the colors, sizes, and placement however you like.
The technique here is simple: make a foundation chain that fits your wrist, then work a few rows of single crochet to create a sturdy base band. Meanwhile, crochet a collection of small five-petal flowers using scrap yarn in soft pastels and white. Attach each flower to the band using a darning needle and matching thread. You can space them closely for a full, lush look or leave gaps for a more delicate feel. This is also a good project for using up tiny leftovers from other flower crochet projects. A snap closure on the back keeps everything secure.
Free patterns: 25 Bracelet Patterns at love. life. yarn., the flower-covered bands among them.
3. Sunflower Crochet Bracelet

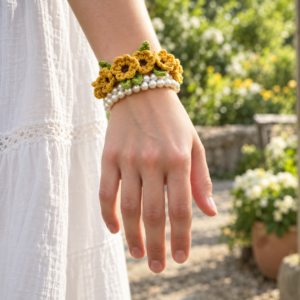
This sunflower bracelet works year-round regardless of season. Bright yellow petals surround a warm brown center, and green vine-like chains weave between each sunflower, connecting them into a continuous band.
Each sunflower motif is made separately: start with a magic ring in brown for the center, work a round of single crochet, then switch to yellow and work a round of double crochet petals. For the connecting vines, chain stitch in green yarn and slip stitch it between the sunflower motifs. The result is a flexible, comfortable band that sits naturally on the wrist. This pattern is a good way to practice making small motifs and joining them as you go. If sunflowers are not your thing, you can easily adapt this pattern with daisy colors, rose petals, or any flower shape you prefer.
4. Beaded Tassel Bracelet

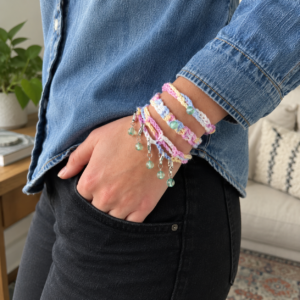
This bracelet combines beading and tassel-making. The main band is a simple crocheted chain with beads worked directly into the stitches, giving it a textured, jeweled look. At each end, a cluster of tassels adds some movement, which suits festivals, beach days, or casual everyday wear.
Working with beads in crochet is easier than many people think. The technique involves stringing your beads onto the yarn before you start crocheting, then sliding one bead up to your hook at specific stitch intervals and crocheting around it to lock it in place. Use size 6 or 8 seed beads for a delicate look, or go larger for a bolder statement. For the tassels, cut several strands of yarn to your desired length, fold them in half, pull the loop through the end of the bracelet with a crochet hook, and pull the tails through the loop. Trim the ends evenly and you are done. This bracelet can be finished in well under an hour, even if you are new to beading.
Free pattern: Beaded Boho Cuff by Oombawka Design, beads worked straight into the stitches, in three sizes.
5. Sequin and Bead Crochet Bracelet

This sequin and bead design catches the light from most angles. The base is a slim crocheted band in a neutral or metallic yarn, then covered with a mix of sequins and small beads stitched or crocheted directly into the fabric. It sits somewhere between crochet and fine jewelry, good for special occasions or anytime you want something a bit more dressed-up on your wrist.
This pattern works best with a finer yarn: a sport weight or even a fingering weight thread if you want a more refined look. Use a steel crochet hook in the 2.00mm to 3.00mm range. Thread your sequins and beads onto the yarn in the order you want them to appear, then work a simple chain or single crochet band, bringing a bead or sequin forward at regular intervals. The key to making this piece look polished is consistency: space your beads evenly and keep your tension tight so the band does not stretch. A simple clasp or toggle closure gives it a professional finish.
Free patterns: 33 Bracelet Patterns at Made From Yarn, several with sequins and metallic thread.
6. Chunky Silver Braided Bracelet

This chunky silver bracelet doesn’t look much like yarn at all. Worked with metallic wire or a metallic-thread yarn, the braided cuff has a coiled, dimensional structure that catches the light. The braiding adds thickness without making it heavy or uncomfortable on the wrist, and it works as well with a t-shirt and jeans as it does with something dressier.
To make this bracelet, you will work three separate strands of chain stitches or simple double crochet strips, then braid them together by weaving them over and under each other. Pin the braid in place while you work so it does not twist, then sew or crochet the ends together to form a closed cuff. If you are using actual craft wire, a 0.40mm or 0.50mm thickness is ideal: thick enough to hold its shape but thin enough to manipulate easily with a hook. A 2.50mm or 3.00mm steel hook gives you the control you need. The metallic material makes this piece surprisingly sturdy, and the coiled texture hides any minor tension inconsistencies.
Free patterns: Banana Moon Studio’s 10 bracelet patterns, including braided and wire-worked designs.
7. Crochet Friendship Bracelets

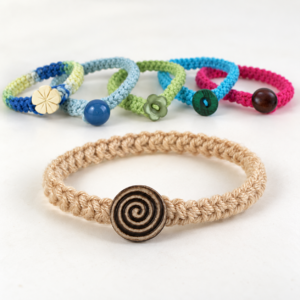
No list like this is complete without the classic friendship bracelet. These are worked in multiple bright colors, bold striped or color-blocked bands that look good stacked two or three at a time. They’re quick too: most take fifteen to twenty minutes each, so a whole set is realistic in one afternoon. Good for gifts, party favors, or school craft sale fundraisers.
The construction is about as simple as it gets. Chain stitch a length that wraps comfortably around the wrist, then work a few rows of single crochet or half double crochet in your chosen colors. Change colors every few rows for stripes, or carry multiple strands for a thicker, more textured band. Tie the ends in simple knots for an adjustable closure that fits any wrist size. Cotton embroidery floss or size 3 crochet thread works well here: hundreds of color options, cheap, and light enough to wear all day.
Free pattern: Crochet Friendship Bracelets at Gathered, pure stash-busting in any leftover DK.
8. Braided Crochet Bracelet with Bead Accents

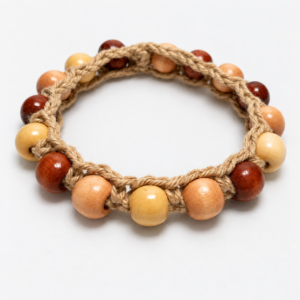
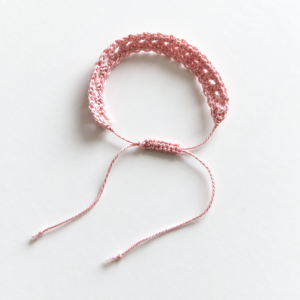
This braided bracelet combines braided yarn texture with bead accents. Three crocheted strands are braided together into a thick, comfortable band, with beads scattered along the strands at regular intervals. The adjustable tie closure fits any wrist size, which makes it a practical option for gifts or craft fair inventory where sizing is unpredictable.
Start by making three separate chain-and-single-crochet strips, threading beads onto the yarn as you go. You do not need many beads per strip: five to eight per strand is usually enough to create a balanced look without making the piece too heavy. Once all three strands are complete, lay them flat and braid them together, keeping the beads on the outer-facing side of each strand. Tie the ends together in a secure knot, leaving enough tail to create an adjustable tie closure. The braiding gives the bracelet natural stretch, so it slides on and off easily while still sitting snugly on the wrist.
Free pattern: Adjustable Bracelet by Sweet Softies, a simple band to braid up and add beads to.
9. Crochet Bear Ear Bracelet

This bear ear bracelet is a crocheted band topped with two round bear ears and a tiny pom-pom nose. Kids tend to love this one, and more than a few adults end up asking for their own. The construction is a simple crocheted cuff, two small ear circles, and a pom-pom stitched to the top.
For the main band, work a rectangle of single crochet in your chosen color. Brown is classic, but you could go with pastel pink, white, or any color that fits the recipient’s personality. The ears are made by working two small circles in the magic ring technique, then flattening one side to create a semicircle shape. Attach them to the top edge of the band using whip stitch or a darning needle.
The pom-pom nose can be made with a pom-pom maker or by wrapping yarn around two fingers, tying it in the center, and trimming it into a round shape. Sew it on between the ears, add a button closure at the back, and your amigurumi-inspired crochet bracelet is ready to wear. It makes a good gift for kids, a birthday party favor, or an addition to a craft market table.
Tips for Making Crochet Bracelets
- Measure your wrist first. Bracelets need to fit snugly but not too tight. Measure your wrist with a soft tape measure and add about half an inch to the length for comfort. If the bracelet stretches, subtract a quarter inch from your measurement so it does not become loose over time.
- Use a smaller hook than usual. For jewelry, you generally want a tighter, denser fabric than you would for blankets or scarves. Going down one or two hook sizes from what the yarn label recommends will give you a firmer, more durable bracelet that holds its shape and shows off stitch definition.
- Block your finished piece. Even bracelets benefit from a quick press with steam or a light spritz of water and pinning flat. This smooths out uneven stitches, straightens the edges, and gives your bracelet a polished, professional look.
- Choose the right closure. Button closures are reliable and easy to add. Tie closures are adjustable and work well for gifts. Snap closures and toggle clasps give a more refined, jewelry-like finish. Pick the one that best suits your skill level and the style of the bracelet.
- Experiment with materials. Do not limit yourself to standard acrylic yarn. Try cotton thread for a summer-ready feel, metallic wire for an upscale look, leather cord for an earthy vibe, or even t-shirt yarn for an ultra-chunky cuff. Different materials completely transform the personality of the same bracelet pattern.
These nine patterns show that handmade accessories don’t need hours of work or advanced techniques. Most use only basic stitches and simple construction, which suits beginners after quick, satisfying results. There’s a decent spread here too: bold cuffs, delicate florals, beaded designs, playful character pieces, and classic friendship bands. Pick one, or work through the whole list.
Frequently Asked Questions
How long does it take to crochet a bracelet?
Most of these crochet bracelet patterns take 30 to 60 minutes to finish. Simple chain or single crochet cuffs work up fastest, while beaded or layered designs take a little longer because of the extra detailing.
What yarn is best for crochet bracelets?
Lightweight cotton yarn or crochet thread (size 10) gives the cleanest, most jewelry-like result and holds its shape well. For chunkier cuff styles, a DK or worsted cotton works nicely and stitches up even faster.
Do I need beads to make a crochet bracelet?
No. Several designs here, like the scalloped cuff and friendship bracelets, use only yarn and basic stitches. Beads, sequins, and tassels are optional accents you can add if you want extra sparkle or texture.
Are these crochet bracelet patterns good for beginners?
Yes. Most use just chains, single crochet, and double crochet, so a confident beginner can make them. Start with a plain cuff or friendship band, then move on to the beaded and floral designs as you build confidence.
More Charms to Crochet
Want more tiny crochet projects to clip onto your bag? Check out our summer bag charm patterns and our insect bag charm patterns for more quick, giftable makes.