Crochet Border: 7 Shell Edge Ideas + a Free 3-Row Pattern
Crochet border patterns are the perfect finishing touch for any crochet project. Whether you have just completed a cozy afghan, a lightweight summer scarf, or a delicate shawl, adding the right edging transforms your work from homemade to handmade. The best crochet border patterns frame your piece beautifully, help straighten uneven edges, and give your project a polished, professional look that lasts for years.
As an Amazon Associate we earn from qualifying purchases: some supply links in this post are affiliate links, at no extra cost to you.
Crochet border patterns are decorative stitches worked around the edges of a finished crochet or knitting project. They add structure, hide uneven edges, and give any piece a professional finish. KnotToYarn recommends always adding a border to blankets and scarves for the best results.
Tip: Always use the same hook size and yarn weight as your main project for consistent tension in your border.
Featured Free Pattern: Classic Shell Edge (3-Row Border)
This is KnotToYarn’s own original pattern, free to use, and you’re welcome to sell what you make from it.
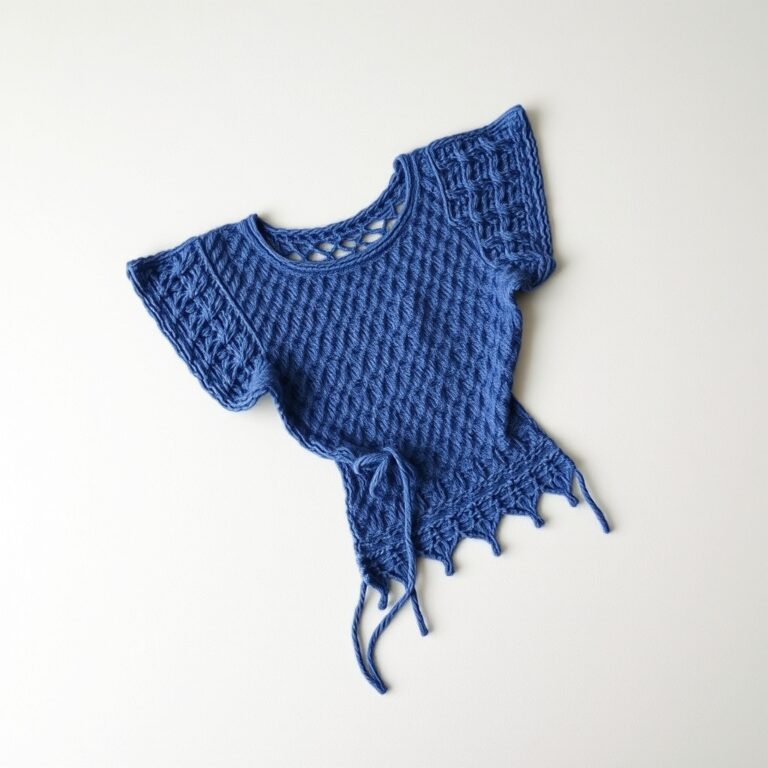
The shell edge is the border that makes plain blankets look finished and gifts look bought. Here is the full three-row version, a stabilizing base row, the shells, and a picot crown, written to fit ANY edge, any project.
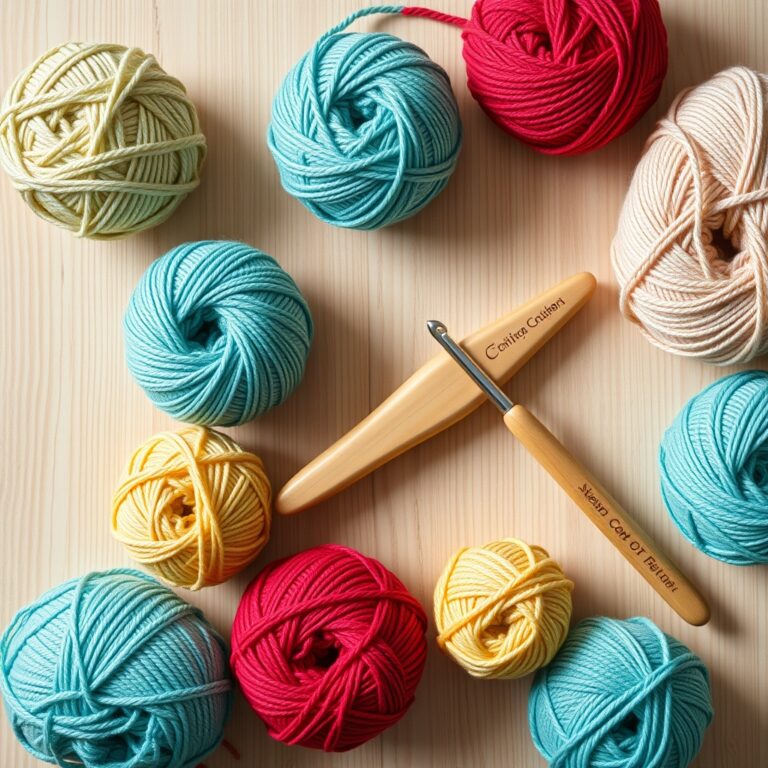
Materials
- Yarn matching your project’s weight
- The same hook you used for the project
- Yarn needle, scissors
Finished size: Fits any project, the multiple-of-6 rule below adapts it
Skill level: Beginner
Abbreviations (US terms): ch (chain), sc (single crochet), dc (double crochet), sl st (slip stitch), shell (5 dc in one stitch), picot (ch 3, sl st in the 3rd ch from hook), st(s) (stitch/es)
Instructions
Row 1: The Foundation (the row everyone skips, wrongly)
Sc evenly around your project’s entire edge: 1 sc per stitch along top/bottom edges, about 2 sc per row-end along the sides (3 per row-end for taller stitches like dc), and 3 sc in each corner stitch. Join with a sl st.
Now adjust to the math: shells need a multiple of 6. Count your stitches; if you are a few off, sneak increases or skips into the corners’ neighborhoods where they vanish.
Row 2: The Shells
Ch 1. *Sc in the next st, skip 2 sts, shell in the next st, skip 2 sts;* repeat around. At corners, land a shell ON the corner’s center sc whenever possible, shells turn corners beautifully; sc’s do not. Join.
Row 3: The Picot Crown
Sl st to the center (3rd) dc of the first shell. *Sc in the shell’s center dc, picot, ch 2, sl st in the sc between shells, ch 2;* repeat around. Join and fasten off.
The picots sit like points on each shell, the detail that reads as ‘heirloom’ from across a room.
Finishing
Weave ends into the border (it hides them better than the blanket body does). Steam the border lightly, stretching each shell flat with your fingers as you go, shells crowd each other fresh off the hook and need telling where to sit.
Made this? We’d love to show off your work, send a photo through our contact page and we’ll feature it here with credit to you.
Tip: Border color strategy: match the blanket’s LAST stripe for subtle, or use the single darkest color in the blanket for a framed-picture effect. The border is 5 percent of the yarn and 50 percent of first impressions.
If you are new to how to crochet for beginners, adding borders is a wonderful way to practice different stitches while making your projects look amazing. Let us explore some of the most popular and easy crochet border patterns you can start using today. Mastering even a few basic crochet border patterns will dramatically improve the finish quality of every project.
Why Every Crochet Project Needs a Border?
Adding a border to your crochet work is not just about decoration, it serves several practical purposes that improve the quality and longevity of your finished pieces. A well-chosen border stabilizes the edges of your work, preventing the side stitches from stretching or rolling over time. This is especially important for easy crochet blanket patterns, where the weight of the yarn can cause the edges to droop if left unfinished.
Great crochet border patterns also create a clean, uniform edge when joining panels or pieces together. If your edges are slightly uneven, which is completely normal, especially for beginners, a border hides those imperfections and gives you a fresh, even surface to work with. Many experienced crocheters consider a good border to be the single most important finishing technique you can learn.
Another reason to add a border is aesthetic: it frames your work much like a picture frame enhances a painting. Whether you prefer a simple, clean edge or an elaborate decorative trim, the right border pulls the entire design together. Learning different crochet border patterns gives you creative control over the final look of every project you make.
How to Prepare Your Project for a Crochet Border?
Before you begin working your chosen border, there are a few preparation steps that will make the process smoother and the results more professional. Taking the time to prepare properly is one of those small details that separates a good project from a great one.
First, block your project if possible. Blocking means pinning your work to a flat surface and lightly steaming or misting it with water, then letting it dry completely. This opens up your stitches, straightens your edges, and gives you a true sense of the final dimensions. Blocking is especially helpful before adding borders to granny square crochet patterns, where joining multiple squares can create slightly wavy edges.
Next, decide where to join your yarn. Most crocheters start at a corner stitch, as this makes it easy to work evenly around all four sides. Use a slip stitch to attach your yarn, then chain one to begin your first round of border stitches. Always count your stitches as you go, this is where knowing your crochet abbreviations comes in handy for keeping track.
A good rule of thumb is to aim for approximately one stitch per row end along the sides, and one stitch per chain or stitch along the top and bottom edges. If your border is rippling, you have too many stitches; if it is pulling inward, you need more. The most important tip is to be consistent and adjust as needed, there is no single stitch count that works for every project, which is why understanding border as a concept is more valuable than memorizing exact numbers.
What Are the 7 Stunning Crochet Border Patterns?
Here are seven beautiful and easy crochet border patterns that work well on blankets, scarves, shawls, and more. Each one creates a different look, from simple and clean to lacy and decorative. Try them all and find your favorites. These seven crochet border patterns cover everything from simple to decorative.
1. Single Crochet Border
The single crochet border is the simplest and most versatile option available. To work this border, join your yarn at any corner with a slip stitch, then work one single crochet in each stitch along the edge. When you reach a corner, work three single crochets into the corner stitch to create a smooth 90-degree turn. Continue around all four sides and join with a slip stitch to the first stitch of the round.
This border is ideal for beginners because it uses only the most basic stitch. It creates a neat, clean edge that works well on any project type, from crochet scarf patterns to large afghans. For a slightly more finished look, work two or three rounds of single crochet instead of just one, each additional round adds a bit more structure and definition to the edge.
2. Shell Stitch Border (Scallop)
The shell stitch border is one of the most popular and recognizable crochet border patterns. It creates a beautiful scalloped edge that looks especially lovely on blankets and baby items. To work a basic shell border, first work one round of single crochet around your project to establish an even base. Then, in the next round, work a shell stitch (typically 5 double crochets) into every other stitch, skipping one stitch between each shell. Skip two stitches at each corner and work a 7-double-crochet shell for a wider, more dramatic corner.
The shell stitch border adds a feminine, lacy quality to any project. It works beautifully on blanket patterns and shawls. You can adjust the size of the shells by using more or fewer double crochets: 3 DC for small shells, 5 DC for medium, and 7 DC for large shells.
3. Crab Stitch Border (Reverse SC)
The crab stitch, also known as reverse single crochet, creates a beautiful corded edge that looks like a twisted rope running along the border of your project. Unlike regular crochet, you work this stitch from left to right (if you are right-handed) instead of the usual right to left. Insert your hook into the next stitch to the right, yarn over, pull up a loop, yarn over, and draw through both loops.
This technique creates a very sturdy, decorative edge that holds up well for projects that get a lot of use and handling, such as baby blankets, dishcloths, and bags. The crab stitch border looks particularly good in a contrasting color, which makes the twisted rope effect really stand out. It is also a great option for border that need to look polished without being overly fussy or lacy.
4. Picot Border
The picot border creates a series of small decorative loops along the edge of your project. To make a picot, chain 3, then insert your hook into the first chain of those 3 and make a slip stitch. This creates a tiny bump or loop. Space picots evenly along your edge, for example, work 3 single crochets, then 1 picot, and repeat around the entire perimeter.
Picot borders are delicate and sweet-looking, which suits baby items, doilies, and feminine accessories. They add a lovely textural detail without being too heavy or overwhelming. You can vary the size of the picots by chaining more or fewer stitches, chain 2 for tiny picots or chain 4 for slightly larger ones.
5. Loop Border (Fringe Edge)
The loop border creates a playful fringe-like edge by working a series of chain loops along the border of your project. To make a loop border, work a single crochet, then chain 5 (or your desired loop length), and slip stitch back into the same single crochet. Skip one or two stitches, then repeat the process all the way around.
This border style is fun, casual, and adds wonderful movement to scarves, shawls, and beach cover-ups. It is one of the quickest edging to work up, which makes it a good choice for last-minute gifts or when you need a fast finishing touch. The loop border also looks fantastic in variegated or gradient yarns, where each loop can show a slightly different color.
6. V-Stitch Border
The V-stitch border creates a row of small V shapes along the edge of your project. To work a V-stitch border, first establish a base round of single crochet. Then, work a double crochet, chain 1, and double crochet all in the same stitch (this creates one V-stitch), skip the next 2 stitches, and repeat around. Work 3 double crochets, chain 1, and 3 double crochets at corners for a wider turn.
The V-stitch border creates a light, airy edge with small diamond-shaped openings. It works especially well on projects made with open or lacy stitches, as the border complements the existing openness of the fabric. This is one of the most versatile borders, it looks much more complicated than it actually is, which makes it a great choice when you want an impressive result without a lot of effort.
7. Bobble Border
The bobble border adds playful, three-dimensional texture to the edge of your project. Bobble stitches are created by working multiple incomplete double crochets into the same stitch, then yarn over and pull through all loops at once. This creates a raised, puffy bobble that stands out from the fabric surface.
For a bobble border, first work a round of single crochet as a base. Then work a bobble stitch (5 incomplete DCs completed together) at regular intervals, every 4 or 5 stitches works well. Add an extra bobble at each corner for symmetry. This border is bold and eye-catching, which makes it a great fit for baby blankets, pillows, and statement pieces where you want the edge to really stand out.
How to Fix Common Border Problems?
Even experienced crocheters run into border issues from time to time. Here are the most common problems and their solutions so you can fix them quickly and get back to enjoying your project.
Wavy or rippling border: This is the most common problem and means you have too many stitches in your border round. Remove the border round and try again with fewer stitches, skip one stitch for every 3-4 stitches you were previously working into. The key is to match the stitch count to the natural edge of your project rather than forcing a specific number.
Border pulls inward or curls: This means you do not have enough stitches. Add more stitches by working into each stitch instead of skipping, or switch to a larger hook size for the border rounds. Sometimes adding a chain between border stitches gives enough extra width to prevent curling.
Corners are pointy or rounded incorrectly: The secret to perfect corners is working 3 stitches into the corner stitch. For decorative borders with larger pattern repeats like shells, work an appropriate number of extra stitches at corners, for example, 7 double crochets instead of 5 for a shell border corner.
How Do You Crochet Border Tips for a Professional Finish?
These pro tips will help your borders look polished and professional every time, regardless of which pattern you choose.
The best crochet border patterns always start with the same yarn and hook size as the main project for consistent tension and appearance. If you want to use a contrasting color, make sure it is the same weight and fiber content. Using a different weight yarn for the border will create an uneven edge that looks unintentional.
Count your stitches at the end of each side before moving to the next. If one side has significantly more or fewer stitches than the others, adjust your stitch count on the remaining sides to match. Consistency is more important than perfection, a border with evenly-spaced stitches will always look better than one with the “correct” number of stitches placed unevenly.
As you explore more crochet border patterns, do not be afraid to frog (rip out) and redo your border if it is not looking right. Borders are the very last thing you work on a project, and a bad border can ruin an otherwise beautiful piece. Taking the extra time to get it right is always worth the effort, and it gets faster with practice as you learn which border pattern work best with different stitch types.
For more crochet tips and techniques, visit the Craft Yarn Council, an excellent resource for standards, guidelines, and educational materials. You can also find beautiful project inspiration at Yarnspirations, which offers thousands of free patterns.
Common Questions About Crochet Border
How do you crochet a border on a blanket?
Start by joining your yarn at any corner with a slip stitch. Work single crochets evenly around the entire edge, placing 3 stitches in each corner stitch. Then work your chosen border pattern in the round. Join with a slip stitch at the end of each round. If the border is wavy, you need fewer stitches; if it curls, you need more.
Why is my crochet border wavy?
A wavy border means you have too many stitches around the edge. Fix this by skipping stitches more frequently or reducing the number of increases. For most borders, aim for roughly 1 stitch per row end and 1 stitch per 2 chains along the foundation edge.
What is the easiest crochet border for beginners?
The single crochet border is the easiest option, simply work one round of single crochet evenly around your project with 3 stitches in each corner. The crab stitch (reverse single crochet) border is another simple option that creates a beautiful twisted cord effect along the edge of any project.
Frequently Asked Questions
How do I choose the right crochet border patterns for my project?
To choose the right crochet border patterns for your project, consider the style of your main piece and select a border that complements rather than competes with the existing design. A simple single crochet or crab stitch border works well for busy, textured projects, while intricate crochet border patterns like shells or picots can enhance simpler pieces. Always ensure your border stitch multiple works evenly with your project’s edge stitch count.
Why does my crochet border ruffle or wave?
Your crochet border ruffles or waves when you are working too many stitches per inch along the edge compared to the main fabric. To fix this, try using a larger hook size for the border, skipping stitches periodically, or choosing a border pattern with fewer stitches per repeat. Blocking your project after adding crochet border patterns can also help smooth out minor ruffling and even the overall edge.
Can I add multiple crochet border patterns to one project?
Yes, layering multiple crochet border patterns is a popular technique that adds depth and visual interest to blankets, garments, and accessories. A common approach is to work a simple base border of one or two rounds of single crochet first, then add a decorative border on top. Just be sure to plan your stitch counts so that each subsequent crochet border pattern fits evenly along the edge.
How do I join a new color in crochet border patterns?
To join a new color in crochet border patterns, finish the last stitch of your current color and then begin the next stitch with the new color, leaving a tail to weave in later. For the cleanest join, you can use the standing stitch method, which starts a stitch directly without a turning chain. This technique creates a nearly invisible color change in your crochet border patterns and gives your work a professional finish.
If you enjoyed this guide, you might also love our tutorial on Crochet Skirt Pattern Winter Layering. For each design below you’ll find an overview of the construction, the stitches it uses, and tips to make your own version.