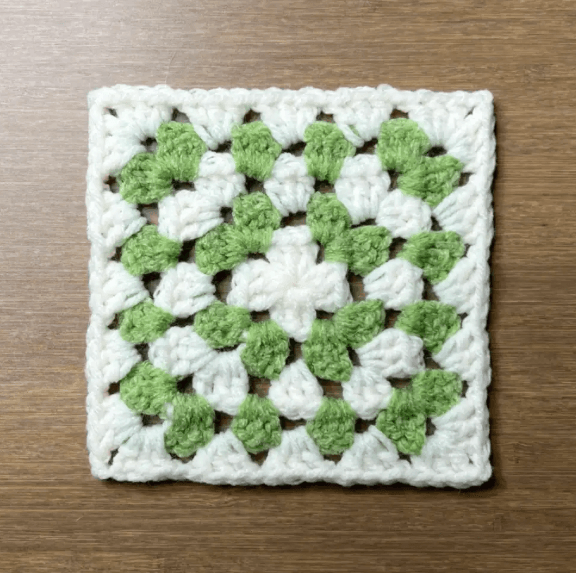
Folk Flower Medallion Granny Square Pattern

Quick Answer
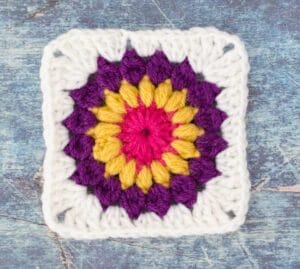
Folk flower medallion granny squares have layered, curling petals set in a round medallion center, framed by a traditional granny border. The look comes from Eastern European and Scandinavian folk embroidery, which gives them an old-world charm. The dimensional petals come from where you place the stitches and a few small tension tweaks, not anything complicated.
Tip: Use a slightly smaller hook for the center bobble stitches to keep them compact, then switch to your regular hook for the petals so they curl naturally outward.
At a Glance
- Skill level: Intermediate
- Time needed: 45-75 minutes per square
- Best yarn: DK or light worsted weight cotton blend
- Hook size: 4.0 mm (G/6) for center, 4.5 mm (7) for petals and border
Common Mistakes to Quick Fixes
- Flat petals instead of curled: Work the last stitch of each petal slightly tighter to encourage natural curling, or block by pinning petals upward.
- Center bobble too loose: Use a hook one size smaller for the bobble round, or add one extra yarn-over per bobble stitch.
- Uneven petal spacing: Count your chain spaces between petals carefully, most patterns require exactly 2 or 3 chains for even distribution.
Mini Glossary
Medallion, a circular or nearly circular decorative motif; bobble stitch, grouped partial double crochets gathered at the top; FLO, front loop only; BLO, back loop only; working in the round, crocheting in continuous circles without turning; blocking, shaping finished crochet with moisture and tension.
This square is one of those designs that sits right between traditional folk art and modern pattern style. Borrowing from the embroidery traditions of Eastern Europe and Scandinavia, it has a layered flower center with petals that lift off the fabric, the kind of thing that makes people stop and ask how you did it.
This guide covers what you need to make these medallion squares, a bit about where the design comes from, plus the specific stitch tricks that create the dimensional petals, so you can add a real showpiece to your repertoire.
The Cultural Inspiration Behind the Design
Folk art flower motifs have been a cornerstone of decorative arts across Eastern Europe, Scandinavia, and parts of Asia for centuries. These bold, graphic floral designs appear on traditional clothing, household textiles, pottery, and architectural elements. What makes them distinctive is their combination of geometric precision with organic, flowing petal shapes.
The square translates those embroidered motifs into crochet with layered stitches that mimic appliquéd or embroidered flowers. The center bobble stands in for the flower’s pistil, and the curled petals radiate out like the stylized blooms on traditional Hungarian, Ukrainian, and Scandinavian folk garments.
What makes this pattern especially appealing is how it honors these cultural traditions while feeling thoroughly modern. The structured granny square border grounds the ornate flower center, making it versatile enough for contemporary projects. For more pattern inspiration that bridges old and new, explore our modern granny square pattern collection.
Understanding the Construction
Unlike most granny squares that build outward evenly, this one is really two pieces: a round medallion center and a square border. Getting how those two parts work together is the key to a good result.
Part One: The Medallion Center
The medallion center is worked in the round and contains all the dimensional elements, the bobble center and the layered petals. This is where the magic happens. The center begins with a magic ring (or chain-4 ring) and builds outward in concentric rounds. The bobble stitches form the flowers heart, while successive rounds of special stitches create the curling petal layers.
Each petal layer is worked separately, with the stitches of the next layer worked behind the previous one. This stacking technique is what creates the dramatic dimensional effect. The innermost petals curl the most, while outer layers lie progressively flatter, creating a natural cascade of texture.
Part Two: The Granny Square Border
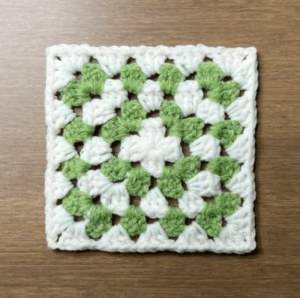
Once the circular medallion is complete, the square border fills in the corners to create a traditional granny square shape. This involves working stitch increases in the four corners to transition from a circle to a square. The border rounds use standard granny cluster stitches, which provides a nice textural contrast to the ornate center.
The transition from circle to square is a technique used in many medallion designs. If you are new to this approach, our granny square pattern tutorial covers the basics of granny clusters that you will need for the border section.
5 Essential Tips for Success
After making dozens of these, here are the five tips that make the biggest difference to how your square turns out.
Tip 1: Master Your Tension for Dimensional Petals
The curling petal effect relies entirely on tension control. The last stitch of each petal should be worked slightly tighter than the rest. This natural tension difference encourages the petal to curl backward, creating the dimensional lift that makes this design so distinctive. If your petals lie completely flat, you are working too evenly, embrace a little intentional inconsistency for the best results.
Conversely, if your petals curl too aggressively and obscure the stitch definition, loosen your tension slightly on the final stitch. Finding the sweet spot may take a few practice petals, but once you dial it in, the technique becomes second nature.
Tip 2: Use a Two-Hook System
One of the most effective tricks for this pattern is using two different hook sizes. Work the center bobble round with a hook one size smaller than recommended, this keeps the bobbles compact and well-defined. Then switch to the regular hook for the petal rounds. The slightly larger hook gives the petals more drape and encourages the natural curling effect.
This two-hook approach might feel fussy at first, but it makes a remarkable difference in the finished appearance. Compact bobbles surrounded by flowing petals create a much more professional look than uniform tension throughout.
Tip 3: Color Choices Make or Break the Design
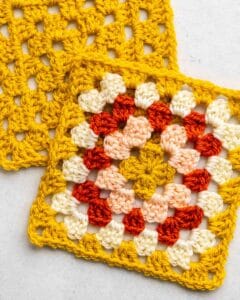
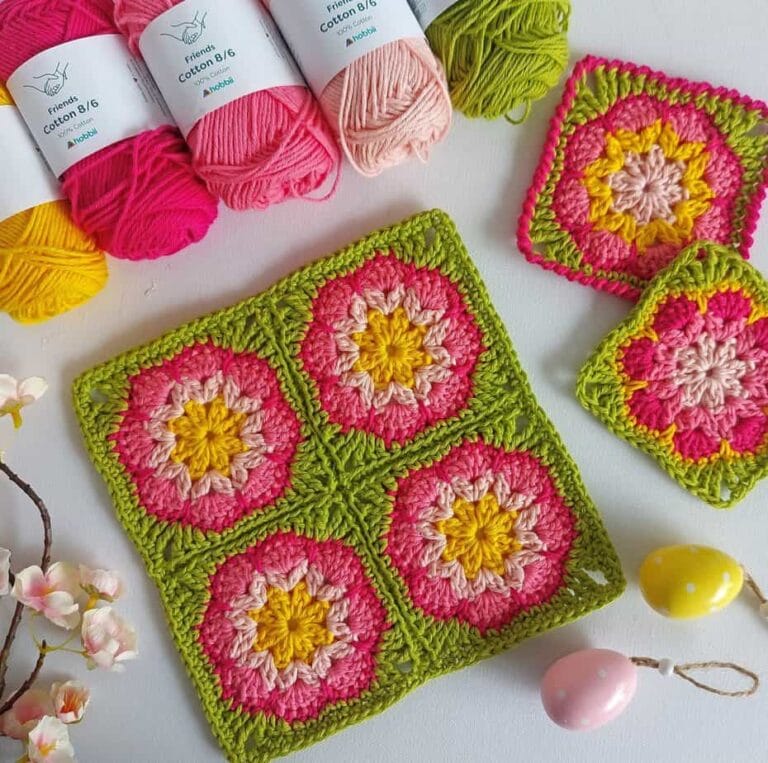
The square looks best with strong contrast between the flower and the background. Folk art leans on bold, saturated color, rich reds, deep blues, golden yellows, forest greens, against cream or white. The petals are often white or cream to echo the embroidered lace on traditional folk garments.
For a modern twist, try using a gradient of shades within the same color family. A center of deep burgundy fading to soft pink petals against a charcoal background is unexpectedly sophisticated. Or go monochromatic with varying shades of a single color for an elegant, tonal effect.
Tip 4: Block Thoroughly After Finishing
Blocking is not optional for this pattern, it is essential. The dimensional elements, combined with the circle-to-square transition, mean your finished square will likely be somewhat wavy or distorted fresh off the hook. Pin your square to the correct dimensions, paying special attention to the petal positioning. Pin each petal in the direction you want it to curl, then steam gently.
The difference between an unblocked and blocked folk flower square is dramatic. Blocking evens out your stitch tension, sharpens the petal definition, and transforms a slightly lumpy piece into a polished, professional-looking motif. For more blocking tips, the Spruce Crafts blocking guide covers all the techniques you need.
Tip 5: Practice the Bobble Center Separately
Before starting your full square, make a small practice swatch of just the bobble center. This lets you dial in your tension and hook size without the commitment of a full project. The bobble center sets the foundation for the entire medallion, so getting it right at the beginning saves enormous frustration later.
Practice making 6 to 8 bobbles in a ring with your chosen yarn and hook combination. Check that they are uniform in size and height, and that they stand up nicely from the fabric. If you are new to bobble stitches, our how to crochet for beginners guide includes a section on basic stitch techniques that will help.
Step-by-Step Overview
While the exact stitch counts will vary depending on your specific pattern, here is a general overview of how a folk flower medallion granny square comes together. This framework will help you understand the construction before you begin.
Round 1: Create a magic ring and work your bobble stitches into it. Typically 6 to 8 bobbles with chain spaces between them. Join with a slip stitch to complete the flower center.
Round 2: Work behind the bobbles to create the first layer of petals. These innermost petals should be short and tight, half double crochet or single crochet petals work well. The key is working these stitches into the spaces between bobbles, not into the bobbles themselves.
Rounds 3-4: Add subsequent petal layers, working behind the previous rounds petals. Each layer should be slightly larger and flatter than the last. Use chain stitches between petals to maintain even spacing.
Rounds 5-6: Begin the transition from circle to square. Work granny clusters evenly around the medallion, with double increases in each of the four corners. This rounds out the corners and starts creating the square shape.
Rounds 7-8: Continue with standard granny square rounds, working (3 DC, chain 2, 3 DC) in each corner space. The number of rounds depends on how large you want your finished square to be.
Project Ideas Using Folk Flower Medallions
Because the folk flower medallion granny square is so visually striking, it works best as a featured element rather than a background repeat. Here are some project ideas that put this beautiful pattern to use.
Statement cushion covers: A single large medallion square makes a gorgeous cushion front. Pair it with a solid-color fabric back for a polished look. Choose colors that complement your rooms palette for a custom home decor piece.
Market bags and totes: Use two or four medallion squares as the focal panels of a crochet bag. The dimensional petals add visual interest that turns a simple bag into an accessory worth showing off. Line the bag with fabric for durability.
Mixed motif blankets: Alternate folk flower medallions with simpler squares, perhaps solid granny squares in coordinating colors, for a balanced blanket design. This keeps the overall project manageable while putting your most impressive squares front and center. For more square ideas, our flower granny square pattern guide offers complementary motifs.
Wall art and table runners: Individual medallion squares can be mounted in embroidery hoops or frames for instant wall art. Or join several in a row for a stunning table runner that celebrates folk art traditions.
Common Questions Answered
Can beginners make this pattern? While the individual stitches used are basic, single crochet, half double crochet, double crochet, and bobble stitch, the way they are combined requires some experience. We recommend this pattern for confident beginners who have completed at least a few granny square projects before. The solid granny square pattern is a great warm-up project.
How do I keep my petals from curling too much? If your petals curl so aggressively that they roll into tubes, your tension is too tight on the petal stitches. Try going up a hook size for the petal rounds, or consciously loosen your grip as you work. Light steaming during blocking can also relax overly curled petals.
Can I make this square bigger? Absolutely. Simply add more rounds to the granny square border after completing the medallion center. You can continue adding rounds until the square reaches your desired size. Each additional border round adds approximately half an inch to the squares dimensions.
Final Thoughts
This is a genuinely satisfying pattern, cultural heritage meets modern crochet. The petal technique takes a little practice, but the payoff is worth it: each finished square is a small piece of art that celebrates folk flower motifs. Grab your yarn and hooks and enjoy the slow, meditative process of building these flowers one petal at a time.
Frequently Asked Questions
How do I care for finished granny square projects?
Hand washing in cool water with a mild detergent is safest for most granny square projects. Squeeze out the water gently without wringing, then lay the piece flat on a towel to dry. Acrylic yarn usually handles a gentle machine cycle in a garment bag fine, just air dry so it doesn’t stretch. Block your squares before joining for the cleanest result.
How long does it take to finish one granny square?
A standard four-round granny square takes most people about twenty to thirty minutes. More involved ones with extra rounds or special stitches run forty-five minutes to an hour, and you’ll speed up with practice. For a big project like a blanket, it helps to batch, do the same round on every square before moving to the next.
What hook size should I use for this pattern?
Most granny square patterns work well with a 5.0 mm (H-8) or 5.5 mm (I-9) hook when using worsted weight yarn. Check the pattern for a specific gauge recommendation. If your stitches are consistently too tight, move up one hook size. If they are too loose and have visible gaps, try one size smaller. Consistent tension matters more than the exact hook size, so choose whatever feels most comfortable in your hand.
Can I sell finished items made from this pattern?
Most free patterns let you sell finished items, just not the written pattern itself. It’s good practice to credit the original designer when you sell online, and when you price, cover your full material cost plus a fair hourly rate for your time and skill.
What yarn weight works best for this granny square?
Worsted weight (size 4) acrylic or cotton is the most versatile pick. Cotton gives crisper stitch definition and a slightly stiffer fabric, good for motifs headed into blankets or bags. Acrylic is softer, cheaper, and comes in more colors. For lacy squares, try a DK weight with a slightly smaller hook.