7 Easy Crochet Mushroom Patterns: Cute Amigurumi Ideas

Quick Answer
A crochet mushroom is one of the best beginner-friendly amigurumi projects out there. These little fungi use basic stitches like single crochet and work up fast with small amounts of yarn, you’ll have a finished one in under two hours, even on your first try.
Tip: Always stuff your mushroom cap firmly before closing: this gives the classic round dome shape that makes amigurumi mushrooms so charming.
At a Glance
- Skill level: beginner
- Time needed: 1-2 hours per mushroom
- Best yarn: worsted weight cotton or acrylic (Red Heart Super Saver, Bernat Premium)
- Hook size: 4.0 mm (G/6) or 3.5 mm (E/4)
Common Mistakes → Quick Fixes
- Closing the cap too loosely: leave a long tail and use a yarn needle to cinch the opening tightly shut.
- Uneven color change on the cap: switch yarn on the last yarn-over of the stitch before the new color begins.
- Wobbly stem: insert a craft pipe cleaner inside the stem before stuffing for extra stability.
Mini Glossary
sc, single crochet, inc, increase (2 sc in one stitch), dec, decrease, BLO, back loop only, mr, magic ring, FO, fasten off, sl st, slip stitch, HDC, half double crochet
Why Every Beginner Needs a Crochet Mushroom Pattern?
There’s something irresistible about tiny crochet mushrooms, whimsical, colorful, and surprisingly simple to make. Decorate a plant pot, build a fairy garden, or just fill a fun weekend, and a mushroom is a perfect starting point.
Amigurumi mushrooms use a small handful of techniques. If you already know how to crochet for beginners, you have everything you need. The shapes are simple, a rounded cap and a cylindrical stem, and most patterns finish in a single afternoon. Plus, mushrooms are one of the most photographed projects on social media right now, so your finished piece will look just as good in photos as it does on your shelf.
In this post, you will find seven distinct crochet mushroom designs. Each one includes a materials list, stitch counts, and clear row-by-row instructions so you can follow along with confidence.
What You Need Before You Start?
Before you start, gather a few basic supplies. Having everything ready before your first stitch saves time and keeps your momentum going.
Yarn and Hooks
Worsted weight yarn is the best choice for most mushroom projects. Cotton blends like Bernat Handicrafter Cotton hold their shape beautifully, while affordable acrylics like Red Heart Super Saver come in every color you could want. You will need at least two colors, typically red or tan for the cap and white or cream for the stem.
A 4.0 mm hook (size G/6) pairs well with worsted yarn. If your tension runs tight, move up to a 4.5 mm hook. If your stitches feel loose and you can see the stuffing through the gaps, drop to a 3.5 mm hook.
Other Supplies
- Polyester fiberfill stuffing
- Yarn needle (tapestry needle) for sewing pieces together
- Stitch markers (at least 3)
- Scissors
- Optional: safety eyes (6 mm) for face details, pipe cleaners for stem support
If you are brand new to the craft, our crochet abbreviations guide will help you decode any shorthand you encounter in the patterns below.
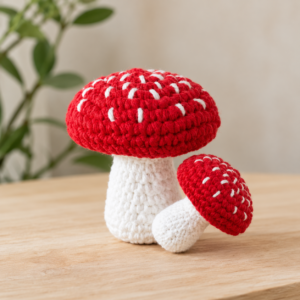
Pattern 1: Classic Red-and-White Toadstool

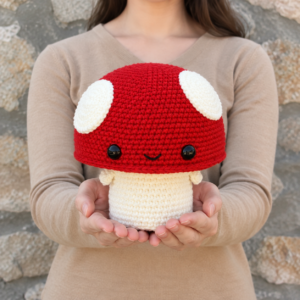
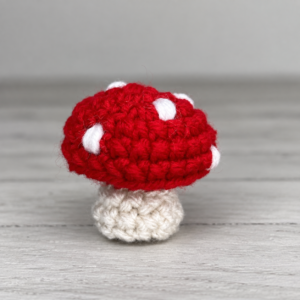
This is the iconic mushroom shape everyone pictures, a bright red dome with white spots and a chunky cream stem. It’s the most popular style for a reason.
Cap (make 1)
Using red yarn and your 4.0 mm hook:
Round 1: 6 sc in magic ring (6)
Round 2: 2 sc in each st around (12)
Round 3: (sc, inc) × 6 (18)
Round 4: (2 sc, inc) × 6 (24)
Round 5: (3 sc, inc) × 6 (30)
Round 6: (4 sc, inc) × 6 (36)
Round 7: sc in each st around (36)
Round 8: sc in each st around (36)
Fasten off, leaving a long tail for sewing. Do not stuff yet.
White Dots
Cut 5-7 small lengths of white yarn. Thread your yarn needle and stitch clusters of 3-4 French knots randomly across the surface of the cap. Space them naturally, imperfect placement actually looks more realistic.
Stem (make 1)
Using cream or white yarn:
Round 1: 6 sc in magic ring (6)
Round 2: 2 sc in each st around (12)
Rounds 3-8: sc in each st around (12)
Stuff firmly. Fasten off with a long tail.
Assembly
Whipstitch the cap to the stem using the long tails. Weave in all ends. If you need a refresher on starting amigurumi, check our magic circle crochet guide.
Pattern 2: Pastel Pocket Mushroom
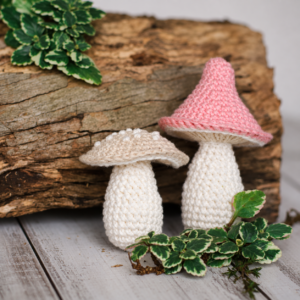
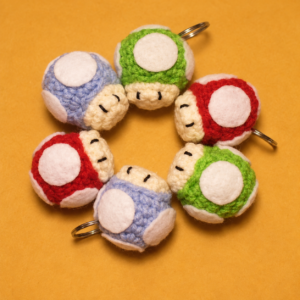
This tiny version is designed to be a keychain or bag charm. Use soft pastel tones, think blush pink caps and lavender stems, for a modern, aesthetic vibe. This crochet mushroom pattern is the smallest in the list and works up in about 30 minutes.
Mini Cap
Using a 3.5 mm hook and pastel yarn:
Round 1: 5 sc in magic ring (5)
Round 2: 2 sc in each st (10)
Round 3: (sc, inc) × 5 (15)
Round 4: sc in each st (15)
Fasten off and stuff lightly.
Mini Stem
Round 1: 4 sc in magic ring (4)
Round 2: 2 sc in each st (8)
Rounds 3-5: sc in each st (8)
Sew the cap to the stem and attach a small keychain ring through the top of the cap. These make wonderful handmade gifts and are a fantastic use of scrap yarn.
Pattern 3: Chunky Amanita with Gills
The Amanita muscaria is the most recognizable mushroom in the world, and this chunky version captures its distinctive silhouette. The secret detail? Tiny crochet gills stitched underneath the cap.
Gills (optional detail)
Before sewing the cap to the stem, attach several short lengths of cream yarn in parallel lines across the underside of the cap opening. This adds a realistic touch that improves the whole project.
The cap and stem follow the same basic construction as Pattern 1, but use a 5.0 mm hook and chunky weight yarn for a larger, squishier result. The finished mushroom stands approximately 5 inches tall.
Pattern 4: Simple Flat Mushroom Appliqué
Not every mushroom needs to be three-dimensional. This flat appliqué is made to be sewn onto hats, scarves, tote bags, or blanket squares, one color per piece, no stuffing at all.
Flat Cap
Round 1: 6 sc in magic ring (6)
Round 2: 2 sc in each st (12)
Round 3: (sc, inc) × 6 (18)
Round 4: BLO sc in each st (18)
Working in the back loop only on the last round creates a subtle ridge that looks like the underside of the mushroom cap.
Flat Stem
Row 1: Ch 6, sc in 2nd ch from hook and across (5)
Rows 2-4: ch 1, turn, sc across (5)
Sew the stem behind the center of the cap. This is a great pattern to pair with other motifs, try combining it with our easy crochet flower pattern for a woodland-themed project bag.
Pattern 5: Mushroom with a Face
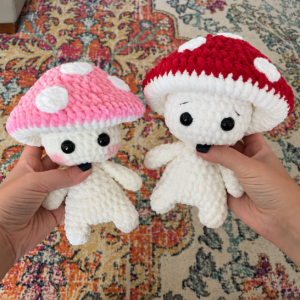
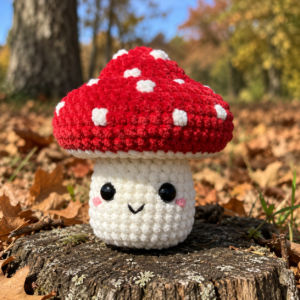
Give your mushroom some personality with eyes and a smile. This version uses 6 mm safety eyes set between rounds 4 and 5 of the cap and a simple mouth embroidered in black floss.
Safety eyes snap into place before you stuff and close the piece. If you are making this for a young child, embroider the eyes instead for safety. This pattern is a fantastic gateway into full amigurumi toy patterns because it teaches you face placement, shaping, and finishing all in one small project.
Pattern 6: Tiny Mushroom Pencil Topper
School supplies are more fun handmade. This micro version fits right over the top of a standard pencil, use a 2.5 mm hook and fingering weight yarn for the smallest size.
The cap is only 3 rounds, and the stem is a simple tube of 6 single crochet stitches for about 8 rounds. Slide the stem onto the pencil eraser and glue in place with a drop of fabric glue. Kids love these, and they make excellent classroom gifts or party favors.
Pattern 7: Two-Tone Ombre Mushroom
This intermediate variation uses a yarn that gradually shifts color to create an ombre effect on the cap. Look for self-striping or gradient yarns in earthy tones, think brown fading into cream or burgundy melting into coral.
Follow the same cap instructions as Pattern 1, the yarn does all the visual work. Pair it with a solid stem in a complementary neutral and you get a result that looks boutique-made. It’s the most “Instagram-worthy” one in the collection and a lovely addition to any crochet home decor display.

What Are the Best Tips for Getting the Best Results?
Stuffing Matters More Than You Think
The difference between a floppy mushroom and a perfect one comes down to stuffing. Add fiberfill in small pinches rather than one big clump. Pack the cap firmly so it holds its dome shape, and stuff the stem tightly enough to stand on its own. Understuffed stems lean and wobble, which looks messy in photos.
Use Stitch Markers Religiously
Amigurumi is worked in continuous spirals, which means there is no obvious end-of-row signal. Place a stitch marker in the first stitch of every round and move it up as you go. Without markers, it is nearly impossible to keep accurate stitch counts. If you struggle with this, our guide on how to read a crochet pattern has a dedicated section on tracking rounds.
Block Your Finished Mushrooms
Blocking is not just for garments. Lightly steam your finished mushrooms with an iron held about an inch above the surface. This relaxes the stitches, evens out your tension, and gives the piece a polished, professional finish. Never press the iron directly onto acrylic or polyester yarn, it will melt.
What to Make With Your Crochet Mushrooms?
Once you have a few finished mushrooms, the project possibilities multiply:
- Fairy garden accessories: Arrange several mushrooms among pebbles and moss in a shallow dish.
- Plant pot picks: Attach a wooden skewer to the stem base and insert into potted plants.
- Garland: String 8-10 mini mushrooms onto cotton twine for a woodland bunting.
- Gift toppers: Tie a small mushroom to a gift package instead of a bow.
- Desk decor: Group three different sizes together on a small tray for an adorable vignette.
For more creative project ideas, browse our collection of beginner-friendly crochet patterns that pair beautifully with handmade mushrooms.
Frequently Asked Questions
How long does a crochet mushroom pattern take to complete?
Most small mushrooms take between 45 minutes and 2 hours, depending on the pattern, your skill level, and the yarn weight. The pocket mushroom (Pattern 2) is fastest at around 30 minutes, while the chunky Amanita (Pattern 3) can take up to 2.5 hours because of its size and gill detail.
What is the best yarn for a crochet mushroom pattern?
Worsted weight cotton or a cotton-acrylic blend is ideal, cotton holds its shape and gives crisp stitch definition. Acrylic is a perfectly good budget option. Skip very fuzzy or novelty yarns for your first mushroom, since the texture hides your stitches. For inspiration, the Craft Yarn Council has helpful yarn-weight and hook-size charts.