Puff Stitch Cardigan: Free Easy Crochet Pattern

Puff Stitch Cardigan: Free Easy Crochet Pattern

Handmade crochet hat with flowers

Quick Answer

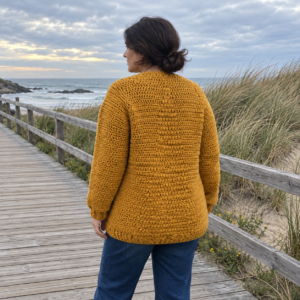
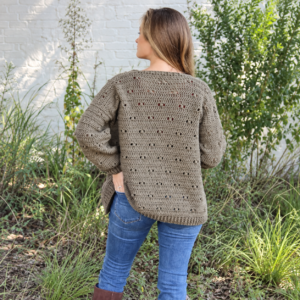
A puff stitch cardigan is a gorgeous, textured wearable project that looks high-end but is surprisingly achievable for intermediate beginners. The entire body is worked from one continuous foundation chain (front panel, back panel, and second front panel all in one piece), which means very little seaming. The signature puff (or bubble) stitch creates a dimensional, padded texture that makes this cardigan a true statement piece. With about 500 grams of acrylic yarn, a 4 mm hook, and the step-by-step instructions below, you can complete this puff stitch cardigan in a weekend.

If you love the modular construction approach, these granny square cardigan patterns use joined motifs to create stunning wearable pieces.

Tip: Always take your body measurements before starting. The shoulder-to-shoulder plus 6 inches formula determines your back panel width, and getting this right ensures a perfect fit.

At a Glance

  • Skill level: intermediate beginner
  • Time needed: 8-12 hours (depending on size and experience)
  • Best yarn: acrylic worsted weight, 50 g per skein, ~10 skeins
  • Hook size: 4.0 mm

Common Mistakes to Quick Fixes

  • Foundation chain too short: measure desired length x2 for front+back, add extra chains for turning
  • Bubble stitches too loose: always pull through all 6 loops tightly and push the bubble outward
  • Sleeve width too tight: measure arm circumference plus 5 inches for the sleeve width

Mini Glossary

HDC (half double crochet), SC (single crochet), SL ST (slip stitch), CH (chain), BLO (back loop only), puff stitch / bubble stitch (5 HDC stitches in 1 stitch, pull through all 6 loops)

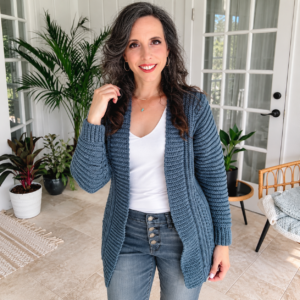
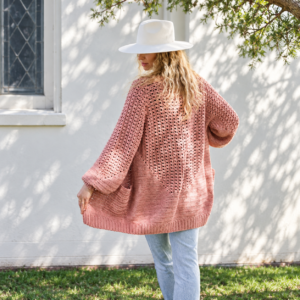
A puff stitch cardigan is one of the most eye-catching crochet garments you can make. The 3D bubble texture adds warmth and interest, turning a simple cardigan into something that looks boutique-made. The whole body (both front panels and the back) is worked from one long foundation chain, with only the two sleeves made separately and slip-stitched on. That construction makes it one of the smartest garment patterns for intermediate crocheters.

This tutorial covers every measurement, stitch, and construction phase so you can crochet your own. Make it cropped like the original or go long and oversized. The pattern adapts to your style and wardrobe.

What Materials Do You Need for This Puff Stitch Cardigan?

Gather these supplies before you start. The right materials make a big difference, and a good result starts with quality yarn and an accurate gauge.

  • Yarn: acrylic worsted weight yarn, 50 grams per skein with approximately 133 meters. You will need about 10 skeins (~500 grams). The original used a beautiful Fox Brown color. Choose any color you love; this puff stitch cardigan looks stunning in neutrals, pastels, and bold tones alike.
  • Hook: 4.0 mm crochet hook. The yarn label recommends 3.5 to 4.5 mm, so adjust slightly based on your natural tension. For more help with hook sizes, check out our crochet hook sizes guide.
  • Notions: tape measure, scissors, tapestry needle for weaving ends, and several stitch markers.
  • Tape measure: essential. You will use it for every measurement throughout this puff stitch cardigan pattern.

What Should You Know About the Construction?

The cardigan is worked in a smart, low-seaming way. Here’s the overall structure:

  1. Foundation chain: one long chain for both front and back panels (desired length x2)
  2. Left front panel + back panel: worked together from one side to the neckline
  3. Back panel only: worked across the neckline (5 inches for the neck opening)
  4. Right front panel + back panel: chain back the neck stitches and continue
  5. Sleeves: two separate rectangles, attached with slip stitching
  6. Sleeve cuffs: single crochet ribbing joined in the round
  7. Front ribbing: single crochet ribbing along both front edges and neckline

The pattern repeat throughout the body is: 5 rows of half double crochet (back loop only), then 1 row of puff/bubble stitches. This creates those gorgeous puffy ridges that give the cardigan its signature look.

Complete Step 1: Foundation Chain (Both Panels Together)

Decide how long you want your puff stitch cardigan to be from shoulder to hem. Take that measurement and multiply by two: one measurement for the front panel and one for the back panel. For example, if you want a 17-inch cardigan, your total chain will be 34 inches (approximately 127 chains, depending on your tension).

Chain that total length. The first and last 14 chains on each end will become the ribbing, and everything in between will be the cardigan body.

Complete Step 2: First Row: Ribbing and Body Setup

Skip the first chain, then work 14 single crochets for the ribbing. You can adjust this number (10, 12, 14, 16, or 17 single crochets) depending on how tall you want the ribbing band (about 3 to 5 inches).

After the 14 single crochets, switch to half double crochets and work them all the way across the remaining chains until you reach the other end. Then work 14 more single crochets to create the matching ribbing on the opposite side. This gives you ribbing on both edges because one end will become the front hem and the other will become the back hem.

Complete Step 3: Rows 2-5: Back Loop Only Ribbing and Body

Chain 1 and turn your work. For all subsequent rows, work only in the back loop of each stitch. This creates the beautiful ridged texture you see in the finished cardigan.

  1. Work 14 single crochets in back loops only for the ribbing section.
  2. Switch to half double crochets in back loops only for the body section.
  3. Work 14 single crochets in back loops only for the opposite ribbing.
  4. Chain 1, turn, and repeat for a total of 5 rows.

Use stitch markers to track where your ribbing transitions to the body. This will save you from counting constantly.

Complete Step 4: Row 6: The Puff (Bubble) Stitch Row

This is the fun part. After 5 rows of half double crochet in back loops, it is time for the puff stitch row. Here is exactly how to work the puff stitch, which is the defining element of this puff stitch cardigan:

  1. Work 1 half double crochet in the back loop of the first stitch after the ribbing.
  2. For the next stitch, work in both loops (this is where the bubble goes): yarn over, insert hook, pull through 2 (2 loops remaining). Repeat this 4 more times. You will have 5 stitches pulled up in the same stitch, with 6 loops on your hook.
  3. Yarn over and pull through all 6 loops at once.
  4. Push the bubble outward to give it that puffy, dimensional shape.
  5. Work 3 half double crochets in back loops only, then repeat the puff stitch.
  6. Continue the pattern of 3 HDC back loop, 1 puff stitch across the entire row.

One of the best things here is how customizable the bubble texture is. Adjust the spacing: 4 or 5 HDC between bubbles for a more spaced-out look, or every 7th or 9th row instead of every 6th for different density.

Complete Step 5: Repeat the Pattern to the Neckline

Keep repeating the pattern (5 rows HDC back loop only, then 1 puff stitch row) until you have completed the left front panel and back panel. Here is how to figure out the measurements:

Back panel width formula: Measure shoulder to shoulder, then add 6 inches. So for a 16-inch shoulder width: 16 + 6 = 22 inches for the back panel.

Each front panel width: Take the back panel width, subtract 5 inches for the neckline, then divide by 2. So: (22: 5) / 2 = 8.5 inches per front panel.

Work the puff stitch cardigan body until your left front panel measures 8.5 inches (or whatever your calculation gives you). Take measurements in the middle of the panel to account for any variations at top and bottom.

Complete Step 6: The Neckline (Back Panel Only)

When you reach the neckline, count all your stitches and divide by 2 to find the exact middle. Place a stitch marker there. You will now work only the back panel, skipping the front panel stitches entirely.

  1. Work across the back panel stitches only, doing your pattern as normal (HDC back loop, puff stitch rows).
  2. When you reach the center stitch marker, work your last stitch in both loops to keep it straight.
  3. Chain 2 (since you are going straight into HDC, not SC for ribbing) and turn.
  4. Work half double crochets in back loops across the back panel, down through the ribbing section, then back up the other side.
  5. Keep going up and down until you have 5 inches of neck height.

Continue your pattern (every 6th row is a puff stitch row) even through the neckline section.

Complete Step 7: Re-Adding the Right Front Panel

After completing the neckline, you need to add the right front panel back. Chain the same number of chains you removed (the 5-inch neck width), plus 1 extra chain for turning. In the original, this was 64 chains (63 for the neck + 1).

  1. Skip the first chain and work 14 single crochets for the ribbing.
  2. Continue with half double crochets across the new chain, matching the same number of HDC stitches you had on the left panel.
  3. Connect to the back panel stitches and continue the pattern (5 rows HDC + 1 puff stitch row).
  4. Work until the right front panel matches the left front panel in row count.

Once both front panels are done, your main puff stitch cardigan body is complete. Now it is time for the sleeves.

Complete Step 8: Making the Sleeves

Each sleeve is a simple rectangle made separately, then attached to the body. Here is how to determine your sleeve measurements:

  • Sleeve length: measure from your bicep (where the cardigan armhole sits) to your desired cuff length. Subtract about 2 inches for the cuff ribbing. The original used 14.5 inches.
  • Sleeve width: measure around your arm at the bicep, then add 5 inches. For a 10-inch arm: 10 + 5 = 15 inches.

Chain enough for your sleeve length. Skip 2 chains, then work half double crochets in every chain to the end. From row 2 onward, work in back loops only. Follow the same pattern: 5 rows HDC back loop, 1 puff stitch row. Continue until the sleeve rectangle reaches your desired width (15 inches in the original).

Complete Step 9: Attaching the Sleeves

Once both sleeve rectangles are complete, it is time to attach them to the body:

  1. Work a row of single crochets across one long edge of the sleeve. Place a stitch marker in the middle stitch.
  2. Lay the cardigan body flat with the right side facing you. Count the armhole stitches and place a stitch marker in the middle.
  3. Align the sleeve middle marker with the armhole middle marker.
  4. Join using slip stitches in the outer loops only, working from the marked center point down one side, around the bottom, and up the other side.
  5. Repeat for the second sleeve.

Complete Step 10: Sewing Side Seams

With the cardigan turned inside out, join the side seams using slip stitches in the outer loops only. Start at the bottom hem, work up through the armpit, and continue along the underside of the sleeve to the cuff edge. This creates an invisible, sturdy seam that will hold up through years of wear and washing. Repeat for both sides to complete the puff stitch cardigan body assembly.

Complete Step 11: Sleeve Cuffs

Turn the sleeve right side out. For each cuff:

  1. Chain enough for your desired cuff width (12 stitches = chain 13).
  2. Skip first chain, work single crochets across (12 total).
  3. Slip stitch in the next 2 ridges, turn, skip slip stitches, work 12 SC in back loops only.
  4. Chain 1, turn, repeat 12 SC in back loops. Continue until the cuff reaches all the way around the sleeve opening.
  5. Join the cuff by turning the sleeve inside out and slip stitching in the outer loops from top to bottom.

Complete Step 12: Front Ribbing

The front ribbing runs along both front edges and around the entire neckline. Reattach your yarn at the bottom of one front edge (right side facing):

  1. Chain 6, skip the first chain, work 5 single crochets.
  2. Skip 1 stitch, slip stitch in the next 2 stitches, turn.
  3. Skip the 2 slip stitches, work 5 SC in back loops only. Chain 1, turn.
  4. Repeat 5 SC back loop, skip 1, slip stitch 2, turn, all the way up the front edge, around the neckline, and back down the other front edge.

This creates a neat, stretchy ribbed border that gives the puff stitch cardigan a polished, professional finish. If you prefer a clean look without front ribbing, you can skip this step. The cardigan still looks great without it.

Sizing and Customization Tips

It also adapts easily to different sizes and styles. A few tips:

  • For a longer cardigan: simply increase your foundation chain. A 20-inch length gives you a tunic-length cardigan, while 25+ inches gives you a dramatic longline style.
  • For a wider fit: use a larger hook (4.5 mm or 5 mm) with the same yarn to create a looser, more oversized drape.
  • For different bubble density: space your puff stitches further apart (every 5th stitch instead of every 4th), or change the frequency (every 9 rows instead of every 6th).
  • For different yarn: cotton or cotton-blend yarns create a lighter, more breathable cardigan well suited to spring. Acrylic gives you warmth and structure for fall and winter.

If you are newer to garment construction, our how to read a crochet pattern guide and beginner crochet tutorial are great references. For yarn selection, the Craft Yarn Council provides the official yarn weight standards, and you can find more cardigan inspiration on Ravelry.

Frequently Asked Questions

How much yarn do I need for a puff stitch cardigan?

You’ll need about 500 grams (roughly 10 skeins of 50 g acrylic worsted) for an XS-to-S cardigan; plan on 600-700 g for larger sizes. The sleeves take about 150 g each, the body the rest. Buy an extra skein or two beyond your estimate. The puff stitch is yarn-hungry.

Can I make this puff stitch cardigan with cotton yarn?

Absolutely. Cotton or cotton-blend yarn creates a lighter, more breathable version well suited to spring and summer layering. The puff stitch will be slightly less puffy than with acrylic because cotton has less loft, but the texture is still beautiful. A lightweight cotton yarn in DK or worsted weight works best for draping comfortably.

How do I figure out my sizing for this cardigan?

Take your shoulder-to-shoulder measurement and add 6 inches for the back panel width. Subtract 5 inches for the neck opening, then divide by 2 for each front panel. For sleeves, measure around your bicep and add 5 inches for width, then from bicep to your desired cuff length. Always measure in the middle of panels, since edges can vary.

What is the difference between puff stitch and bubble stitch?

They’re essentially the same technique with different names. Both work multiple stitches (usually 5 half double crochets) into one stitch, then pull through all the loops at once for a rounded, 3D bump. Some call it a puff, others a bubble or bobble. The result is the same textured, padded fabric.

How do I attach the sleeves neatly?

The key is working single crochets along one long edge of the sleeve rectangle first, then using stitch markers to align the sleeve midpoint with the armhole midpoint. Join with slip stitches in the outer loops only, which creates a nearly invisible seam on the right side. Work from the center point down one side, around the bottom, and up the other side. Sewing the side seams with the same outer-loop slip stitch technique keeps everything consistent.

Similar Posts

Leave a Reply

Your email address will not be published. Required fields are marked *