Crochet Ear Warmer: 7 Ideas + a Free One-Hour Pattern

Featured Free Pattern: One-Hour Ribbed Ear Warmer
This is KnotToYarn’s own original pattern, free to use, and you’re welcome to sell what you make from it.
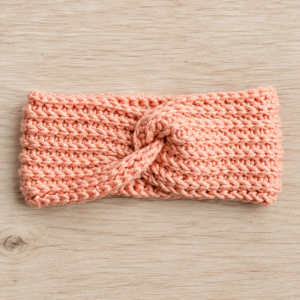
Before browsing the design ideas, here is a complete ear warmer you can make tonight. Working half double crochet in the back loop only creates a stretchy knit-look rib, the same technique most of the ideas below rely on.
Materials
- Worsted weight (category 4) yarn, about 60 g, wool or wool-blend is warmest
- 5.0 mm (US H) crochet hook
- Yarn needle, scissors, measuring tape
Finished size: Adult: about 10 cm (4 in) wide and 48 cm (19 in) around, stretching to fit 53-58 cm heads. Child: stop at 40 cm (16 in).
Skill level: Beginner
Abbreviations (US terms): ch (chain), hdc (half double crochet), BLO (back loop only), st(s) (stitch/es)
Instructions
The band is worked flat as a long strip of rows, then seamed into a loop. The ribbing runs vertically, so the strip’s width becomes the warmer’s height.
Row 1: Ch 16. Hdc in the 3rd ch from the hook and in each ch across: 14 hdc. Ch 2, turn.
Row 2: Hdc in the BLO of each st across: 14 hdc. Ch 2, turn.
Repeat Row 2 until the strip measures 48 cm (19 in) unstretched, usually 55-60 rows. The band should be about 10-13 percent smaller than the head it is for, so it stays up snugly.
Fasten off, leaving a 40 cm (16 in) tail for seaming.
Finishing
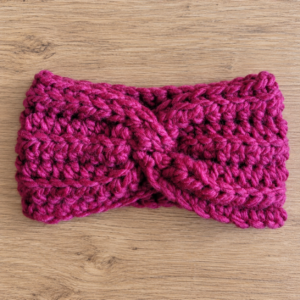
Fold the strip in half with the short ends together and use the tail to whip-stitch through both layers, matching ridge to ridge. For the popular twisted look, give the strip one half-twist before seaming. Weave in the ends inside the loop. Optional: wrap a 10 cm wide crocheted or fabric band around the seam point to create a faux-bow cinch.
Made this? We’d love to show off your work, send a photo through our contact page and we’ll feature it here with credit to you.
Tip: Always measure around your head where the warmer will actually sit, over the ears, across the forehead, not the hat line. Negative ease is what keeps it from sliding off.
Quick Answer
A crochet ear warmer is a wide band worn around the head to keep your ears warm in cold weather. It’s one of the fastest crochet projects there is, usually just one skein and a few hours. You’ll find good free patterns here and on community sites like Ravelry.
Tip: Always measure your head circumference before starting: ear warmers should fit snugly but comfortably without being too tight.
At a Glance
- Skill level: beginner to intermediate
- Time needed: 2-4 hours per ear warmer
- Best yarn: medium worsted weight (size 4) acrylic or wool blend
- Hook size: 5.5mm (I-9) to 6.5mm (K-10.5)
Common Mistakes → Quick Fixes
- Ear warmer too tight: chain more stitches or use a larger hook size for better stretch
- Uneven edges: count stitches carefully at the end of each row and use stitch markers
- Curling edges: block your finished piece or add a border round in single crochet
Mini Glossary
SC (single crochet), HDC (half double crochet), DC (double crochet), FPDC (front post double crochet), BPDC (back post double crochet), ch (chain), sl st (slip stitch), sp (space), st/sts (stitch/stitches)
If you want a quick, rewarding project, an ear warmer is a great pick. Complete beginner or experienced crocheter after a fast gift, it’s practical and stylish, these headbands keep your ears toasty without the bulk of a full beanie, and they use very little yarn. This guide shares seven free patterns plus tips on yarn, sizing, and stitches.
Why Make a Crochet Ear Warmer?
An ear warmer is one of the most versatile, beginner-friendly things you can make. Unlike a sweater or blanket, it works up fast and needs barely any supplies. A few reasons to add it to your queue:
Fast and beginner-friendly. Most ear warmer patterns can be completed in just 2 to 4 hours, even if you are learning how to crochet for beginners. The simple rectangular or tube shapes mean you do not need to worry about complex shaping, increases, or decreases.
Budget-friendly. A single skein of medium-weight yarn is usually all you need. If you already have a crochet hook and some yarn in your stash, you can start right away without any additional purchases. For yarn recommendations, check out our guide on the best yarn for beginners.
Great for gifts. Handmade ear warmers make thoughtful, personalized gifts for friends and family during the holiday season. Because they are so quick to make, you can easily produce several in different colors to match everyone’s winter coats and scarves.
Highly customizable. From ribbed textures to cable patterns, braided designs, and decorative bows, there is a crochet ear warmer style to suit every taste. You can experiment with different stitch combinations, color changes, and embellishments to create a genuinely unique accessory.
Practical and warm. Ear warmers provide excellent protection against cold winds and freezing temperatures. They are especially useful for outdoor activities like walking, running, hiking, or commuting. Many people prefer them over beanies because they keep ears warm without flattening your hairstyle.
An ear warmer is a great little canvas for building skills, whether you want to practice your single crochet or try new techniques like post stitches and cables.
7 Free Crochet Ear Warmer Patterns
Below are seven free ear warmer patterns, each using different techniques and stitch combinations so you can pick one that suits your level and style. All are beginner-friendly, with a few optional intermediate touches if you’re ready to level up.
1. The Classic Ribbed Ear Warmer
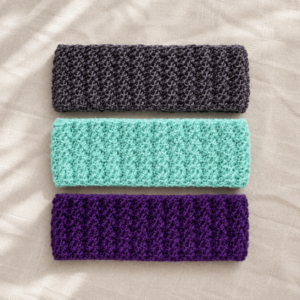
The classic ribbed ear warmer is the go-to pattern for anyone new to crochet. It uses a simple repeat of half double crochet stitches worked in the back loop only, creating a stretchy, cozy ribbed texture that naturally hugs your head. This pattern typically starts with a foundation chain of about 80 to 90 stitches (depending on your head size) and is worked back and forth in rows until the piece reaches approximately 4 to 5 inches in width. The two short ends are then sewn together to form a tube.
This pattern is an excellent introduction to the half double crochet stitch, which is one of the most versatile and commonly used stitches in crochet. The back-loop-only technique is what creates the beautiful ridged ribbing effect. We recommend using a 5.5mm or 6.0mm hook with soft worsted weight yarn for the best results.
2. The Buttoned Twist Headband
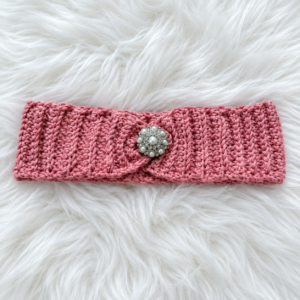
The buttoned twist ear warmer adds an elegant twist detail to the classic headband design. After crocheting a long rectangular strip, you twist the center section once or twice before fastening it with buttons at the back. This design element adds visual interest and allows for easy adjustment, making it a great option if you are unsure about sizing. The twist also creates a layered effect over the ears, providing double warmth right where you need it most.
To make this pattern, crochet a strip that measures approximately 22 to 24 inches long and 4 to 5 inches wide. Sew a simple buttonhole loop at one end and attach one or two large decorative buttons at the other end. This pattern works beautifully in solid colors, but you can also experiment with self-striping or variegated yarns for a fun, colorful look.
3. The Braided Ear Warmer
The braided ear warmer creates a stunning three-strand braid effect across the front of the headband. This is achieved by crocheting three separate long strips and then braiding them together before joining the ends. The result is a thick, plush ear warmer that looks incredibly impressive but is surprisingly simple to construct.
Each strip is typically made using single crochet or half double crochet stitches worked in rows. Once all three strips are complete, you braid them loosely and sew the raw ends together. The braided design naturally adds extra thickness and warmth, making this one of the coziest crochet ear warmer options. It is also a fantastic pattern for using up small amounts of leftover yarn in coordinating colors.
4. The Cable Knit Style Ear Warmer
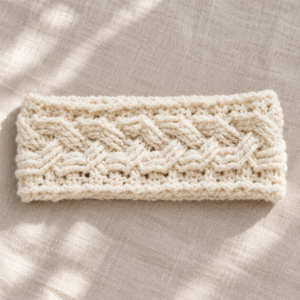
If you want your crochet ear warmer to have the look of a knitted cable, this pattern is for you. Using front post double crochet (FPDC) and back post double crochet (BPDC) stitches, you can create realistic cable patterns that look just like traditional knit cables. The cable design adds beautiful texture and visual depth to the ear warmer, making it a standout accessory.
This pattern is best suited for beginners who are comfortable with double crochet and ready to learn post stitches. A cable ear warmer typically uses a foundation chain of about 80 to 90 stitches and is worked in a repeating cable pattern across 4 to 6 rows. The result is a thick, structured ear warmer with incredible stitch definition. Choose a smooth, light-colored yarn to really show off the cable texture.
5. The Moss Stitch Ear Warmer
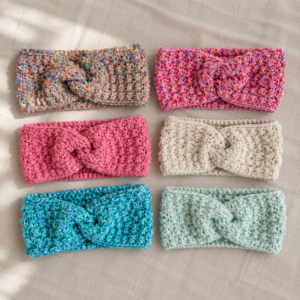
The moss stitch, also known as the linen stitch or granite stitch, creates a beautifully textured, slightly open fabric that is both breathable and warm. This stitch is worked by alternating single crochet stitches and chain stitches in an offset pattern on each row. The result is a subtle, woven-looking texture that pairs perfectly with solid and heathered yarns alike.
A moss stitch crochet ear warmer is wonderfully easy to make and works up quickly because the pattern repeat is so simple. After chaining an even number of stitches, you simply alternate between a single crochet in the chain space and a chain one, shifting the pattern by one stitch on each row. This pattern creates a soft, draping fabric that is comfortable to wear for extended periods. It is a great choice for a first-ever crochet ear warmer project.
6. The Bow Ear Warmer
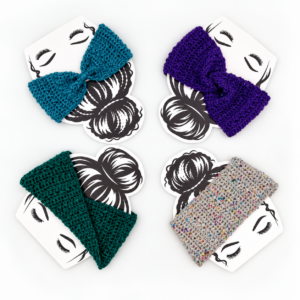
The bow ear warmer combines a simple headband base with a decorative crochet bow attached at the front. This pattern is incredibly popular for children’s accessories but looks equally charming on adults when made with sophisticated color choices. The bow is usually made separately as a flat rectangle, then cinched in the center and sewn onto the finished headband.
This is one of the most photogenic crochet ear warmer designs, making it great for sharing on social media or gifting at craft fairs. You can make the bow in a contrasting color for a bold statement, or use the same yarn as the headband for a subtle, coordinated look. Add a small button or bead to the center of the bow for an extra touch of elegance.
7. The Double-Layered Ear Warmer
The double-layered ear warmer is designed for maximum warmth and comfort. As the name suggests, this pattern creates two layers of fabric, an inner layer and an outer layer, that are crocheted together at the edges. The double thickness provides excellent insulation against cold weather while maintaining a neat, polished appearance.
This pattern can be made using any basic stitch, single crochet, half double crochet, or double crochet, for both layers. You can even use different stitches or colors for each layer to create a reversible ear warmer. The double-layered construction also means your crochet ear warmer will be extra durable and long-lasting, making it ideal for everyday wear throughout the winter season.
Best Yarn for Crochet Ear Warmers
The yarn you choose really shapes a comfortable, warm, long-lasting ear warmer, it affects warmth, stretch, and how it feels against your skin. A few things to weigh when you shop:
Weight: Medium worsted weight (size 4) yarn is the most popular choice for crochet ear warmers. It provides the perfect balance of warmth, durability, and ease of use. Bulkier yarns (size 5 or 6) work up faster but can feel stiff and heavy, while lighter yarns (size 2 or 3) may not provide enough warmth on their own.
Fiber content: Acrylic yarn is affordable, widely available, and comes in a huge range of colors. It is also machine washable, which is a big plus for winter accessories that may get dirty from outdoor wear. Wool and wool-blend yarns offer superior warmth and natural moisture-wicking properties, making them ideal for very cold climates. Alpaca yarn is another excellent choice, known for being softer and warmer than wool.
Softness: Since your crochet ear warmer will sit directly against your ears and forehead, choose a yarn that feels soft and comfortable against the skin. Avoid scratchy or stiff yarns, especially for children’s ear warmers. Test the yarn by rubbing it against the inside of your wrist before purchasing.
Elasticity: Look for yarns with some natural stretch or bounce. Yarns that are too rigid will result in a stiff ear warmer that does not conform comfortably to your head. Wool, wool blends, and high-quality acrylics generally have the best elasticity for wearable projects.
For specific yarn recommendations, the Craft Yarn Council provides helpful standards and guidelines that can assist you in selecting the appropriate weight and fiber for your crochet ear warmer project.
How to Size Your Crochet Ear Warmer?
Getting the size right matters. Too small and it squeezes; too large and it slips down and won’t protect your ears. Here’s a simple sizing guide for a good fit:
Standard sizing chart:
- Toddler (ages 1-3): 17-18 inches circumference, 3.5-4 inches width
- Child (ages 4-10): 18-20 inches circumference, 4-4.5 inches width
- Teen/Small Adult: 20-21 inches circumference, 4-4.5 inches width
- Adult Medium: 21-22 inches circumference, 4.5-5 inches width
- Adult Large: 22-24 inches circumference, 5-5.5 inches width
How to measure: Use a flexible measuring tape to measure around your head, placing the tape about 1 inch above your eyebrows and ears, exactly where you want the ear warmer to sit. Subtract 1 to 2 inches from your measurement to account for stretch. Most crochet ear warmer patterns include some negative ease, meaning the finished piece is slightly smaller than your actual head circumference so it stretches to fit snugly.
Gauge matters. Always crochet a small gauge swatch (at least 4 inches square) before starting your ear warmer. This will tell you how many stitches per inch you are getting with your chosen yarn and hook. If your gauge does not match the pattern, adjust your hook size up or down until it does. Skipping this step is the number one cause of sizing issues in crochet projects.
What Are the Best Tips for Perfect Crochet Ear Warmers?
A few reliable tips to take your ear warmer from good to great:
Use stitch markers. Place a stitch marker at the beginning of each row or round to help you keep track of your starting point. This is especially helpful when working in the round or when your pattern requires consistent stitch counts across long rows.
Count your stitches. At the end of every row, take a moment to count your stitches and verify they match the pattern. It is much easier to fix a mistake immediately than to discover uneven edges several rows later. This simple habit will dramatically improve the quality of your finished work.
Block your finished piece. Blocking is the process of wetting or steaming your finished crochet piece and pinning it into shape to dry. This helps even out your stitches, relax the fabric, and give your ear warmer a polished, professional look. Simply spray your ear warmer with water, gently shape it on a blocking mat, and let it air dry completely.
Add a border. If your ear warmer edges are curling or look uneven, add a simple single crochet border around the entire piece. This frames the edges neatly and prevents rolling. You can also use a crab stitch (reverse single crochet) border for a decorative, rope-like edge.
Weave in ends securely. Take the time to weave in all yarn tails with a tapestry needle, weaving through at least 2 inches of stitches in different directions. This ensures your ends will not come loose during wearing or washing. A well-finished ear warmer looks clean and professional.
Experiment with color changes. If your crochet ear warmer pattern is worked in rows, try changing yarn colors every few rows for a striped effect. Striped ear warmers are eye-catching and fun to make, and they are a great way to use up small amounts of leftover yarn from other projects.
Make a gauge swatch first. We cannot stress this enough, a quick gauge swatch saves time and frustration. If your stitches are too tight, go up a hook size. If they are too loose, go down. Matching the pattern’s gauge ensures your ear warmer will be the correct size and have the right drape and stretch.
Frequently Asked Questions
How long does it take to crochet an ear warmer?
Most ear warmers take 2 to 4 hours, which makes them one of the fastest wearables you can crochet. Beginners might be closer to 4 hours, experienced crocheters under 2. It depends on the pattern, stitch, and your speed.
What is the best yarn for a crochet ear warmer?
Medium worsted weight (size 4) is the best choice. Acrylic is affordable and easy to care for; wool and wool blends give more warmth. Look for a soft, medium-weight yarn with good elasticity for the most comfortable fit.
How do I size a crochet ear warmer?
Measure your head circumference where you want the ear warmer to sit, usually about 1 inch above the ears. Standard adult sizes range from 20 to 24 inches in circumference. The ear warmer should measure about 1 to 2 inches less than your head measurement for a snug but comfortable fit. Always crochet a gauge swatch first to ensure accurate sizing.
Can a beginner make a crochet ear warmer?
Absolutely, an ear warmer is an excellent beginner project, needing only basic stitches like single, half double, and double crochet. Many free patterns use simple repeating rows you can finish in one sitting. If you’re new, start with a ribbed or moss-stitch version, both are forgiving and easy to master.
How do I keep my crochet ear warmer from curling?
Curling happens when the edges roll inward. To prevent it, add a single crochet border around the whole piece after finishing, and block it, wet it, pin it flat, and let it dry. A larger hook can help too by relaxing the fabric.