No-Sew Crochet Dragon Pattern in 7 Easy Parts (Free)
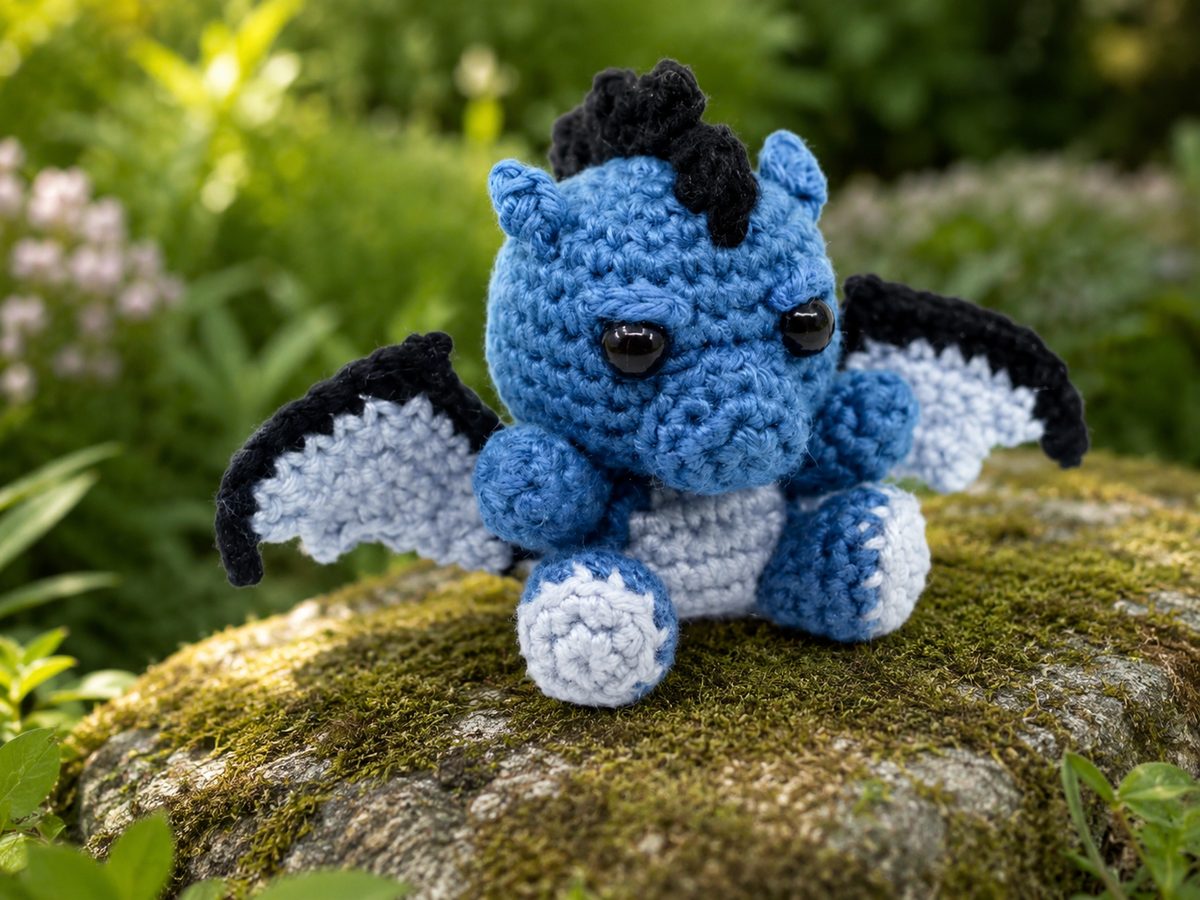
This no-sew crochet dragon pattern builds a chubby little dragon without a single seam: the head and body are one continuous piece, the arms and feet pop out as bobble stitches while you crochet past, and the tail, two-tone wings, black head crest, ears and belly patch are all worked directly onto the finished body with surface crochet. No pinning wings in place, no sewing a tail on crooked. When the last end is woven in, the dragon is done and slightly smug about it.
As an Amazon Associate we earn from qualifying purchases: some supply links in this post are affiliate links, at no extra cost to you.
Crochet Dragon Pattern at a Glance
- Skill level: Confident beginner
- Time needed: about 3 hours
- Finished size: about 12 cm tall in smooth worsted, 15-16 cm in chenille
Materials
- Smooth worsted weight (#4) cotton, the yarn in our photos: about 50 g mid blue (body), 15 g light blue (belly, wing undersides, toe caps) and 10 g black (crest and wing edges). Chenille works for a bigger, squishier dragon with softer detail
- 3.5 mm (US E/4) hook for worsted, or 4.5 mm (US 7) for chenille
- Pair of 8 mm safety eyes (6 mm for a smaller look, or embroider eyes for baby-safe toys)
- Fiberfill stuffing, a generous handful
- Stitch marker and yarn needle
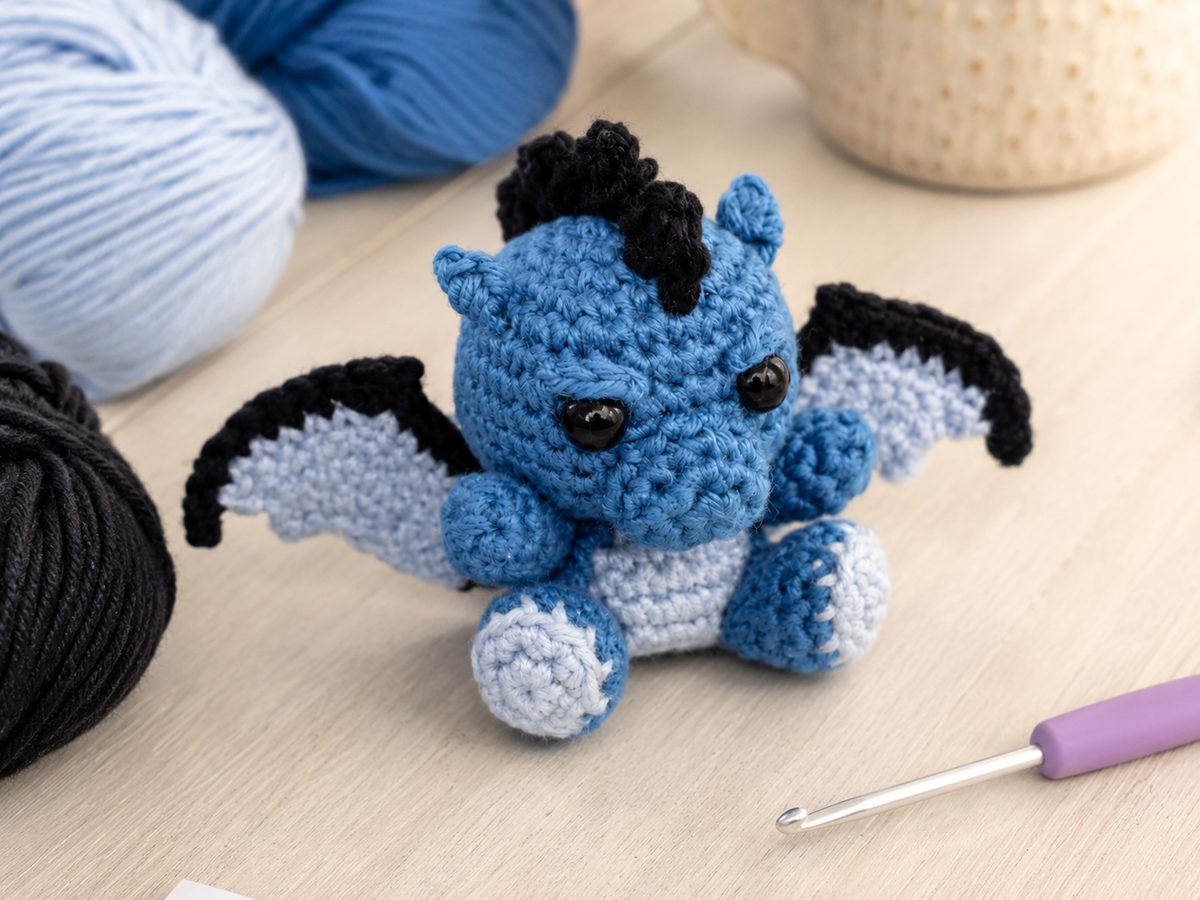
Whichever yarn you choose for this crochet dragon pattern, size your hook down from the Craft Yarn Council recommendation so the stuffing never peeks through.
Abbreviations (US Terms)
- MR: magic ring
- sc: single crochet
- inc: 2 sc in the same stitch
- dec: invisible decrease (2 stitches worked together)
- pc: popcorn, 5 dc in one stitch, remove hook, pull the loop through the first dc
- jumbo pc: popcorn with 7 dc instead of 5, for the feet
- dc: double crochet
- hdc: half double crochet
- ch: chain
- sl st: slip stitch
- (…) xN: repeat the bracket N times
The whole crochet dragon pattern is worked in a continuous spiral. Don’t join rounds, just move the stitch marker up as you go.
Crochet Dragon Pattern: Step by Step
Part 1: Head into Body (mid blue)
This crochet dragon pattern starts at the top of the head and grows downward, so the face is in front of you the whole time and eye placement is easy to judge.
R1: MR, 6 sc. (6)
R2: inc x6. (12)
R3: (1 sc, inc) x6. (18)
R4: (2 sc, inc) x6. (24)
R5-R8: sc around. (24, 4 rounds)
Place the safety eyes between rounds 6 and 7, about 6 stitches apart. Snap the backs on now.
R9: (2 sc, dec) x6. (18) This is the neck. Stuff the head firmly before moving on.
R10: (2 sc, inc) x6. (24)
R11: (3 sc, inc) x6. (30)
R12 (arms): sc 7, pc, sc 6, pc, sc 15. (30) The two popcorns are the arms, sitting just below the neck on the front half.
R13: sc around. (30)
R14 (feet): sc 8, jumbo pc, sc 4, jumbo pc, sc 16. (30) The bigger popcorns are the feet, centered under the arms.
R15-R16: sc around. (30, 2 rounds)
R17: (3 sc, dec) x6. (24)
R18: (2 sc, dec) x6. (18) Stuff the body firmly, pushing fiberfill behind the arms and feet so they bump outward.
R19: (1 sc, dec) x6. (12)
R20: dec x6. (6) Top up the stuffing, fasten off, thread the tail through the front loops of the last 6 stitches and cinch closed. The cinch point is the dragon’s bum, which is exactly where the tail goes next.
Part 2: The Crocheted-On Tail (mid blue)
Set-up: Surface slip stitch a ring of 8 stitches around the cinch point at the lower back.
R1: Work 8 sc into the ring. (8)
R2-R3: sc around. (8, 2 rounds)
R4: (2 sc, dec) x2. (6)
R5: sc around. (6)
R6: (1 sc, dec) x2. (4) Stuff the tail lightly with your hook tip as you go.
R7: sc around, then dec x2. (2) Fasten off and pull the end through the tip. Bend the finished tail into a gentle S curve.
Part 3: The Two-Tone Wings (light blue and black)
Each wing is a small fan worked from a surface line on the shoulder blade, finished with a black edging row along the top for that classic storybook look.
Set-up: With light blue, surface slip stitch a line of 4 stitches down one shoulder blade, angled slightly toward the tail.
Row 1: Ch 1, then into the 4 surface stitches work: sc, hdc, dc, dc. Turn. (4)
Row 2: Ch 3, dc in the first st, ch 1, (dc, ch 3, sl st) in the next st, sl st in the next, (hdc, ch 2, sl st) in the last. Do not fasten off yet. The chains and dips form two scalloped points.
Edging row: Change to black, ch 1, and work sc evenly along the entire top edge of the wing, from body to wing tip. Fasten off and weave both ends into the body. The dark edge stiffens the wing so it stands up off the back on its own.
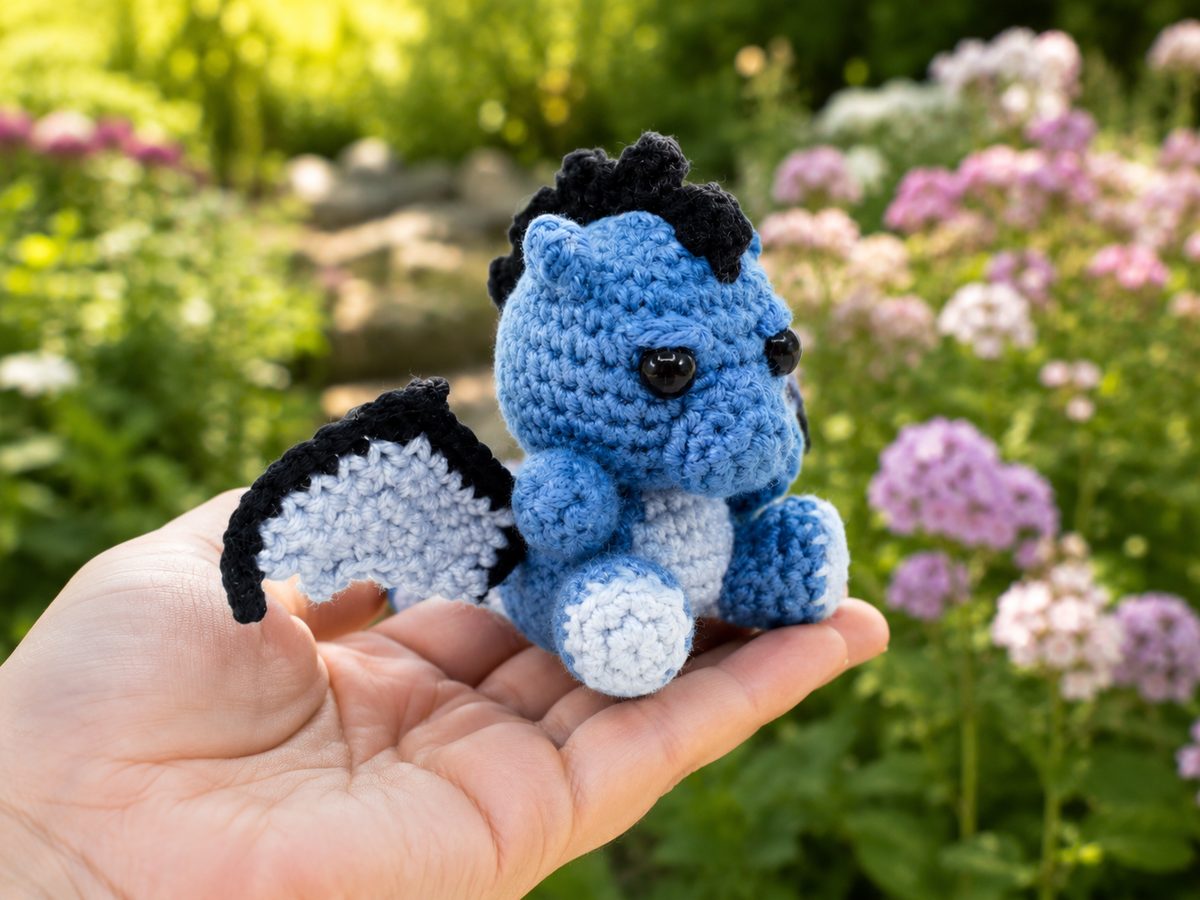
Repeat on the other shoulder blade, mirroring the angle so the wings sweep back symmetrically.
Part 4: The Black Head Crest
Set-up: With black, surface slip stitch a line of 6 stitches over the top of the head, running from just behind the forehead back toward the neck, between where the ears will go.
Crest row: Working back along the line: *sl st in the first st, ch 2, dc in the same st, sl st in the next st.* Repeat from * to the end of the line. The three bumpy points read as a proper little dragon mohawk, just like the photos.
Part 5: The Ears (mid blue)
Make 2: Surface slip stitch a line of 3 stitches on the side of the head, level with the top of each eye. Row 1: ch 1, sc 3, turn. Row 2: ch 1, sc 1, dec, turn. Row 3: ch 1, dec. Ch 1, sc down the side of the little triangle, sl st into the head and fasten off. Pinch the base gently so the ear cups forward.
Part 6: Belly Patch, Toe Caps and Snout (light blue and mid blue)
Belly patch: With light blue, surface slip stitch a vertical line of 5 stitches up the center of the tummy, between the feet and up toward the neck. Work rows of hdc back and forth along it (5, 6, 6, 5 stitches), slip stitching the end of every row into the body fabric so the patch lies flat against the belly. Fasten off.
Toe caps: With light blue, work 6 sc directly around the front face of each jumbo popcorn foot, then a second round of 6 sc, and sl st into the body. The pale caps make the feet read as proper paws.
Snout: With mid blue, surface slip stitch a short arc of 3 stitches under the eyes and work 3 sc into it, then a second row of 3 sc on top. This tiny ledge gives the face a muzzle bump without a separate piece.
Part 7: Finishing
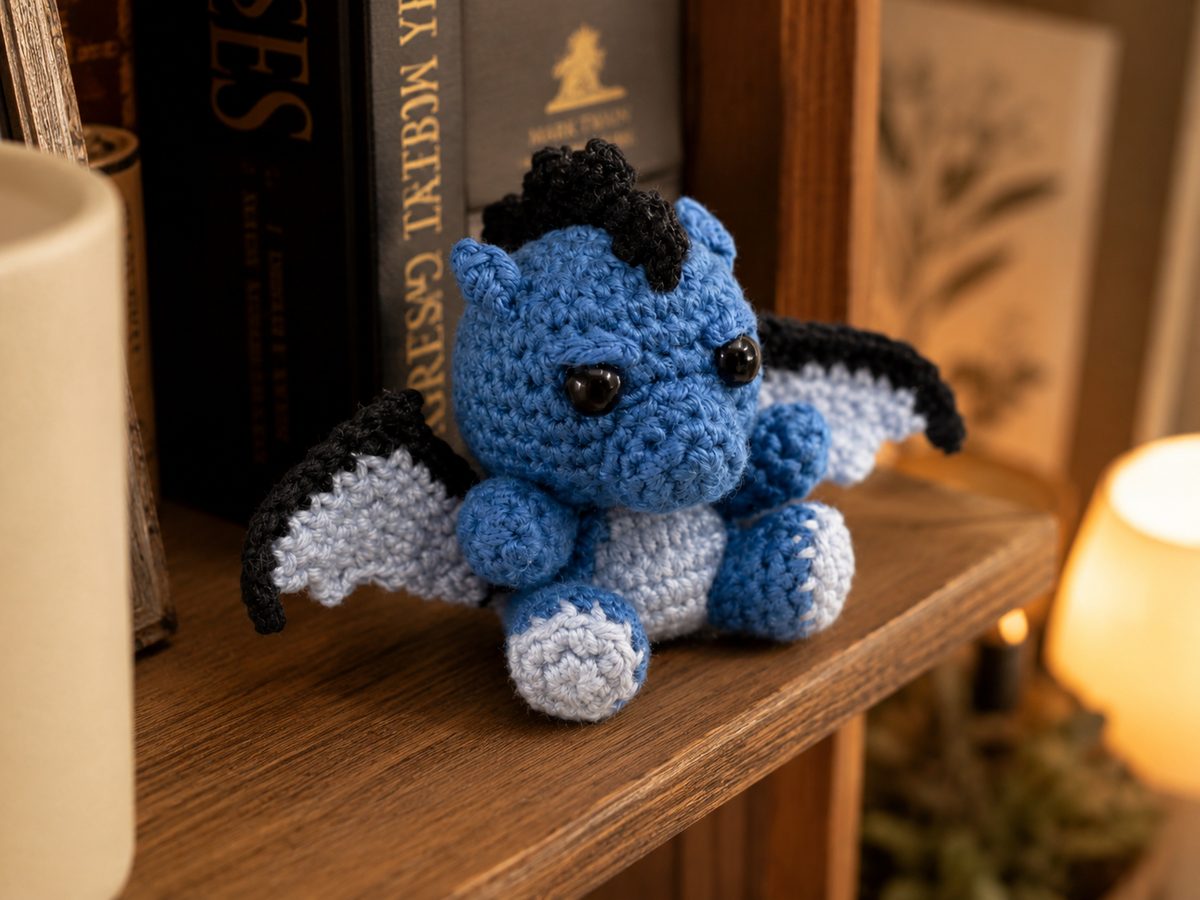
Weave every end into the body. Roll the dragon between your palms to even the stuffing, curve the tail, fan the wings open, and check the crest runs straight over the crown. Done: one small dragon, zero seams, full attitude.
Tips for a Better No-Sew Dragon
- Surface crochet loosely. Every feature in this crochet dragon pattern rides on surface slip stitches, and tight ones dent the body. Keep them relaxed and the features sit proud of the fabric instead of pinching it.
- Wings before the crest. The crest line ends between the shoulder blades, so placing wings first makes the spacing obvious.
- Three yarns, one weight. A thinner contrast yarn makes floppy wings and a shy crest. Match weights and everything keeps its shape.
- Count from the eyes. Ears, crest and snout all place themselves relative to the eyes, so double-check eye symmetry before starting the add-ons.
Complete the no-sew pocket zoo: the no-sew triceratops and pocket pig use the same popcorn-limb and surface-crochet tricks, and if you want more winged and scaled inspiration, our crochet dragon amigurumi roundup collects seven designs from around the community.