No-Sew Triceratops Crochet Pattern in 6 Easy Parts (Free)
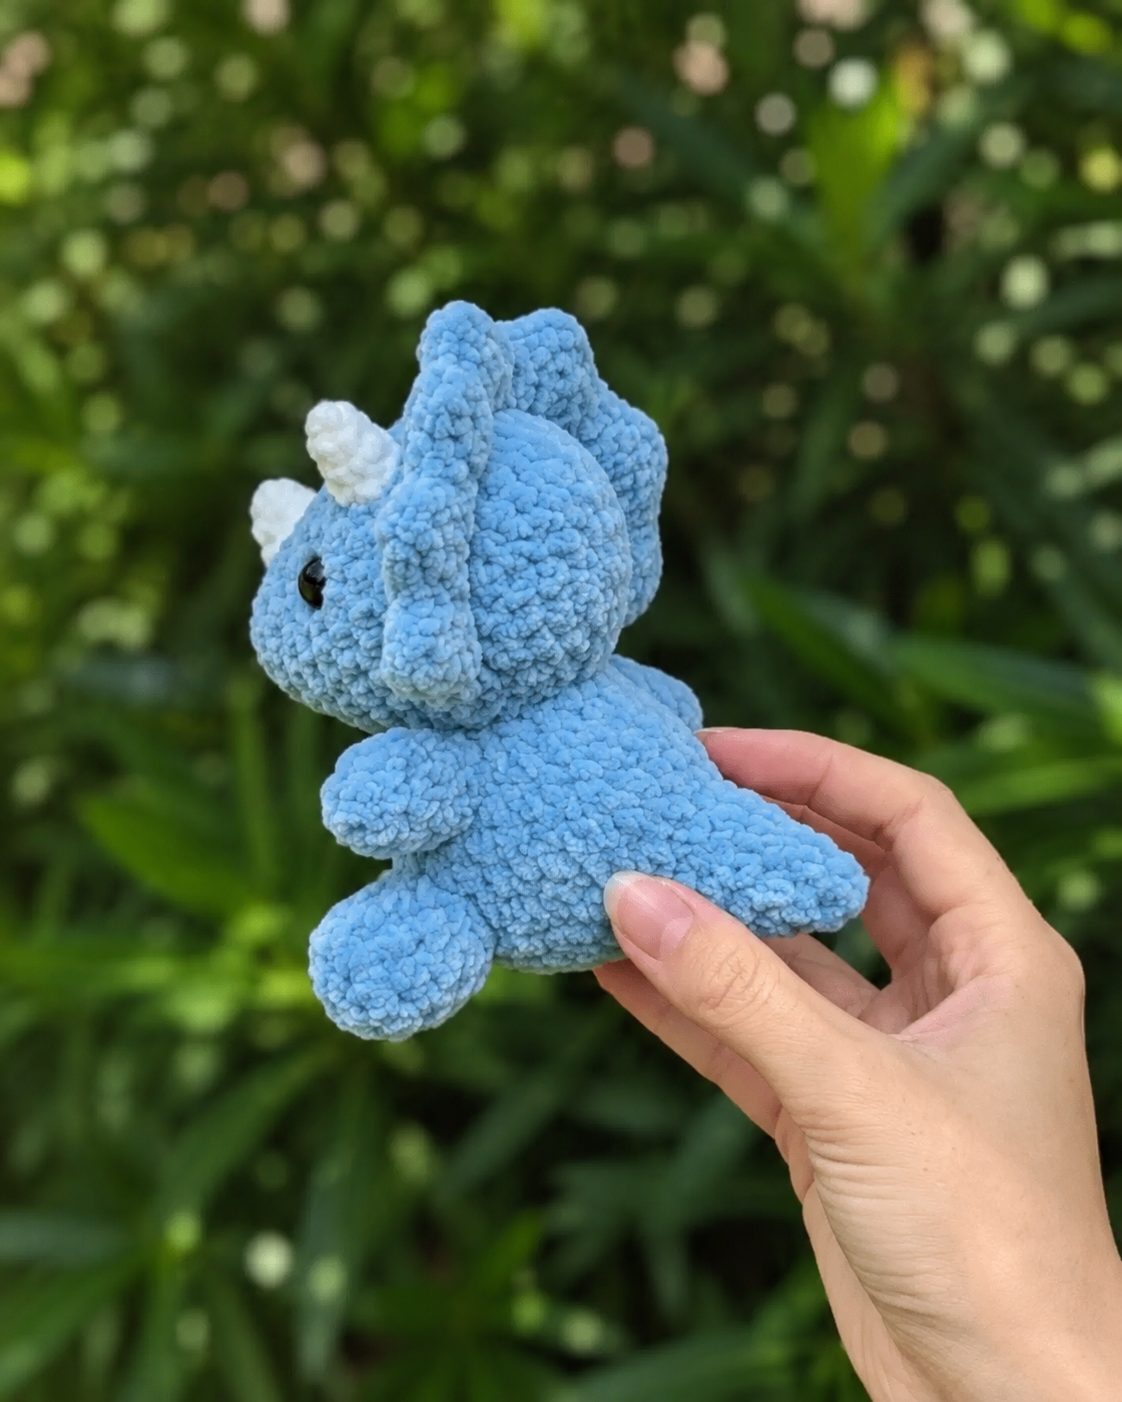
This no-sew triceratops crochet pattern builds the whole dinosaur as one continuous piece: you start at the tip of the tail, widen into a plump little body, and keep going straight up into the head without ever fastening off. The legs are popcorn stitches that bump out of the body as you crochet past, and the famous frill and three horns are worked directly onto the head surface. No sewing session at the end, no lopsided limb placement, when the yarn runs out of jobs, the dino is done.
As an Amazon Associate we earn from qualifying purchases: some supply links in this post are affiliate links, at no extra cost to you.
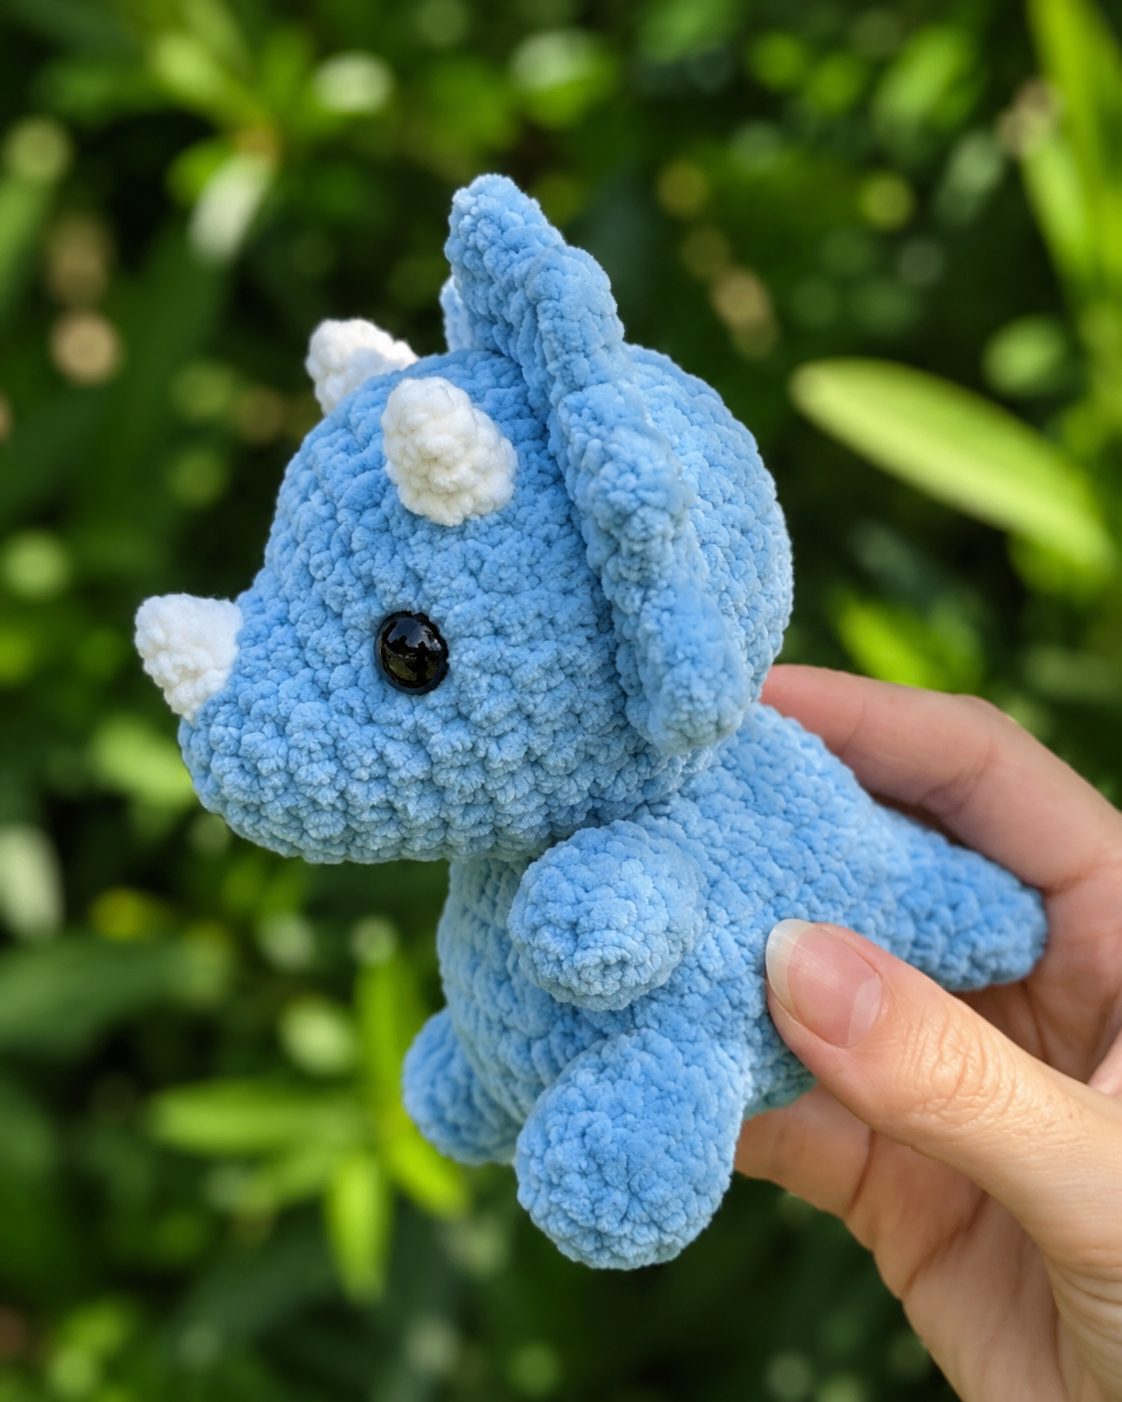
If you’ve tried amigurumi before and given up at the assembly stage (we’ve all pinned a head on five times), this construction is the cure. And if this is your first toy, the whole thing is single crochet in a spiral with one bobble stitch thrown in.
Why You’ll Love This Triceratops Crochet Pattern
- Genuinely no-sew. Tail, body, head, legs, frill and horns, all connected as you crochet. The only needle work is weaving in ends.
- One evening make. Roughly 3-4 hours of relaxed hooking.
- 6 clear parts. Each stage is short, and you can put it down anywhere without losing your place.
- Beginner-safe skills. Magic ring, single crochet, increase, decrease, and one popcorn stitch. That’s the whole list.
Triceratops Crochet Pattern at a Glance
- Skill level: Confident beginner
- Time needed: 3-4 hours
- Finished size: about 18 cm nose-to-tail in smooth worsted, a chunky 22 cm in chenille
Materials
- Worsted weight (#4) yarn: about 60 g soft blue (body) and 15 g white (frill and horns). For the plush look in our photos use a chenille or velvet blanket-style yarn; a smooth worsted also works and gives a smaller, crisper dino
- 3.5 mm (US E/4) hook for worsted, or 4.5 mm (US 7) for chenille, smaller than the yarn label suggests, on purpose
- Pair of 8 mm safety eyes (or black yarn to embroider eyes for baby-safe toys)
- Fiberfill stuffing, about a fistful
- Stitch marker and yarn needle for the ends
Any smooth worsted works for this triceratops crochet pattern; if you substitute a different weight, size your hook down from the Craft Yarn Council recommendation so the stuffing can’t peek through.
Abbreviations (US Terms)
- MR: magic ring
- sc: single crochet
- inc: 2 sc in the same stitch
- dec: invisible decrease (2 stitches worked together)
- pc: popcorn: 5 dc in one stitch, remove hook, pull the loop through the first dc
- dc: double crochet
- sl st: slip stitch
- (…) ×N: repeat the bracket N times
The whole triceratops crochet pattern is worked in a continuous spiral, don’t join rounds, just move your stitch marker up each round.
Triceratops Crochet Pattern: Step by Step
Part 1: Tail into Body (blue)
The tail tip is the very first stitch of the project. Increases along one side keep the tail curving slightly upward.
R1: MR, 4 sc. (4)
R2: sc around. (4)
R3: (1 sc, inc) ×2. (6)
R4: sc around. (6)
R5: (2 sc, inc) ×2. (8)
R6: (3 sc, inc) ×2. (10)
R7: (4 sc, inc) ×2. (12)
R8: (1 sc, inc) ×6. (18)
R9: (2 sc, inc) ×6. (24)
R10: (3 sc, inc) ×6. (30)
No stuffing yet, the tail stays floppy-cute, and the body gets stuffed later.
Part 2: Body with Popcorn Legs
The four legs are popcorn stitches worked as you pass. They sit in two pairs on the underside of the body, the side where your tail increases ended up is the top, so the popcorns go on the opposite side.
R11: sc around. (30)
R12 (back legs): sc 6, pc, sc 4, pc, sc 18. (30)
R13-R14: sc around. (30, 2 rounds)
R15 (front legs): sc 6, pc, sc 4, pc, sc 18. (30)
R16: sc around. (30)
R17: (3 sc, dec) ×6. (24)
R18: (2 sc, dec) ×6. (18)
Stuff the body of your triceratops firmly now, pushing fiberfill into the hips around the popcorn legs so they bump outward.
Part 3: Straight into the Head
Don’t fasten off, the next increase round IS the neck. This is the no-sew moment that makes the whole pattern.
R19: (2 sc, inc) ×6. (24)
R20: (3 sc, inc) ×6. (30)
R21: (4 sc, inc) ×6. (36)
R22-R26: sc around. (36, 5 rounds)
Place the safety eyes between rounds 23 and 24, about 7 stitches apart, centered over the front legs. Snap the backs on now, you can’t reach in later.
R27: (4 sc, dec) ×6. (30)
R28: (3 sc, dec) ×6. (24)
R29: (2 sc, dec) ×6. (18)
Stuff the head firmly, topping up the neck so it doesn’t crease.
R30: (1 sc, dec) ×6. (12)
R31: dec ×6. (6) Fasten off, thread the tail through the front loops of the last 6 stitches, and cinch closed.
Part 4: The Crocheted-On Frill (white)
The frill is worked straight onto the head fabric, no separate piece, no sewing.
Set-up: With white yarn, surface slip stitch an arc of 15 stitches over the top of the head, running from one side of the neck, up and over between the eyes and the crown, down to the other side. Each surface stitch grabs one head stitch.
Frill Row 1: Ch 2, then work 2 hdc into each surface stitch along the arc. (30 hdc)
Frill Row 2: Ch 2, hdc in each stitch across. (30 hdc)
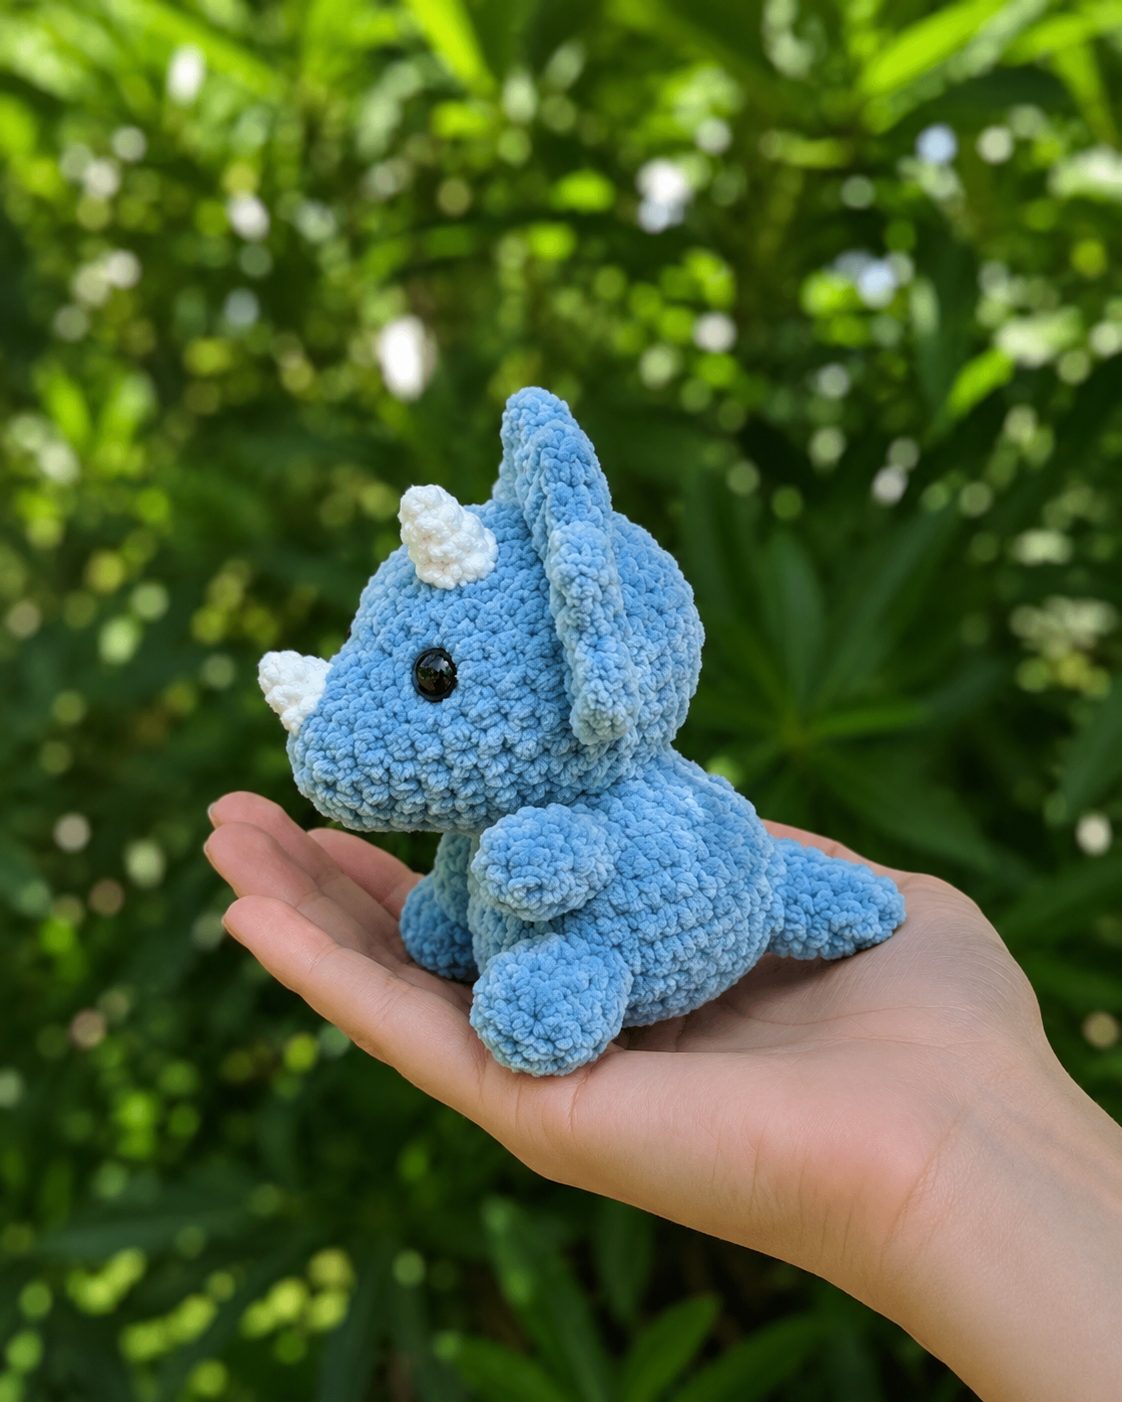
Frill Row 3: Ch 1, sc in each stitch across, working 2 sc in the first and last stitch to round the corners. Fasten off and weave the end into the head. The result is the solid, rounded frill plate you see in the photos, working into the surface stitches makes it stand up on its own.
Part 5: Three Horns (white)
Brow horns (make 2): Surface slip stitch a small ring of 5 stitches on the head just above and behind each eye. Work 5 sc into the ring, then 2 rounds of 5 sc even, then dec, dec, sc 1. Poke a wisp of fiberfill in with your hook tip, fasten off and pull the end through the tip to close.
Nose horn (make 1): Surface slip stitch a ring of 4 stitches on the snout, two rounds below the eyes. Work 4 sc in the ring, 1 round even, then dec ×2. Fasten off and close.
Part 6: Finishing
Weave every end into the body. Roll the dino gently between your palms to even out the stuffing, and bend the tail into a little curve. If you skipped safety eyes, embroider two sleepy line-eyes with black yarn now, they suit this chunky face just as well.
Triceratops Crochet Pattern FAQ
What does no-sew mean here?
Every part is either crocheted continuously or worked directly onto the body, tail into body into head, popcorn legs made in passing, frill and horns crocheted onto the head surface. The only needle work is weaving in ends.
Is it baby-safe?
Swap the safety eyes for embroidered yarn eyes and yes, everything else is one connected piece with nothing to detach.
What yarn works best?
Chenille or velvet blanket yarn gives the plush look in our photos; a smooth worsted is easier to count if this is your first amigurumi. Either way go down a hook size so the stuffing stays hidden.
How firm should the stuffing be?
Firmer than feels natural, especially through the neck, under-stuffed amigurumi wrinkle there once the head gains weight.
If you hook up this triceratops crochet pattern, send us a photo through the contact page, we feature reader makes right here on the post. Happy crocheting!