Crochet Mesh Top: Free Pattern in 5 Sizes
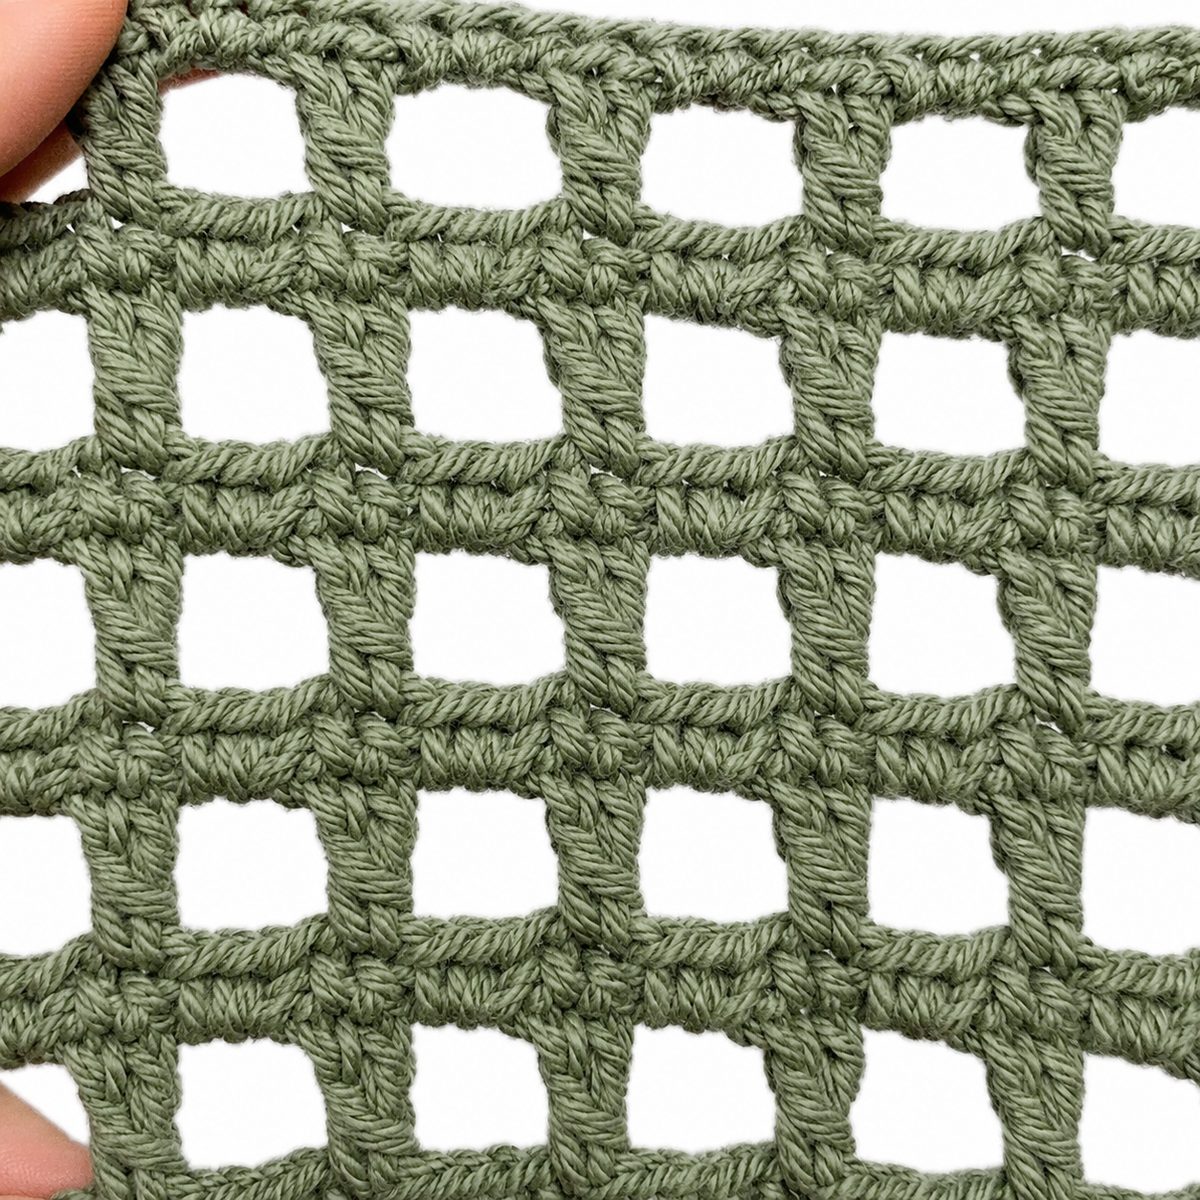
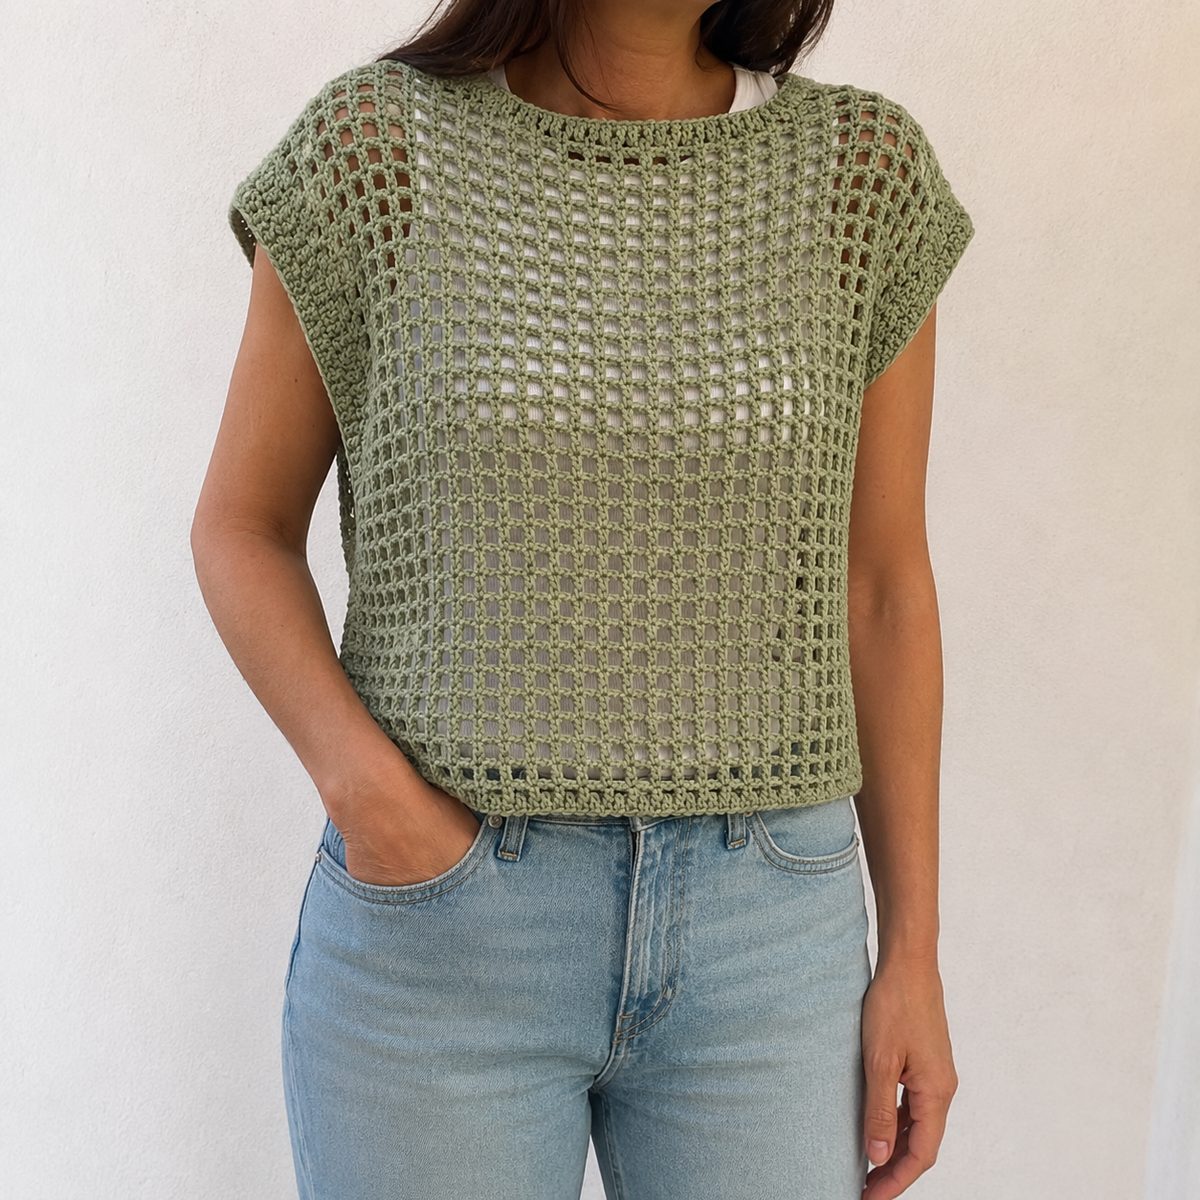
This crochet mesh top is two flat rectangles and nothing else: no shaping, no sleeves to set in, no pattern reading beyond one mesh row you’ll memorize in minutes. The dc and ch-1 mesh makes an airy, see-through grid that drapes beautifully in cotton, and the boxy silhouette comes entirely from where you place the seams. If you can chain and double crochet, you can wear this by the weekend.
As an Amazon Associate we earn from qualifying purchases: some supply links in this post are affiliate links, at no extra cost to you.
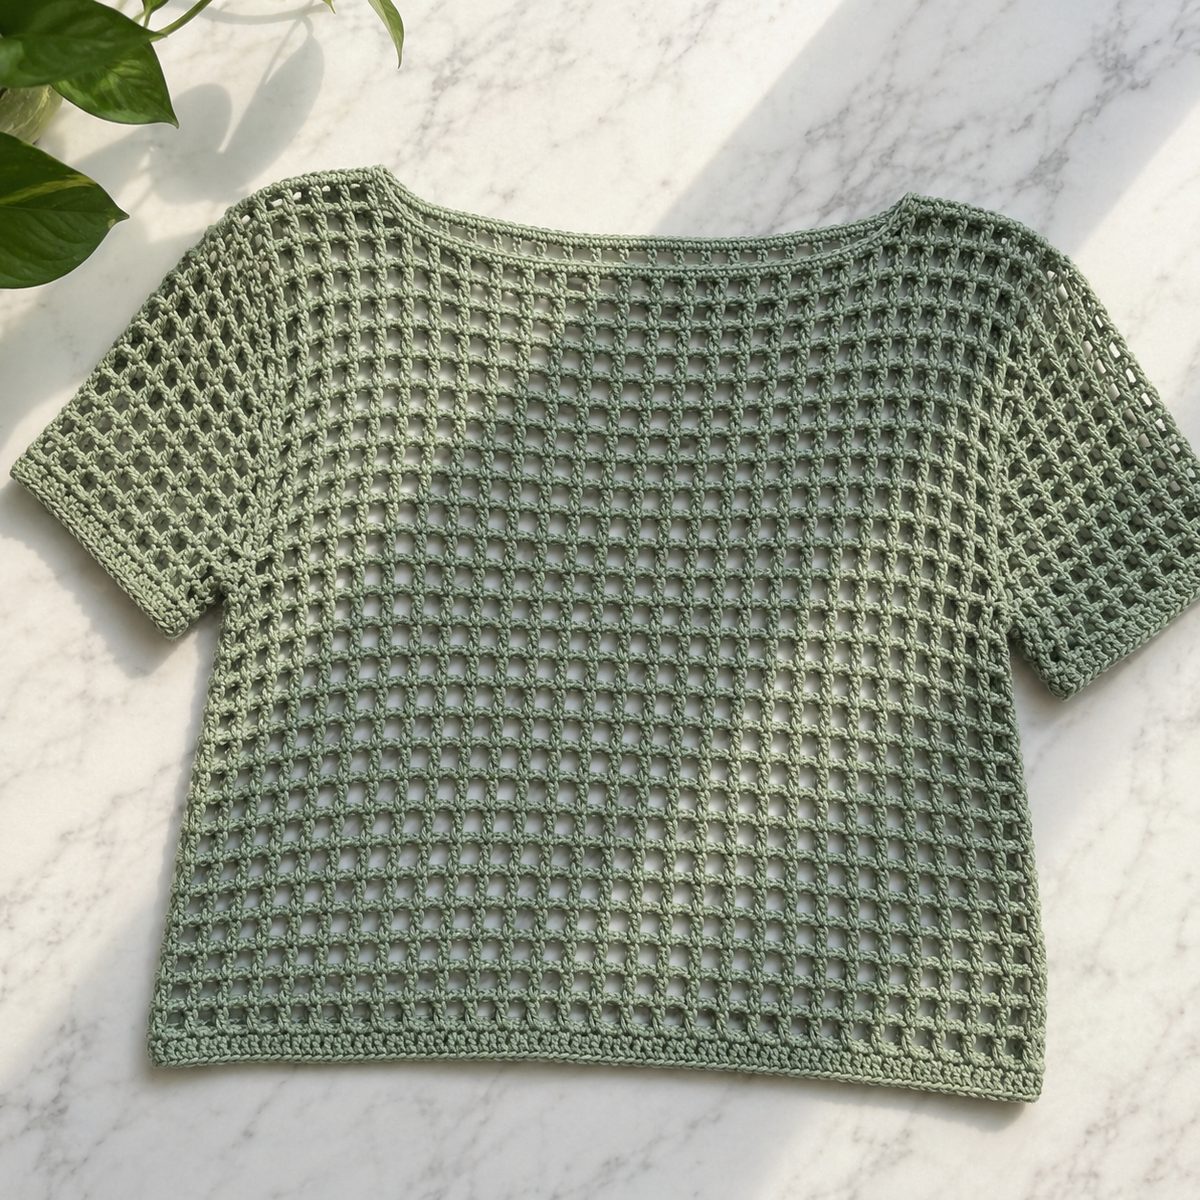
We wrote it in five real sizes with reconciled chain counts and a gauge you can actually check, because “chain a lot and hope” is not a sizing method. Every size follows the same three steps: make two rectangles, block them, sew three short seams.
Why You’ll Love This Crochet Mesh Top
- One row, repeated. The entire fabric is a single mesh row worked over and over. True beginner territory.
- 5 sizes that reconcile. S to 2XL with exact chain counts, box counts and seam measurements for each.
- No shaping at all. The neckline and armholes are just gaps you leave while seaming.
- Fast for a garment. Airy mesh grows quickly; each panel is a few relaxed evenings.
Crochet Mesh Top at a Glance
- Skill level: Confident beginner
- Time needed: a weekend of evenings per panel, one evening for seams and edging
- Fit: boxy, with about 8 to 10 cm of positive ease at the bust
Materials
- DK weight (#3) cotton or cotton blend: about 380 (430, 480, 530, 580) m for sizes S (M, L, XL, 2XL). Our sample uses sage green.
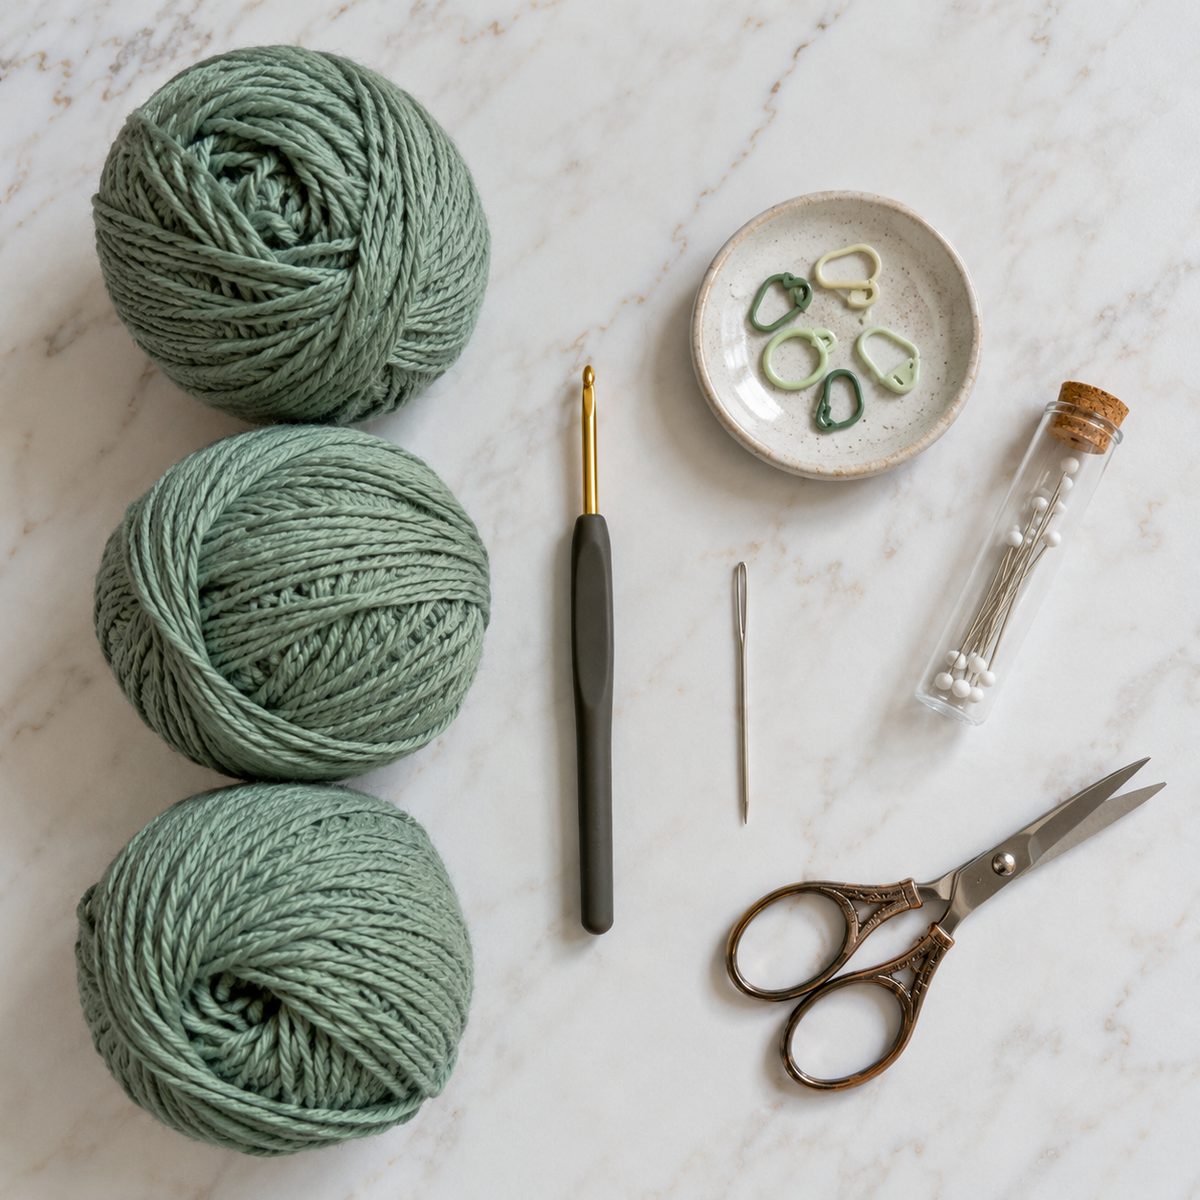
- 4.0 mm (US G/6) hook
- Yarn needle, scissors, stitch markers, blocking pins
Cotton shows the mesh grid crisply and survives summer washing. If you substitute, match the DK weight against the Craft Yarn Council standards and swatch before chaining a whole panel.
Gauge
10 mesh boxes and 10 rows = 10 cm by 10 cm, blocked. One box is one dc plus one ch-1 space, so each box is about 1 cm square. Swatch 15 boxes for 12 rows, block it, then measure the middle 10. If your boxes run wide, go down half a hook size; narrow, go up.
Abbreviations (US Terms)
- ch: chain
- dc: double crochet
- sc: single crochet
- sp(s): space(s)
- mesh box: one dc plus one ch-1 sp
Sizing Chart
| Size | To fit bust | Finished bust | Panel width (boxes) | Foundation chain | Rows (length) | Neck / armhole |
|---|---|---|---|---|---|---|
| S | 81 to 86 cm | 90 cm | 45 cm (45) | ch 94 | 55 (55 cm) | 24 cm / 18 cm |
| M | 91 to 96 cm | 100 cm | 50 cm (50) | ch 104 | 58 (58 cm) | 25 cm / 19 cm |
| L | 101 to 106 cm | 110 cm | 55 cm (55) | ch 114 | 60 (60 cm) | 26 cm / 20 cm |
| XL | 111 to 116 cm | 120 cm | 60 cm (60) | ch 124 | 62 (62 cm) | 26 cm / 21 cm |
| 2XL | 121 to 127 cm | 130 cm | 65 cm (65) | ch 134 | 64 (64 cm) | 27 cm / 22 cm |
Numbers are written as S (M, L, XL, 2XL) throughout. Want a longer tunic or a cropped version? Length is just rows: one row adds one centimeter, and nothing else changes.
Crochet Mesh Top Pattern: Step by Step
Step 1: The Panels (make 2 identical)
Every crochet mesh top panel starts the same way, whatever your size.
Foundation: Ch 94 (104, 114, 124, 134).
Row 1: Dc in the 6th ch from the hook (the 5 skipped chains count as 1 dc, 1 ch-1 sp and 1 skipped ch). *Ch 1, skip 1 ch, dc in the next ch.* Repeat from * to the end. (45 (50, 55, 60, 65) mesh boxes; 46 (51, 56, 61, 66) dc counting the turning chain)
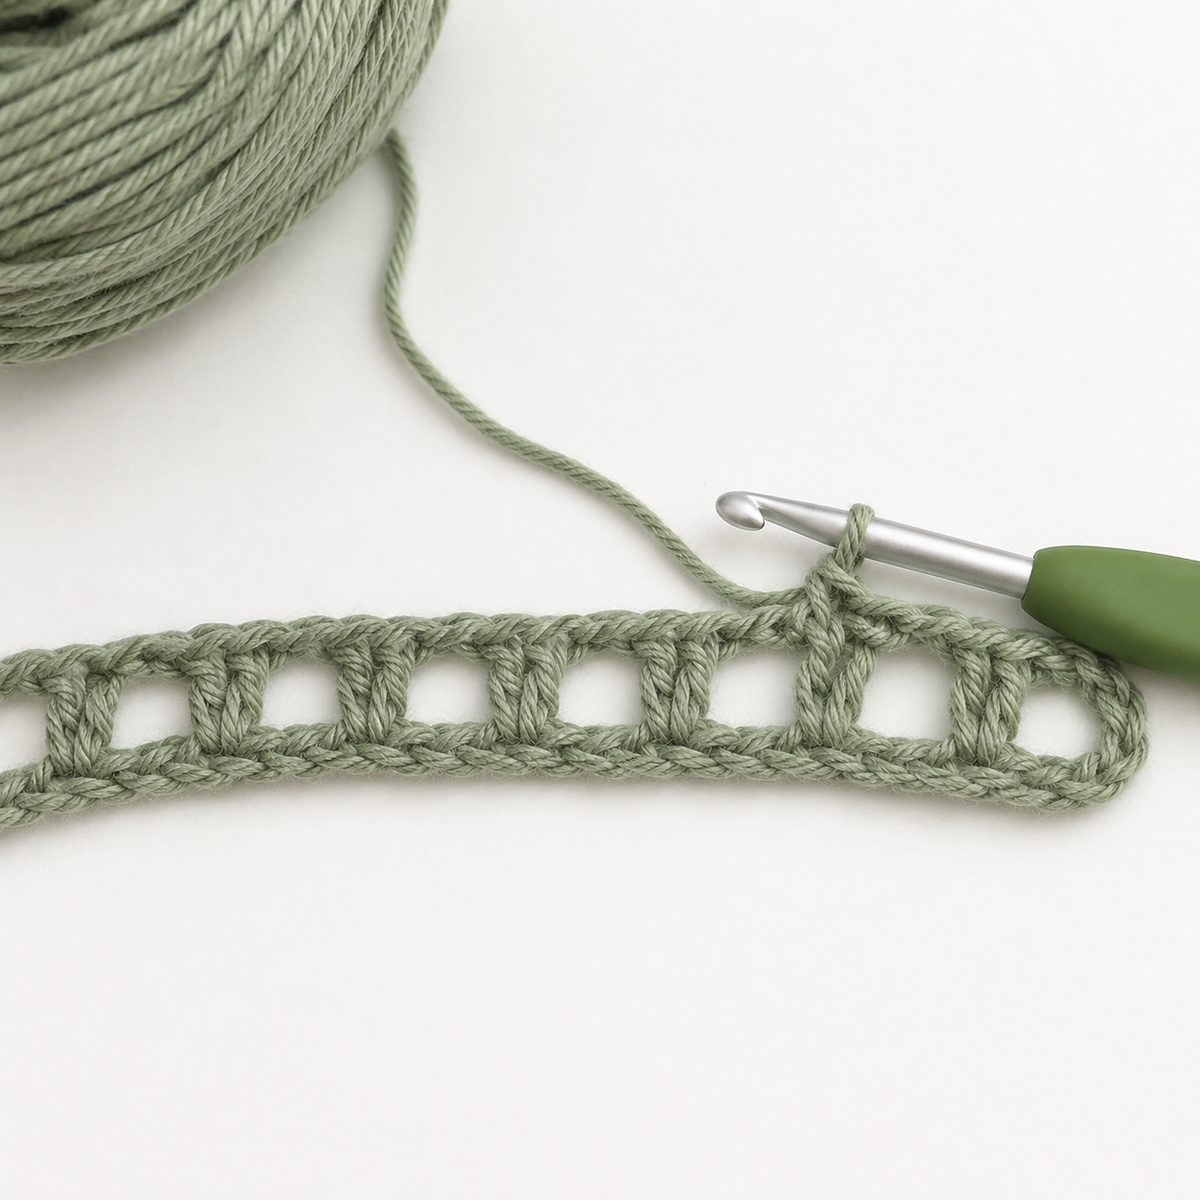
Row 2: Ch 4 (counts as dc plus ch 1), turn. Skip the first ch-1 sp, dc in the next dc. *Ch 1, skip the ch-1 sp, dc in the next dc.* Repeat from *, working the last dc into the 3rd ch of the previous row’s turning chain. (box count unchanged)
Rows 3 and up: Repeat Row 2 until you have 55 (58, 60, 62, 64) rows, or your desired length. Fasten off, leaving a 60 cm tail for seaming. Count your boxes every ten rows or so: the number never changes, and catching a lost edge stitch early beats frogging twenty rows later.
Optional square front neckline (the look in our photos): This is the one place this crochet mesh top offers any shaping, and it’s still just short rows. On the front panel only, stop 5 rows early. Next row: work across the first 11 (13, 15, 17, 19) boxes only, turn, and continue on just these boxes until the panel’s full row count; fasten off. Skip the center 23 (24, 25, 26, 27) boxes, rejoin with a standing dc in the next dc, and work the second shoulder strip to match. The center drop becomes a clean square neckline once the edging goes around it. Prefer zero shaping? Skip this: the plain slit neck from the seaming step works fine too.
Step 2: Block Both Panels
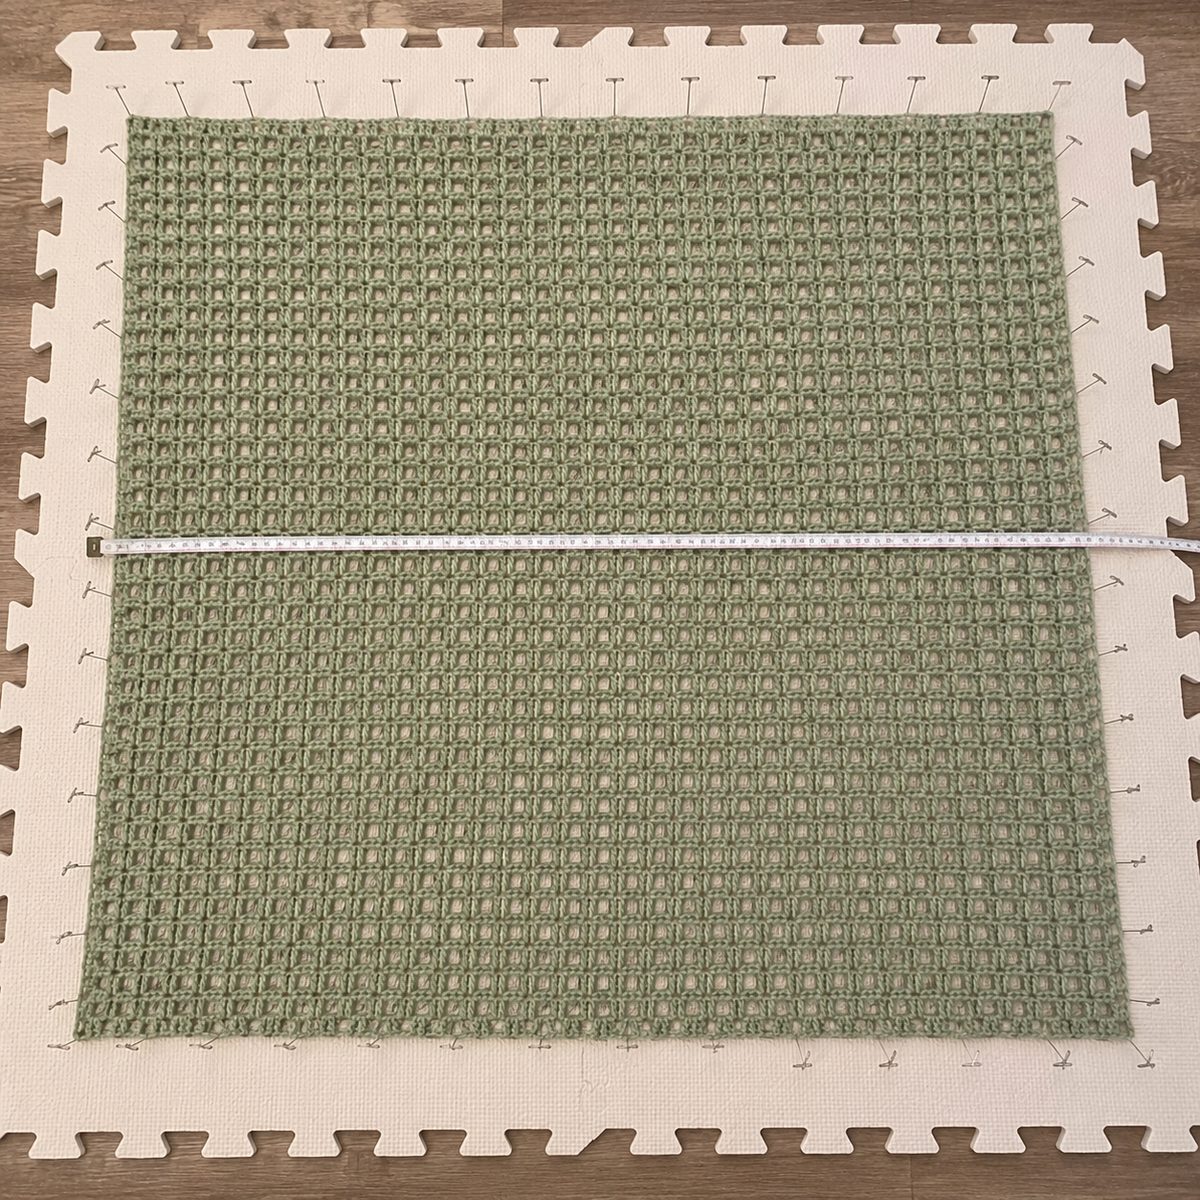
Do not skip this one. A crochet mesh top is mostly air, so wet block both rectangles to the panel measurements in the chart, pinning the edges straight and the corners square. Blocking is where it stops looking like a fishing net and starts looking like a garment.
Step 3: Shoulder Seams
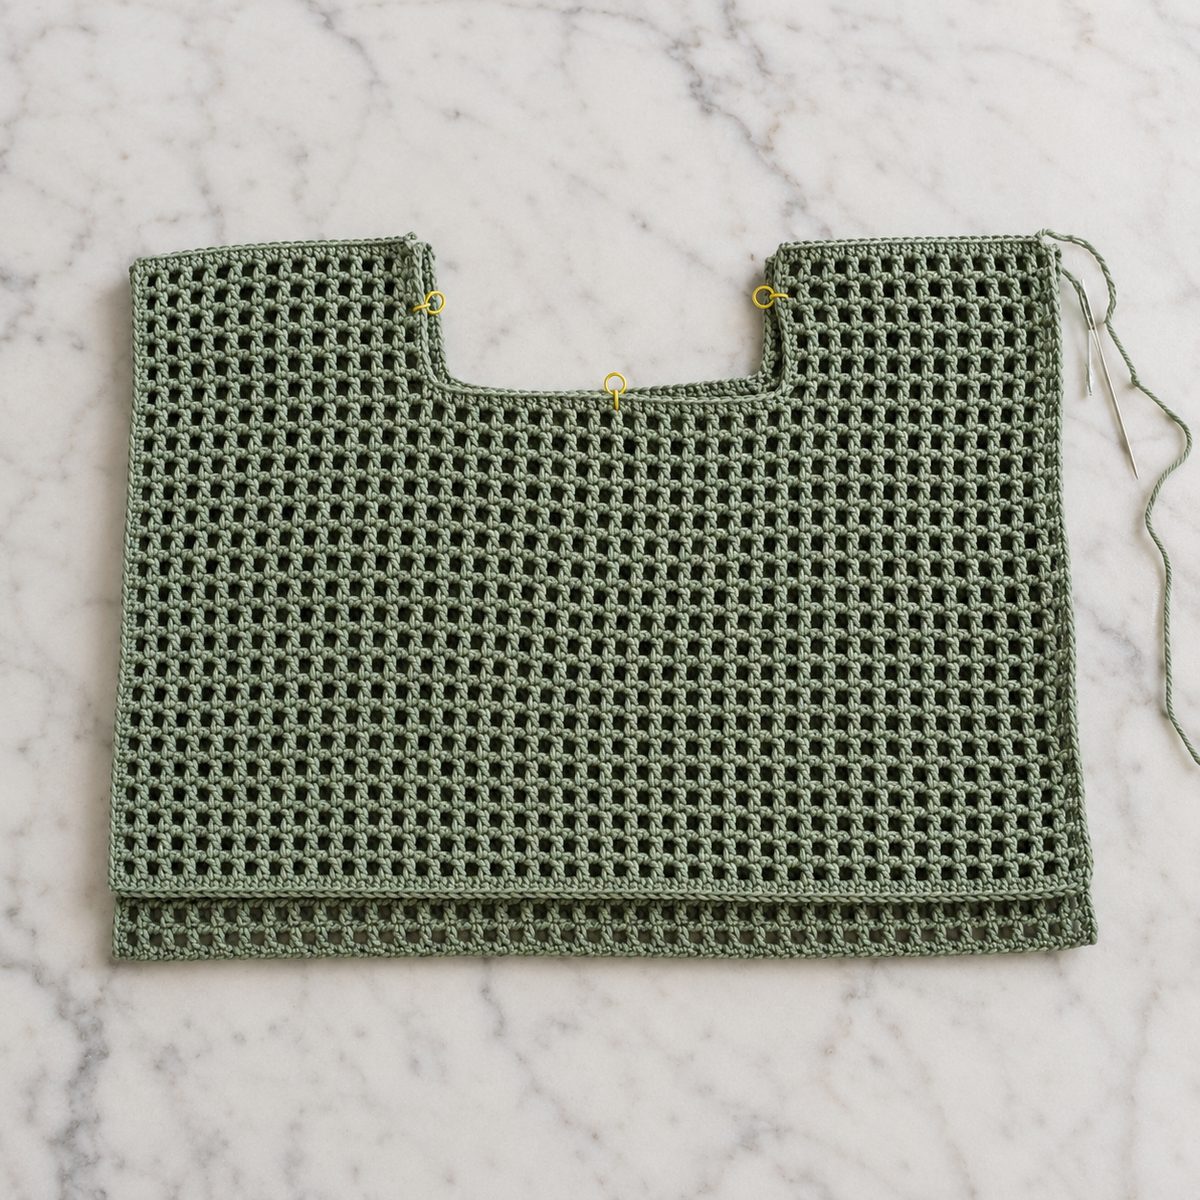
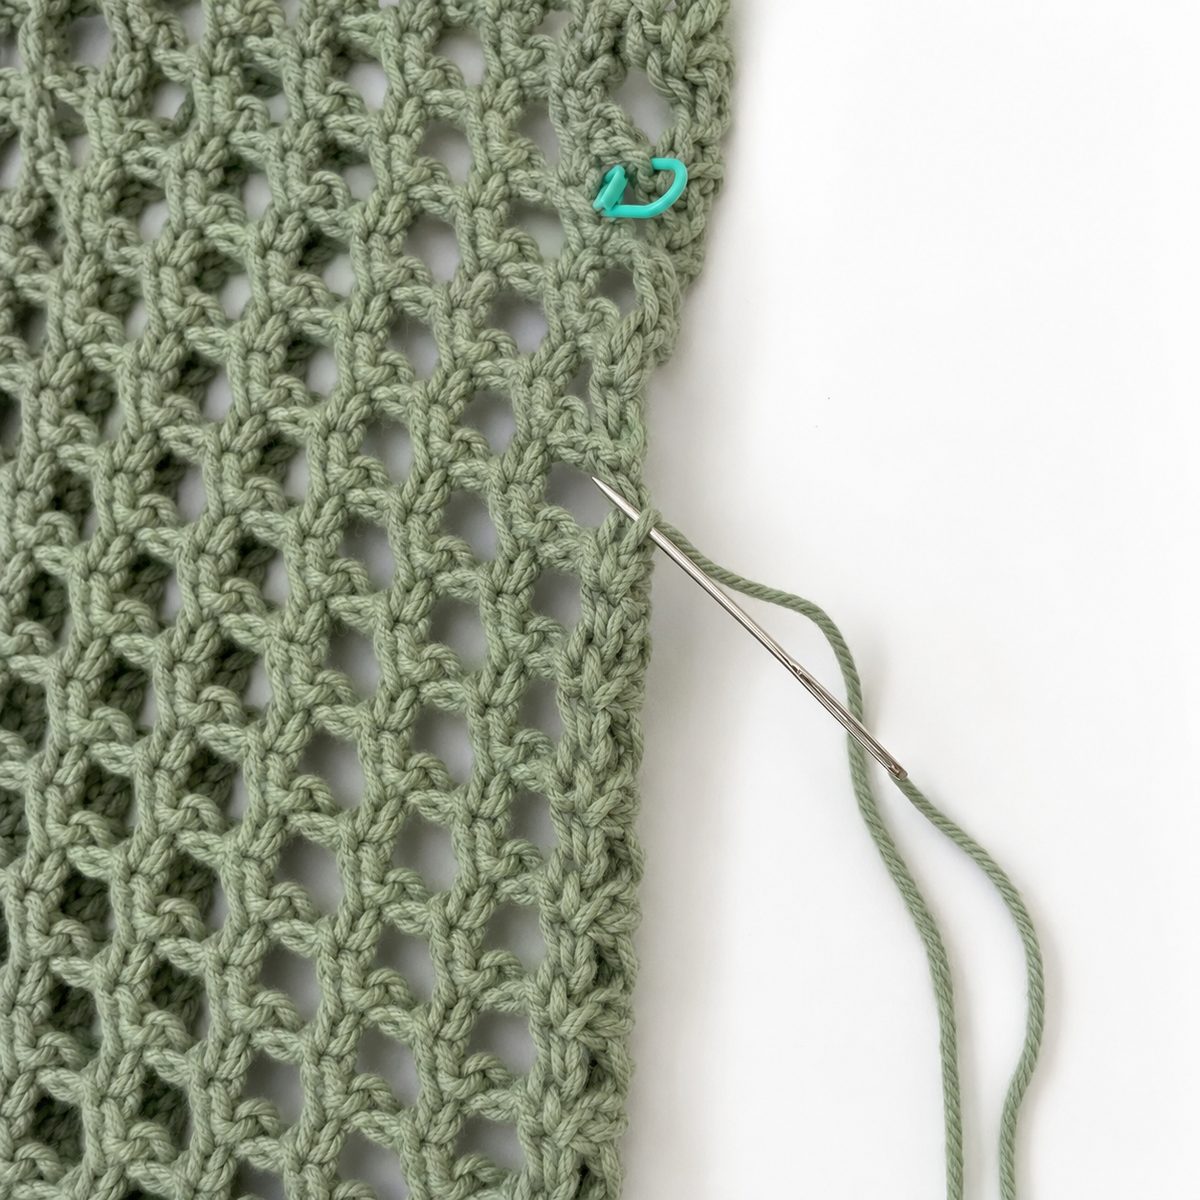
Lay the panels together, right sides out if your stitches have a side you prefer. Measure and mark the neck opening, centered: 24 (25, 26, 26, 27) cm. With the yarn needle, whip stitch each shoulder from the armhole edge in toward the marks, about 10.5 (12.5, 14.5, 17, 19) cm per side. The center stays open as the neckline. If you worked the square front neckline, whip stitch straight across each shoulder strip instead: the notch has already set your neck width.
Step 4: Side Seams
Mark 18 (19, 20, 21, 22) cm down from the shoulder fold on each side: that gap is the armhole. Whip stitch each side seam from the bottom hem up to the mark. Because the panels are wider than your body, the extra fabric folds over the shoulder and reads as a little cap sleeve.
Step 5: Edging (optional but worth it)
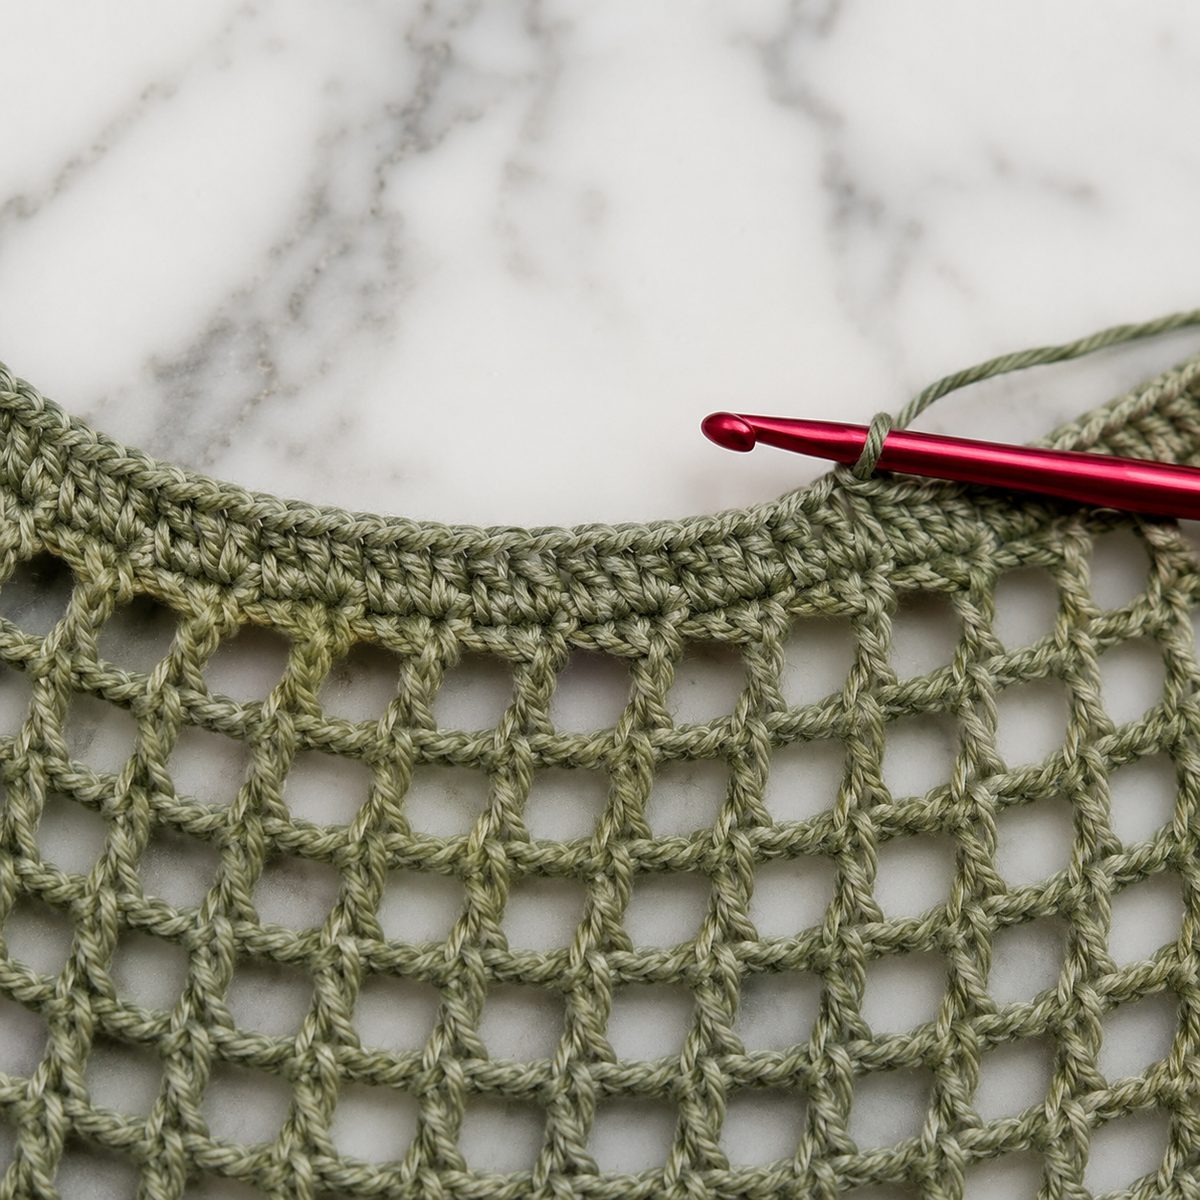
Join yarn anywhere on the neckline and work one round of sc: 2 sc in each mesh box along chain and hem edges, 2 sc around each row-end dc along the sides. Repeat around each armhole and the bottom hem. One round firms up every opening; for the wider solid bands you see in our photos, work 2 or 3 rounds at the neckline and hem before fastening off.
Tips for a Better Crochet Mesh Top
- Chain loosely or go up a hook size for the foundation only. A tight foundation chain bows the hem inward permanently.
- Count boxes, not stitches. Each row should end with exactly the box count from the chart; the turning chain is where miscounts hide.
- Block before seaming, always. Seams sewn through unblocked mesh lock in the wobble.
- Try the crochet mesh top on before edging. Slip it on after Step 4; if you want a deeper armhole, unpick a few whip stitches now rather than after the sc round.
Finish the set: our crochet mesh hat uses the same airy fabric in the round, the floral earring patterns cover the jewelry, and the granny square hub has 25+ blocks if you’d rather build fabric from squares.
Crochet Mesh Top FAQ
Can I make an in-between size?
Yes. Every 2 extra foundation chains add one box, about 2 cm around the finished body. Adjust in pairs from the nearest size.
Can I use worsted instead of DK?
Yes, with a 5.0 mm hook and a fresh swatch. Boxes run about 1.25 cm, so one chain-count size down usually lands near your target.
Will it stretch out?
Cotton mesh relaxes a little, mostly in length. Block the panels, dry it flat, and go down half a hook size for a firmer fabric.
What goes underneath?
A tank, bralette or slip. The see-through grid is the design, so let the underlayer be part of the outfit.
If you hook up this crochet mesh top, send a photo through the contact page: we feature reader makes, and garment photos help other crocheters pick their size. Happy crocheting!