Alpine Stitch Crochet: 7 Essential Tips for Beginners
Quick Answer
Alpine stitch crochet is a popular textured stitch pattern that combines rows of double crochet with front post double crochet stitches worked one row below, creating a stunning ridged or “peak” effect reminiscent of mountain ridges. This technique works well for intermediate crocheters looking to add dimensional interest to their projects. You only need to know basic stitches like the single crochet and double crochet to get started.
Tip: Always use a stitch marker to track your starting chain, the alpine stitch works in multiples and losing count can throw off the entire pattern.
At a Glance
- Skill level: intermediate
- Time needed: 2-4 hours for a small swatch; 20-40 hours for a blanket
- Best yarn: medium-weight (worsted) acrylic or wool blend
- Hook size: 5.0 mm (H-8) to 6.0 mm (J-10)
Common Mistakes → Quick Fixes
- Skipping the foundation row: Always work a solid base row of single or double crochet before starting the alpine stitch repeat.
- Working the FPDC into the wrong row: Make sure you are inserting your hook around the post of the stitch two rows below, not the previous row.
- Inconsistent tension: Keep your FPDC stitches loose enough to avoid puckering; use a larger hook for the post stitches if needed.
Mini Glossary
FPDC (Front Post Double Crochet), a tall stitch worked around the front of the post from the row below; DC (Double Crochet), one of the most common crochet stitches; SC (Single Crochet), a short, tight foundational stitch; CH (Chain), the starting stitch or turning chain in crochet.
The alpine stitch is one of the most visually rewarding patterns an intermediate crocheter can learn. Its bold, ridged texture looks like mountain peaks and turns simple yarn into fabric that reads as far more complex than it is. Cozy winter blanket, stylish scarf, or a textured cardigan, mastering it opens up a lot of design options. This guide walks through seven tips to get you crocheting gorgeous alpine-stitch projects with confidence.
Alpine Stitch Crochet
The alpine stitch is a two-row repeat: you alternate regular double crochet with front post double crochet (FPDC) stitches worked one row below. The FPDC stitches pop forward, creating the raised ridges that give the fabric its signature mountain-like look. It works in a single color but really shines in two or more, which highlights the texture.
The nice thing is how simple it is once it clicks, a row of double crochet, then a row of double crochet with FPDC at regular intervals. From there you can scale it to any project. The stitch works in a multiple of 2 plus 1, so the starting chain is easy to calculate for any width.
If you are brand new to crochet, we recommend reviewing our beginner crochet guide before diving into this pattern. Having a solid grasp of the double crochet stitch will make learning the alpine stitch much smoother.
The Foundation Stitches You Need
Before starting your first alpine stitch crochet project, make sure you are comfortable with these foundational stitches:
- Chain stitch (CH): The starting point for every crochet project. You will chain your foundation row in a multiple of 2, plus 1 extra chain for the turning chain.
- Double crochet (DC): The primary stitch used in this pattern. Every row of the alpine stitch consists entirely of double crochet stitches, some worked normally and some worked as front post stitches.
- Front post double crochet (FPDC): This is the star stitch that creates the textured ridges. Instead of inserting your hook into the top loops of the stitch, you wrap your hook around the post (the vertical bar) of the stitch from the row below. You can learn this technique in detail in our front post double crochet guide.
Tip 1: Master the Front Post Double Crochet First
The most important skill for alpine stitch crochet is the front post double crochet. If you have never worked post stitches before, practice them on a flat swatch before attempting the full alpine pattern. Here is how to execute a FPDC:
- Yarn over and insert your hook from front to back around the post of the stitch one row below (two rows below your current row in the alpine stitch pattern).
- Yarn over and pull up a loop (you should have three loops on your hook).
- Yarn over and pull through two loops (two loops remain).
- Yarn over and pull through the remaining two loops to complete the stitch.
When working the alpine stitch pattern, the FPDC is always worked around a stitch that is two rows below your current working row. This creates the dramatic ridge that sets this stitch apart from other textured patterns. Practice this motion until it feels natural, muscle memory is key to producing even, consistent ridges.
Tip 2: Choose the Right Yarn for Alpine Stitch Crochet
Yarn selection can make or break your alpine stitch project. Because this stitch relies on visible texture, you want a yarn that has good stitch definition. Smooth, plied yarns in medium weight (worsted or DK) are ideal because they allow the raised ridges of the FPDC stitches to stand out clearly.
Avoid highly textured, fuzzy, or novelty yarns like bouclé or eyelash yarn for your first alpine stitch project. These yarns bury the stitch definition and make it difficult to see the beautiful ridge pattern you are creating. Wool, acrylic, and cotton blends in solid or semi-solid colors are your best bets. According to the Craft Yarn Council, worsted weight yarn is the most versatile choice for textured stitch patterns like the alpine stitch.
For colorwork alpine stitch, try using a darker shade for the DC rows and a lighter or contrasting shade for the FPDC rows. This contrast makes the dimensional peaks even more dramatic and eye-catching.
Tip 3: Maintain Consistent Tension Throughout
Tension is critical in alpine stitch because the FPDC stitches naturally draw the fabric inward slightly. If your post stitches are too tight, your fabric will pucker and the edges will curl. Conversely, if your regular double crochet stitches are too loose, the fabric will look uneven and sloppy.
Here are some strategies for maintaining even tension in your alpine stitch work:
- Loosen up on post stitches: Consciously work your FPDC stitches slightly looser than your regular DC stitches. This compensates for the natural tightening that occurs when you wrap around the post.
- Check your gauge: Always crochet a gauge swatch before starting a project. Measure both the stitch count and the row height to ensure your tension is consistent throughout.
- Use the right hook size: If your FPDC stitches are consistently tight, try going up one hook size for the post stitch rows only.
Tip 4: Count Stitches After Every Row
One of the most common pitfalls in alpine stitch is losing or gaining stitches over multiple rows. Because the FPDC stitch pulls from the row below, it can be easy to skip a stitch or accidentally work two stitches into the same space. Counting your stitches at the end of every row takes only a few seconds and can save you from having to frog (rip out) hours of work.
The standard alpine stitch repeat is worked in a multiple of 2, plus 1. For example, if you chain 41 stitches, you should have 40 double crochet stitches in each row (plus your turning chain). Develop the habit of running your finger along the row and counting each stitch before moving to the next row.
Tip 5: Use Stitch Markers for Long Projects
When working on larger alpine stitch projects like blankets or afghans, stitch markers become your best friend. Place a marker every 20 or 25 stitches along your starting chain to help you keep track of your stitch count. This is especially helpful because the alpine stitch can look deceptively uniform, it is easy to miss a skipped stitch when the texture is so repetitive.
You can also use a different colored marker to indicate the right side of your work. Since the alpine stitch has a distinct right and wrong side, keeping track of which side faces out ensures your ridges all lean in the same direction. For more tips on reading patterns and tracking stitches, check out our guide on how to read a crochet pattern.
Tip 6: Block Your Finished Alpine Stitch Crochet Projects
Blocking is an essential finishing step for alpine stitch projects, and many beginners skip it. Blocking involves pinning your finished piece to a flat surface and lightly misting it with water or steaming it to set the stitches into shape. For the alpine stitch, blocking does two critical things: it evens out any minor tension inconsistencies, and it allows the FPDC ridges to relax and “pop” beautifully.
To block your alpine stitch project, follow these steps:
- Fill a basin with lukewarm water and a small amount of wool-safe wash.
- Submerge your project and let it soak for 15-20 minutes.
- Gently squeeze out excess water (never wring or twist the fabric).
- Lay the project flat on a blocking mat or towel-covered surface.
- Pin the edges to the desired dimensions, shaping the FPDC ridges so they stand upright.
- Allow to dry completely before removing the pins.
The difference between an unblocked and a blocked alpine stitch piece is remarkable. Blocking transforms a slightly wavy, uneven fabric into a perfectly flat, professional-looking textile with crisp, defined ridges.
Tip 7: Start With Simple Alpine Stitch Crochet
Do not jump straight into a full-sized blanket for your first alpine stitch project. Instead, start with smaller, manageable projects that let you practice the stitch repeat without a huge time commitment. Some great beginner-friendly alpine stitch projects include:
- Dishcloths and washcloths: Quick to complete and good for practicing the two-row repeat in cotton yarn.
- Scarves and cowls: Worked in a long rectangle, these projects let you focus on rhythm and tension without worrying about shaping.
- Pillow covers: A medium-sized square that displays the stitch texture beautifully in home decor.
- Market bags and totes: The sturdy texture of the alpine stitch makes these surprisingly durable.
Once you feel confident with the stitch pattern on smaller items, you can graduate to larger projects like throws and blankets. You can find free pattern inspiration on platforms like Ravelry or Pinterest.
How to Read an Alpine Stitch Crochet Pattern?
Most alpine stitch patterns follow a similar structure. Here is what a typical pattern looks like in US terminology:
Row 1 (WS): CH 1, SC in each ST across, turn. (This is your foundation row.)
Row 2 (RS): CH 2 (counts as first DC), DC in next ST, *FPDC around the ST two rows below, DC in next ST; repeat from * across to last 2 STS, FPDC around ST two rows below, DC in top of turning CH, turn.
Row 3 (WS): CH 2 (counts as first DC), DC in each ST across, turn.
Row 4 (RS): CH 2 (counts as first DC), DC in next ST, *FPDC around the ST two rows below, DC in next ST; repeat from * across to last 2 STS, FPDC around ST two rows below, DC in top of turning CH, turn.
Repeat Rows 3 and 4 for the pattern. The key thing to remember in alpine stitch is that the FPDC stitches always land in the DC stitches from two rows below, never in the FPDC stitches from the previous ridge row. This offset creates the diagonal, mountain-peak effect that makes the pattern so visually appealing.
Best Projects for Alpine Stitch Crochet
The alpine stitch pattern is incredibly versatile and works well for a wide range of projects. The dense, textured fabric it creates is warm and cozy, making it especially well-suited for winter accessories and home decor items. Here are some of the best project categories for this stitch:
Blankets and Throws
The alpine stitch is perhaps most popular for crochet blankets. The thick, ridged texture provides exceptional warmth, and the stitch pattern works up relatively quickly once you establish your rhythm. A two-color alpine stitch blanket is a stunning showpiece that looks far more complicated than it actually is. Check out our easy crochet blanket patterns for more inspiration.
Scarves and Cowls
Scarves are one of the best projects for practicing alpine stitch because they let you work a long, continuous repeat. The ridged texture looks beautiful wrapped around the neck, and the reversible nature of the stitch (while one side is more defined than the other) means your scarf will look great from any angle.
Wearables
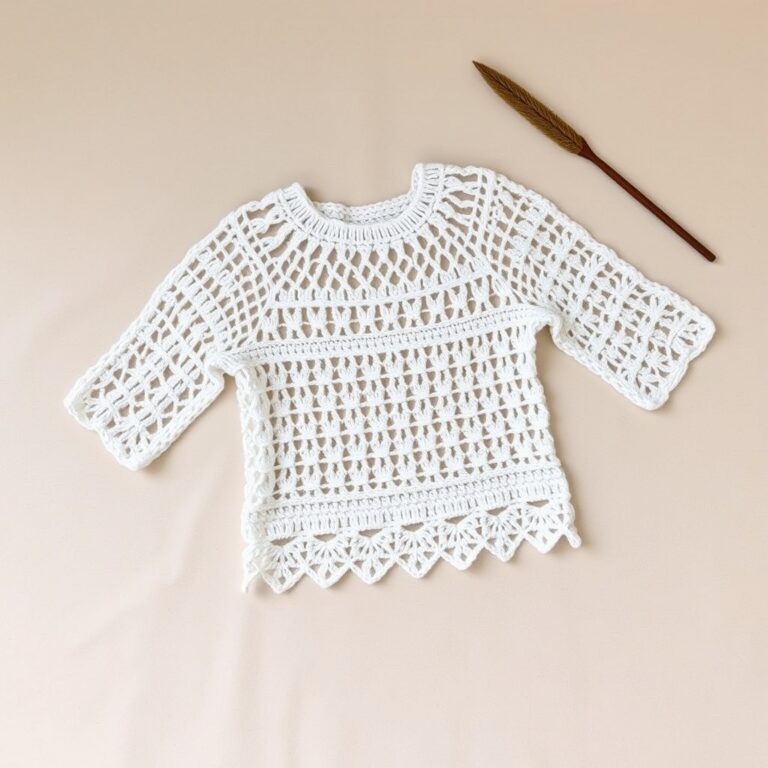
Cardigans, sweaters, and vests worked in alpine stitch have a beautiful, almost knitted appearance. The dense fabric provides warmth without bulk, and the textured pattern adds visual interest to simple garment shapes. Choose a soft wool or alpaca blend for wearable projects to ensure comfort against the skin.
Alpine Stitch Crochet FAQs
Is the alpine stitch pattern suitable for beginners?
While the alpine stitch is technically classified as an intermediate pattern, ambitious beginners can absolutely learn it, our crochet tips cover the fundamentals. You need a solid understanding of the chain stitch and double crochet before attempting this pattern. If you have completed a few simple projects and feel comfortable reading basic patterns, you are ready to try alpine stitch. Start with a small swatch and practice the front post double crochet motion until it feels natural.
What is the best yarn weight for alpine stitch projects?
Medium weight (worsted weight, category 4) yarn is the most popular choice for alpine stitch because it provides excellent stitch definition while still being easy to work with. DK weight (category 3) yarn also works beautifully for lighter projects like scarves and cowls. Bulky yarn (category 5) can be used for extra-cozy blankets, but the texture may be less defined. Always choose a smooth, plied yarn for the best results.
How many chains do I need for an alpine stitch blanket?
The alpine stitch pattern requires a foundation chain in a multiple of 2, plus 1 additional chain. For example, if you want approximately 100 stitches across, chain 101. Always crochet a gauge swatch first to determine how many chains you need for your desired width. Keep in mind that the alpine stitch has a natural tendency to pull in slightly, so your finished project may be a bit narrower than your starting chain.
Can I use the alpine stitch for circular or in-the-round projects?
Yes, alpine stitch can be adapted for in-the-round projects like cowls, hats, and even amigurumi. The key difference is that instead of turning your work at the end of each row, you continue working in a continuous spiral or joined rounds. When working in the round, the FPDC stitches will naturally spiral around the project, creating a beautiful helix-like texture. You may need to adjust your stitch counts slightly to accommodate the circular shaping.
How do I fix a mistake in the middle of an alpine stitch row?
If you notice a mistake in your alpine stitch work, the best approach is to carefully unravel (frog) stitch by stitch back to the error, rather than pulling out the entire row. Because the FPDC stitches are worked around posts from two rows below, ripping back too quickly can cause the stitches to tangle. Work slowly, inserting your hook into each stitch as you undo it to prevent splitting the yarn. Once you have corrected the mistake, continue the pattern from that point forward.
Frequently Asked Questions
Is the alpine stitch pattern difficult for beginners?
The alpine stitch pattern is relatively easy once you master the basic stitches involved, which include single crochet, double crochet, and front post double crochet. The stitch creates a beautiful textured fabric that looks intricate but is achieved by working front post double crochet stitches two rows below. With a bit of practice, even confident beginners can create stunning projects using the alpine stitch technique.
What projects work well with alpine stitch?
The alpine stitch is incredibly versatile and works beautifully for blankets, scarves, cowls, dishcloths, and even garments like cardigans. Its thick, textured fabric provides excellent warmth, making it ideal for winter accessories and cozy home decor. The stitch also looks wonderful in variegated and ombre yarns, as the texture enhances color transitions.
Does the alpine stitch use a lot of yarn?
Yes, the alpine stitch is considered a yarn-heavy stitch because the front post double crochet stitches create a plush, dimensional fabric. You should plan to purchase approximately 10 to 15 percent more yarn than you would for a flat stitch pattern of the same dimensions. The beautiful texture and warmth of the alpine stitch make the extra yarn well worth it.
How do I keep my alpine stitch edges straight?
To keep your alpine stitch edges straight, make sure you chain the correct number of turning chains at the beginning of each row and count your stitches carefully. Working a stitch marker in the first and last stitch of each row can help you maintain consistent stitch counts. Blocking your finished piece will also help even out any slight edge irregularities in your alpine stitch project.