7 Stunning Crochet Sun Hat Pattern Designs
Crochet Sun Hat Pattern at a Glance
- Topic: crochet sun hat pattern
- Skill level: intermediate
- Main goal: help crocheters make a stylish wide-brim sun hat for summer protection and fashion
- Related topics: crochet beanie patterns, how to crochet a hat, half double crochet, granny square patterns
Quick Answer
A crochet sun hat pattern is a summer essential that combines style with sun protection. These wide-brimmed designs use lightweight cotton or hemp yarn to create breathable, fashionable headwear perfect for beach trips, garden parties, and outdoor adventures.
Tip: use cotton or hemp yarn for breathable, lightweight sun hats that keep you cool
At a Glance
- Skill level: intermediate
- Time needed: 4-6 hours
- Best yarn: cotton or cotton-blend worsted weight
- Hook size: 5.0mm (H-8) to 6.0mm (J-10)
Common Mistakes and Quick Fixes
- Brim too floppy: use a smaller hook size or add a second strand of yarn for the brim rounds
- Hat too small: check your gauge and measure head circumference before starting the crown
- Uneven brim: count stitches carefully and use stitch markers at each increase point
Mini Glossary
Brim (the wide projecting part of a hat), Crown (the rounded top portion that fits the head), HDC (half double crochet stitch), Gauge (number of stitches per inch), FPDC (front post double crochet, used for brim texture)
 KnotToYarn
Subscribe to KnotToYarn!
Get the best free crochet patterns, tutorials & tips delivered straight to your inbox. Join our growing community!
Why You Need a Crochet Sun Hat Pattern This Summer
There is nothing quite like the feeling of completing a handmade accessory that you can wear all season long. A crochet sun hat pattern gives you the perfect project to tackle during those warm afternoons when you want something creative but not overly complicated. Whether you are heading to the beach, working in the garden, or enjoying a picnic, a handmade sun hat keeps you shaded in style.
The beauty of a crochet sun hat pattern lies in its versatility. You can adjust the brim width, change the yarn color, and add decorative elements like ribbons, flowers, or crochet appliques. Every sun hat you create becomes a unique piece that reflects your personal taste and crafting ability.
If you are new to hat-making, you might want to brush up on the fundamentals first. Our how to crochet a hat guide covers the basic techniques you will need, and our half double crochet tutorial will help you master the stitch used most often in sun hat construction.

Best Yarn for a Crochet Sun Hat Pattern
Choosing the right yarn is one of the most important decisions when starting any crochet sun hat pattern. Since sun hats are worn during hot weather, you need a fiber that is breathable, lightweight, and comfortable against the skin. The wrong yarn can leave you sweating and uncomfortable, which defeats the entire purpose of making a sun hat.
Cotton yarn is the gold standard for crochet sun hat patterns. It absorbs moisture, allows air to circulate, and holds its shape beautifully after washing. Mercerized cotton gives a lovely sheen that looks polished and professional. Some excellent cotton yarn brands include Lily Sugar n Cream, Bernat Handicrafter, and Pebble Beach by Berroco.
Cotton-blend yarns are another fantastic option. A cotton-acrylic or cotton-bamboo blend offers the breathability of cotton with added durability and softness. These blends are especially good if you want your sun hat to last through multiple seasons of wear.
Hemp and linen yarns are worth considering for advanced crocheters. These natural fibers become softer with each wash and have a beautiful rustic texture that suits sun hats perfectly. They are incredibly strong and provide excellent UV protection, making them ideal for beach-ready projects.
For more yarn guidance, check out our article on the best yarn for beginner crochet projects, which covers fiber types in detail.
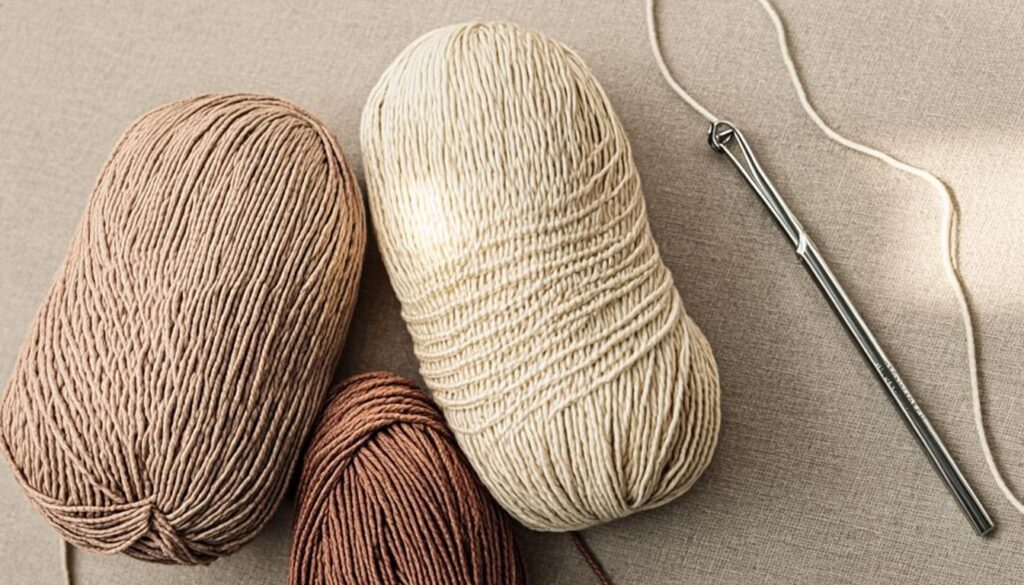
Regardless of which fiber you choose, aim for a worsted weight (category 4) yarn. This thickness provides the ideal balance between coverage and breathability. Bulky yarns are too heavy for summer wear, while lace weight yarns may not offer enough sun protection on their own.
Crochet Sun Hat Pattern: Sizing and Measurements
Before you pick up your hook, taking accurate measurements is essential for a well-fitting crochet sun hat pattern. A sun hat that is too small will be uncomfortable, and one that is too large may blow away in the wind. Here is a handy sizing chart for the most common head circumferences:
- Baby (0-6 months): 13-15 inches crown diameter
- Toddler (1-3 years): 16-18 inches crown diameter
- Child (4-10 years): 18-20 inches crown diameter
- Teen/Small Adult: 20-21 inches crown diameter
- Average Adult: 21-22 inches crown diameter
- Large Adult: 23-24 inches crown diameter
To measure your head, wrap a flexible measuring tape around the widest part of your head, about one inch above your eyebrows and ears. Write this measurement down and refer to it when working through your chosen crochet sun hat pattern.
The brim width is another important measurement. For a classic sun hat look, aim for a brim that is 2.5 to 4 inches wide. Wider brims provide more sun protection but can feel heavier. Narrower brims are sportier and more practical for active outdoor days.
Always crochet a gauge swatch before beginning your project. According to the Craft Yarn Council, gauge ensures your finished piece matches the intended dimensions. To check gauge, crochet a 4-inch square using your chosen hook and yarn, then count the stitches and rows per inch. Adjust your hook size if needed.
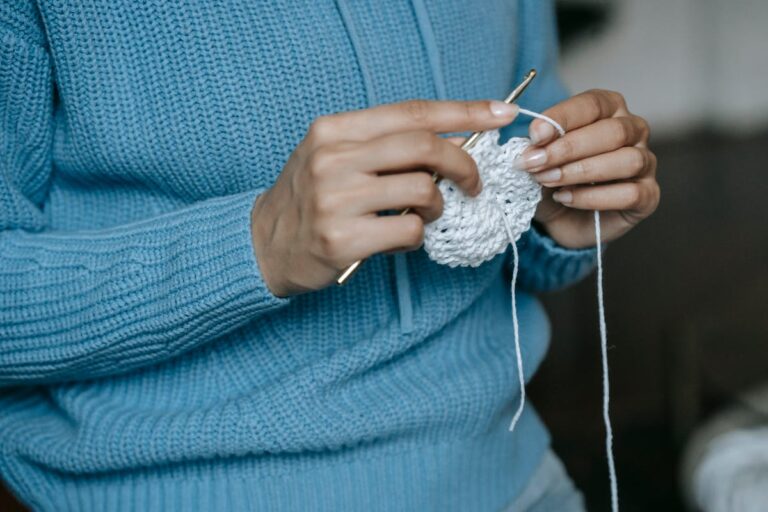
Crochet Sun Hat Pattern: Step-by-Step Crown
The crown is the foundation of every crochet sun hat pattern. It sits on top of the head and determines the overall fit. Here is a detailed walkthrough for creating a classic crown using half double crochet stitches.
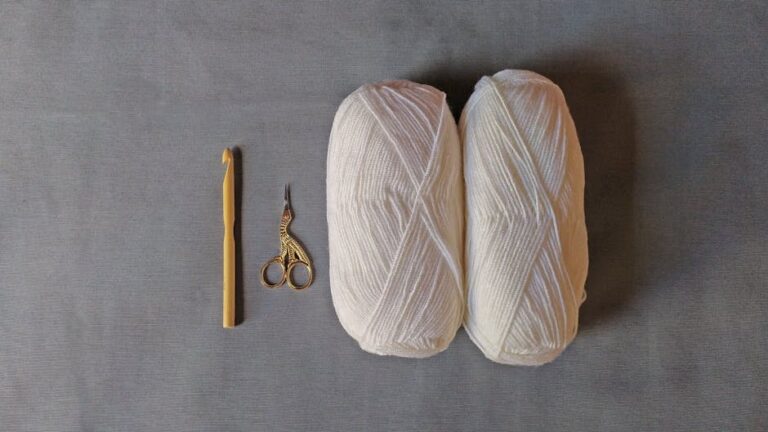
Materials needed:
- 200-300 yards of worsted weight cotton yarn
- 5.0mm (H-8) crochet hook
- Stitch markers
- Yarn needle for weaving in ends
- Scissors
Refer to our crochet hook size chart if you need help selecting the right hook for your yarn weight.
Round 1: Make a magic ring (or chain 4 and join with a slip stitch to form a ring). Chain 2 (counts as your first HDC). Work 11 HDC into the ring. Join with a slip stitch to the top of the chain 2. You should have 12 stitches total. Place a stitch marker in the join.
Round 2: Chain 2. Work 2 HDC in each stitch around. Join with a slip stitch to the top of the chain 2. (24 stitches)
Round 3: Chain 2. Work (HDC in next stitch, 2 HDC in next stitch) around. Join. (36 stitches)
Round 4: Chain 2. Work (HDC in next 2 stitches, 2 HDC in next stitch) around. Join. (48 stitches)
Round 5: Chain 2. Work (HDC in next 3 stitches, 2 HDC in next stitch) around. Join. (60 stitches)
Continue this pattern of increasing one more stitch between each increase until the flat circle measures approximately 1-2 inches smaller than your head circumference. For an average adult head, this usually takes about 8-10 rounds.
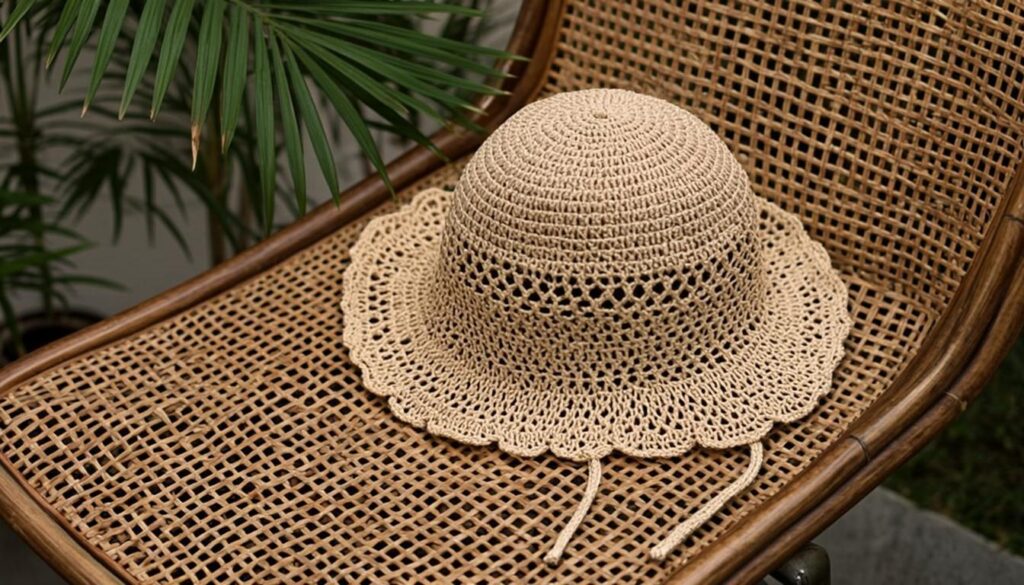
Crochet Sun Hat Pattern: Wide Brim
The wide brim is what transforms a simple crochet hat into a sun hat. This is the part of the crochet sun hat pattern that gives your project its signature look and provides crucial shade for your face and neck.
Transition rounds: Once your crown circle reaches the correct diameter, stop increasing. Work 2-3 rounds of even HDC without any increases. This creates the side band of the hat and helps it contour to your head shape. Try the hat on during this stage to check the fit.
Brim Round 1: Chain 2. Work 2 HDC in each stitch around. This doubles your stitch count and creates the first round of the brim. Join. Use stitch markers to keep track of your increases.
Brim Round 2: Chain 2. Work (HDC in next stitch, 2 HDC in next stitch) around. Join.
Brim Round 3: Chain 2. Work (HDC in next 2 stitches, 2 HDC in next stitch) around. Join.
Continue increasing until the brim reaches your desired width, typically 2.5 to 4 inches. For a stiffer brim that holds its shape, try using front post double crochet (FPDC) stitches in the final two rounds. This creates a beautiful ribbed texture while adding structure.
Pro tip: If you find the brim curling, lightly steam block it using an iron on the lowest setting with a pressing cloth between the iron and your crochet work. Cotton responds beautifully to blocking and will hold its new shape.
How to Customize Your Crochet Sun Hat Pattern
One of the best things about working with a crochet sun hat pattern is how easy it is to personalize. Here are several ways to make your sun hat truly your own:
Color blocking: Use two or three complementary colors to create striped sections. Switch colors every 2-3 rounds for a subtle effect, or alternate every round for bold stripes. Summer-ready color combinations include cream and tan, coral and white, or navy and yellow.
Ribbon accents: Weave a satin or grosgrain ribbon through the stitches where the crown meets the brim. Tie it in a bow at the back or side for a classic, feminine touch. This also helps adjust the fit slightly.
Crochet flowers: Attach small crochet flowers, like daisies or sunflowers, to the brim or side of the hat. These add a playful, summery vibe that is perfect for garden parties and outdoor weddings. You can find flower motif ideas in our granny square tutorial, as many of the same techniques apply to small motifs.
Mesh brim inserts: For extra ventilation on the hottest days, incorporate chain-space meshes into the brim rounds. This creates a lacy, openwork effect that lets air flow through while still providing shade.
Fringed edges: Add short fringe along the outer edge of the brim for a bohemian, festival-ready look. Use the same yarn or a contrasting color for a pop of personality.
7 Stunning Crochet Sun Hat Pattern Variations
Once you have mastered the basic crochet sun hat pattern, you will want to explore different styles. Here are seven stunning variations to try next:
1. The Classic Floppy Sun Hat
This is the most iconic sun hat style, featuring a dramatically wide brim that provides maximum sun protection. Use a soft cotton yarn and work the brim in continuous rounds without joining for a seamless look. The floppy brim naturally curves downward for a relaxed, beachy aesthetic.
2. The Rolled Brim Sun Hat
Instead of a flat brim, this design features a brim that rolls upward at the edges. This creates a structured, sophisticated look that pairs well with sundresses. Achieve this effect by working the final brim rounds in FPDC stitches, which naturally curl.
KnotToYarn
Subscribe to KnotToYarn!
Get the best free crochet patterns, tutorials & tips delivered straight to your inbox. Join our growing community!
3. The Granny Square Sun Hat
Combine the timeless appeal of granny squares with sun hat construction. Crochet a flat circle of joined granny squares for the crown, then work a traditional brim in single crochet. This creates a textured, boho-inspired design that stands out from typical sun hat patterns. If you need a refresher, our crochet beanie patterns guide covers joining techniques that transfer well to this project.
4. The Packable Straw-Style Hat
Designed for travel, this sun hat uses a tight stitch pattern and stiff cotton or hemp yarn so it can be rolled up, packed in a suitcase, and still look great when unpacked. Use single crochet throughout for maximum density and durability.
5. The Toddler Sun Hat with Chin Strap
A practical, adorable version sized for little ones. Add a crocheted chain strap with button closures under the chin to keep the hat secure during windy beach days. Use bright, fun colors and add a small pom-pom on top.
6. The Ruffle Edge Sun Hat
Add a feminine ruffle along the brim edge by working 3 DC in each stitch around the final round. This creates a delicate, romantic finish that looks beautiful in pastel yarns. Perfect for garden parties and outdoor brunches.
7. The Men’s Crochet Sun Hat
Sun hats are not just for women! Create a streamlined version in neutral tones like charcoal, olive, or tan. Use a shorter brim (about 2 inches) and a ribbed stitch pattern for a masculine look. This makes a great Father’s Day gift for the crafty dad who loves fishing or gardening.
For even more sun hat inspiration, browse the collection of designs on Ravelry’s sun hat crochet patterns, where thousands of crocheters share their creations and modifications.
Frequently Asked Questions
How long does it take to complete a crochet sun hat pattern?
Most intermediate crocheters can complete a basic crochet sun hat pattern in 4 to 6 hours. Simpler designs with narrower brims may take as little as 3 hours, while elaborate patterns with decorative elements can take 8 hours or more. The key is to work at a comfortable pace and enjoy the process.
Can beginners make a crochet sun hat?
Yes! While many sun hat patterns are rated intermediate, beginners can absolutely tackle them with patience. Start with a simpler pattern that uses only single or half double crochet stitches. Our how to crochet a hat guide is an excellent starting point for building the skills you need.
What is the best yarn weight for a sun hat?
Worsted weight (category 4) is the most versatile choice for a crochet sun hat pattern. It provides enough coverage for sun protection while remaining lightweight and breathable. DK weight works well for smaller hats, while bulky yarns are generally too heavy for comfortable summer wear.
How do I care for my crochet sun hat?
Hand wash your cotton sun hat in cool water with a mild detergent. Gently squeeze out excess water (never wring or twist) and reshape the hat on a clean towel. Allow it to air dry completely. Store it flat or stuffed with tissue paper to maintain its shape between seasons.
Can I sell sun hats made from these patterns?
That depends on the specific crochet sun hat pattern you are using. Many free and paid patterns allow for selling finished items, but always check the designer’s copyright terms first. Patterns that explicitly state “for personal use only” should not be used for commercial purposes.
How do I block my crochet sun hat?
Wet blocking works best for cotton sun hats. Soak the finished hat in cool water for 15-20 minutes, then gently squeeze out excess moisture. Place it over a hat form, bowl, or balloon in the correct size and pin the brim flat. Let it dry completely before removing. This gives your sun hat a professional, polished finish.