Bee Granny Square: Free Tested Pattern in 10 Rounds
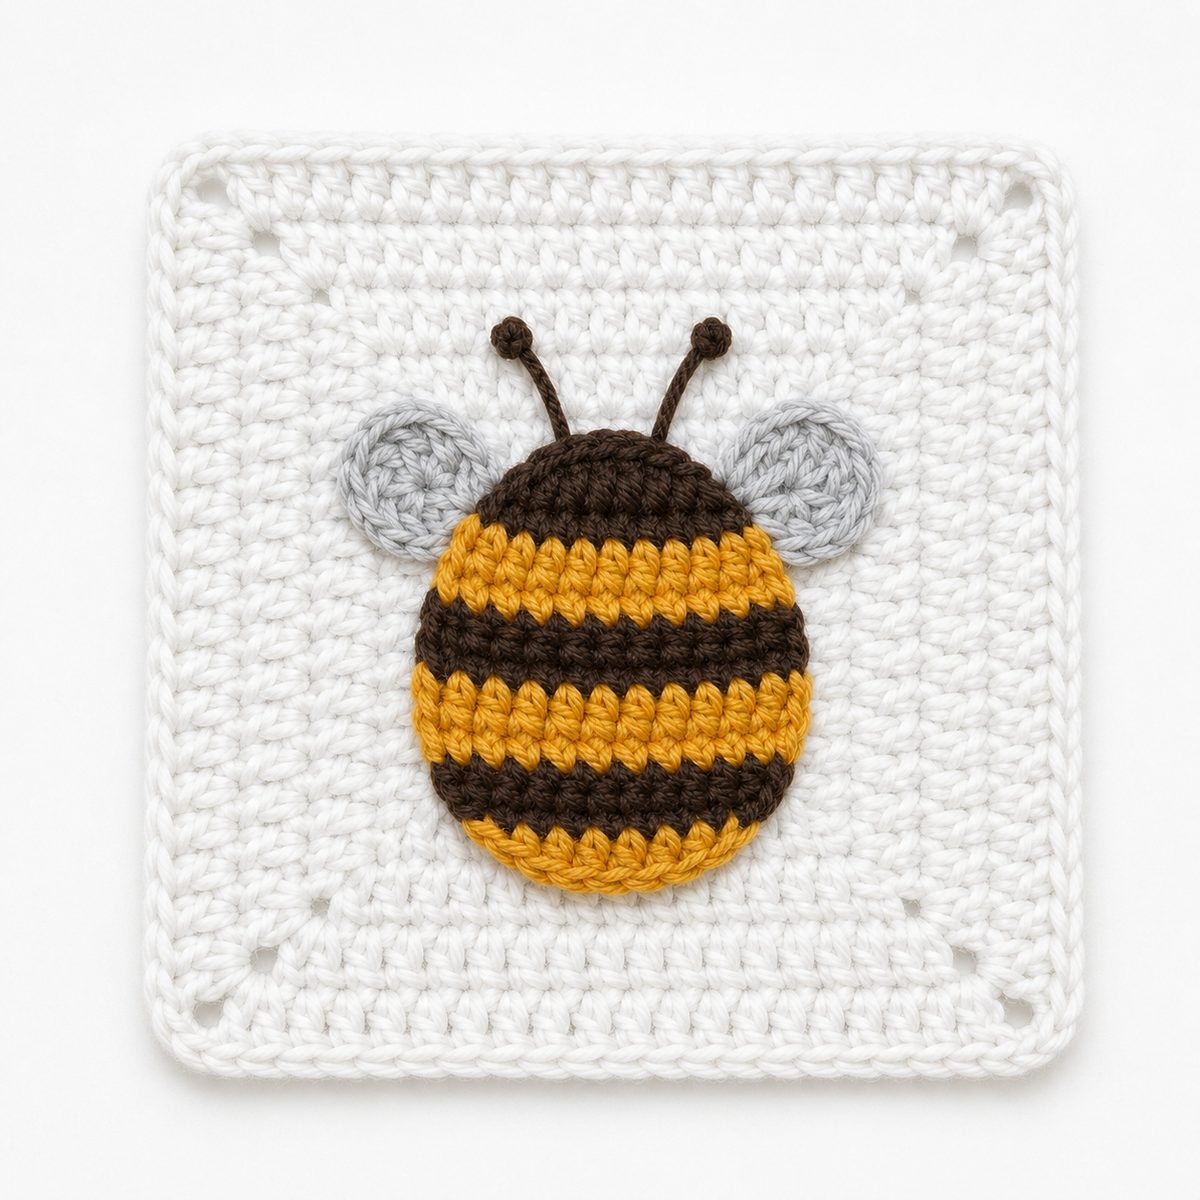
This bee granny square grows a chubby striped bee right in the fabric: no applique to sew on, no embroidery except the antennae. The body is built in six short rows of alternating yellow and brown, the wings pop forward from back loops so they stand off the square, and one clever round turns the whole bee into a tidy square ready for borders. It was hooked up and verified stitch by stitch by a real crocheter before we published it, and the counts below reconcile at every row.
Pattern tested by Hachim, our lead crocheter: she hooked up the full square before publication and confirmed every round works as written.
As an Amazon Associate we earn from qualifying purchases: some supply links in this post are affiliate links, at no extra cost to you.
Why You’ll Love This Bee Granny Square
- The bee is the fabric. Stripes are crocheted in, wings grow from back loops, and only the antennae are embroidered.
- Counts that reconcile. Every row ends with a stated stitch count so you can verify as you go.
- Human tested. The pattern was made and verified by an experienced crocheter before publishing.
- Stacks like any square. Flat apart from the wings, so it joins into blankets and cushion fronts cleanly.
Bee Granny Square at a Glance
- Skill level: Confident beginner (short rows and one cluster; nothing exotic)
- Time needed: about 45 minutes per square
- Finished size: about 10 cm with DK yarn and a 3.00 mm hook
Materials
- DK weight yarn in 4 colors: golden yellow and brown for the bee, pale gray for the wings, white or any background color for the square. The sample uses DK sport wool
- 3.00 mm crochet hook (any comfortable handle works)
- Stitch markers to mark the squaring round corners
- Darning needle and scissors
Any yarn weight works if you match the hook to it; check the Craft Yarn Council standards when substituting. Heavier yarn simply makes a bigger bee.
Abbreviations (US Terms)
- ch: chain
- sl st: slip stitch
- sc: single crochet
- hdc: half double crochet
- dc: double crochet
- tr: treble crochet
- sc2tog: 2 sc worked together (decrease)
- BL / BLO: back loop / back loops only
- ch-1 picot: ch 1, sl st into the stitch just made
- dc inc: 2 dc in the same stitch
Bee Granny Square Pattern: The Body
Every bee granny square starts with the body, worked flat in six short rows, changing color every row. Fasten off at the end of each row: the fresh joins are what keep the stripes crisp. Weave ends as you go.
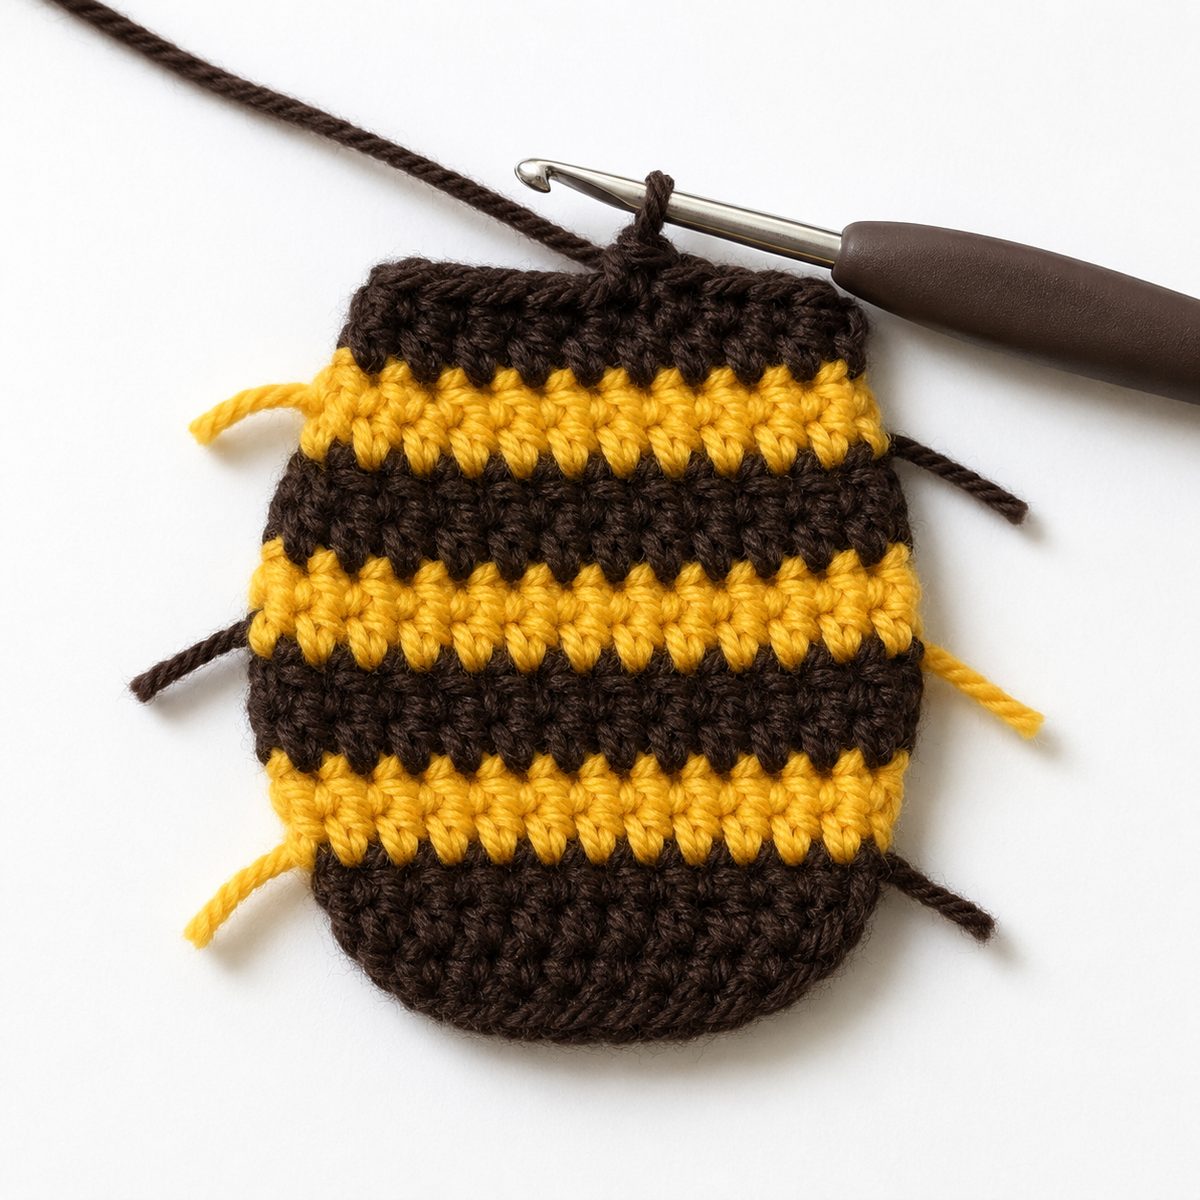
Row 1 (yellow): Ch 4. Skip 3 ch, work 2 hdc in the 4th ch (the first chain you made), ch 3, sl st into that same ch. Fasten off. (2 hdc flanked by two ch-3 stems: this is the bee’s tail)
Row 2 (brown): Join in the top of the right ch-3, ch 1 (does not count as a stitch), 2 sc in that same spot, 1 sc in each of the 2 hdc, 2 sc in the top of the left ch-3. Fasten off. (6 sc)
Row 3 (yellow): Join in the rightmost sc, ch 2, 1 hdc in the same st, 1 hdc in each of the next 4 sc, 1 hdc in the final sc, ch 2, sl st to the same st. Fasten off. (6 hdc between two ch-2 edges)
Row 4 (brown): Join in the top of the right ch-2, ch 1 (does not count). The first decrease starts in the join stitch itself: sc2tog over the right ch-2 top and the first hdc, 1 sc, sc2tog over the next 2 hdc, 1 sc, sc2tog over the last hdc and the top of the left ch-2. Fasten off. (5 sc, perfectly symmetrical)
Row 5 (yellow): Join in the rightmost sc, ch 2, 1 hdc in the same st, 1 hdc in each of the next 2 sc, skip 1 sc, then (1 hdc, ch 2) in the final sc and sl st to the same st. Fasten off. (4 hdc: the head taper begins)
Row 6 (brown): Join in the top of the right ch-2, ch 2, then work hdc, sc, sc, hdc as one cluster across the next 4 sts (keep the last loop of each on the hook, then pull through all loops at once), ch-1 picot, ch 2, sl st to the top of the left ch-2. Fasten off. (the head, closed in one stitch)
The Wings (pale gray)
Both wings grow from the ch-2 groups at the ends of Row 5, worked into the back loops only of those chains so they lift away from the body.
Right wing: Join in the BL of the bottom ch of the right ch-2 group. Ch 3, 1 tr in the same loop, ch-1 picot, 1 dc in the BL of the top ch, ch 2, sl st to the same loop. Fasten off.
Left wing: Turn the bee upside down and find the ch-2 group at the opposite end of the same yellow row. Join in the BL of the bottom ch. Ch 2, 1 dc in the same loop, ch-1 picot, 1 tr in the BL of the top ch, ch 3, sl st to the same loop. Fasten off.
The two wings mirror each other: tall stitch toward the head on both sides.
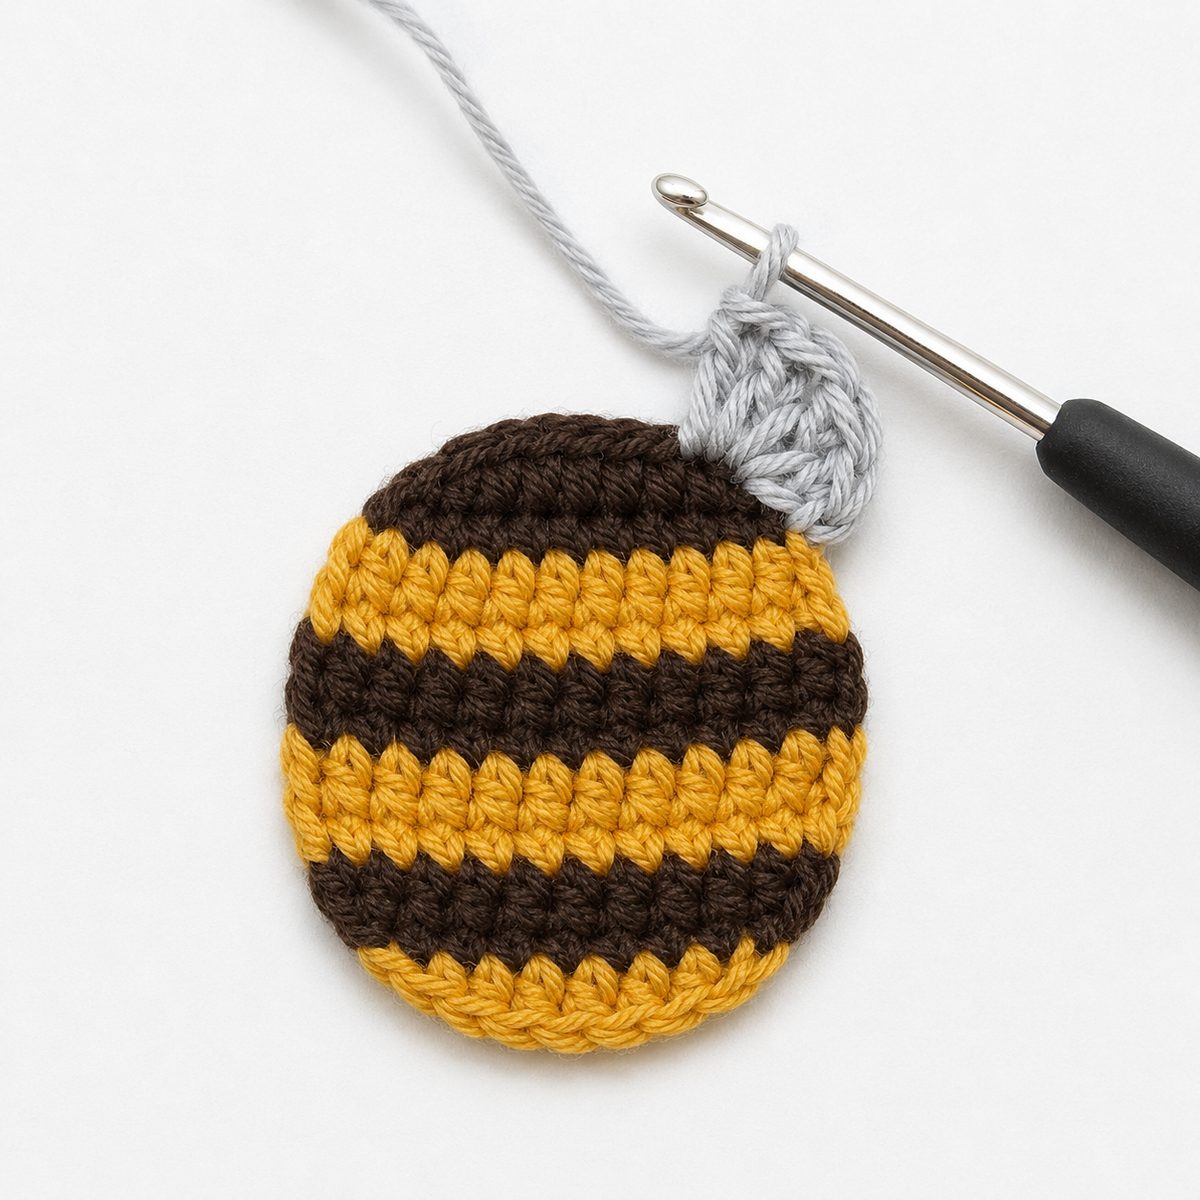
Round 7: Turning the Bee Into a Square (background color)
Flip the bee right side up. This is the round that makes it a bee granny square rather than just a bee: it travels the whole outline and lands 7 stitches on each side with a ch-3 corner between them. Before you start, drop 4 stitch markers roughly at the bee’s diagonal shoulders and hips: those are your corners, and pre-marking them is much easier than finding them mid-round.
Join the background yarn in the third loop of the right ch-1 of the top brown row, ch 3 (counts as 1 dc), 1 dc in the same st, 1 hdc, 1 sc, 1 hdc, dc inc, ch 3. *Working down the side into the row-end chains (roughly one stitch per row end): 2 dc, 1 sc, 2 hdc, dc inc, ch 3.* Across the tail: dc inc, 1 hdc, 1 sc, 1 hdc, dc inc, ch 3. Up the other side: dc inc, 2 hdc, 1 sc, 2 dc, ch 3, sl st to the top of the starting ch 3. (7 stitches per side, 4 ch-3 corners)
Do not stress the exact anchor of every stitch on the sides: hitting 7 per side, spread evenly over the row ends, matters more than which loop each one grabs. The bee’s outline is irregular; the round is what makes it square.
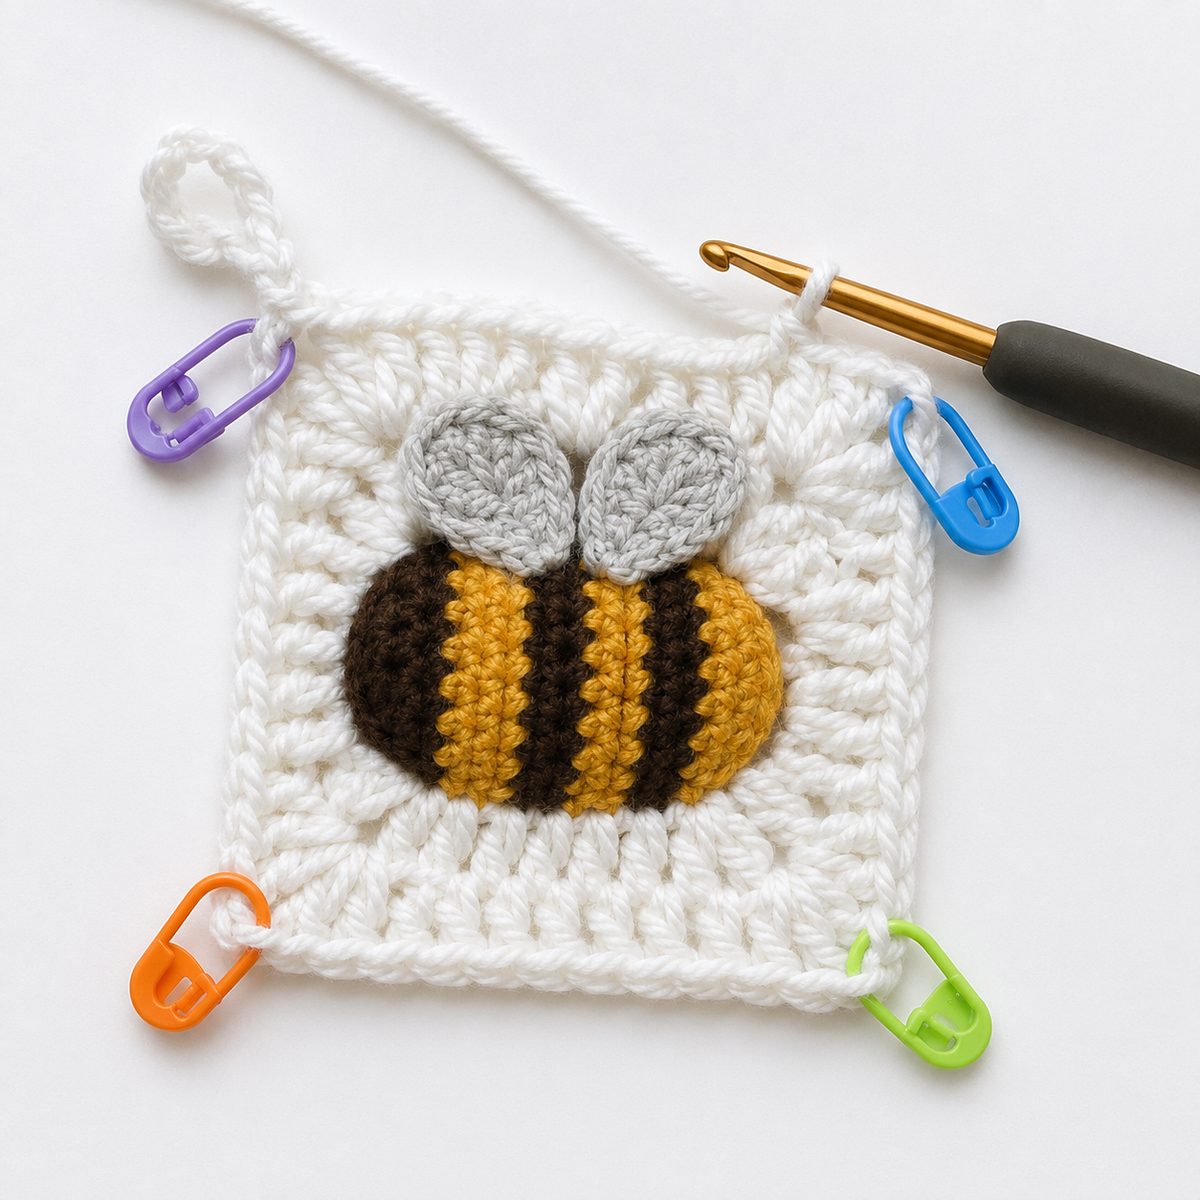
Rounds 8 to 10: The Borders (background color)
Each round: ch 3 (counts as 1 dc), 1 dc in every stitch around, working (2 dc, ch 3, 2 dc) in each corner ch-3 space. Sl st to the top of the starting ch 3. Fasten off after Round 10.
(Counts per side: Round 8 = 11, Round 9 = 15, Round 10 = 19) Want a bigger block? Keep repeating the round; every pass adds 4 stitches per side.
The Antennae
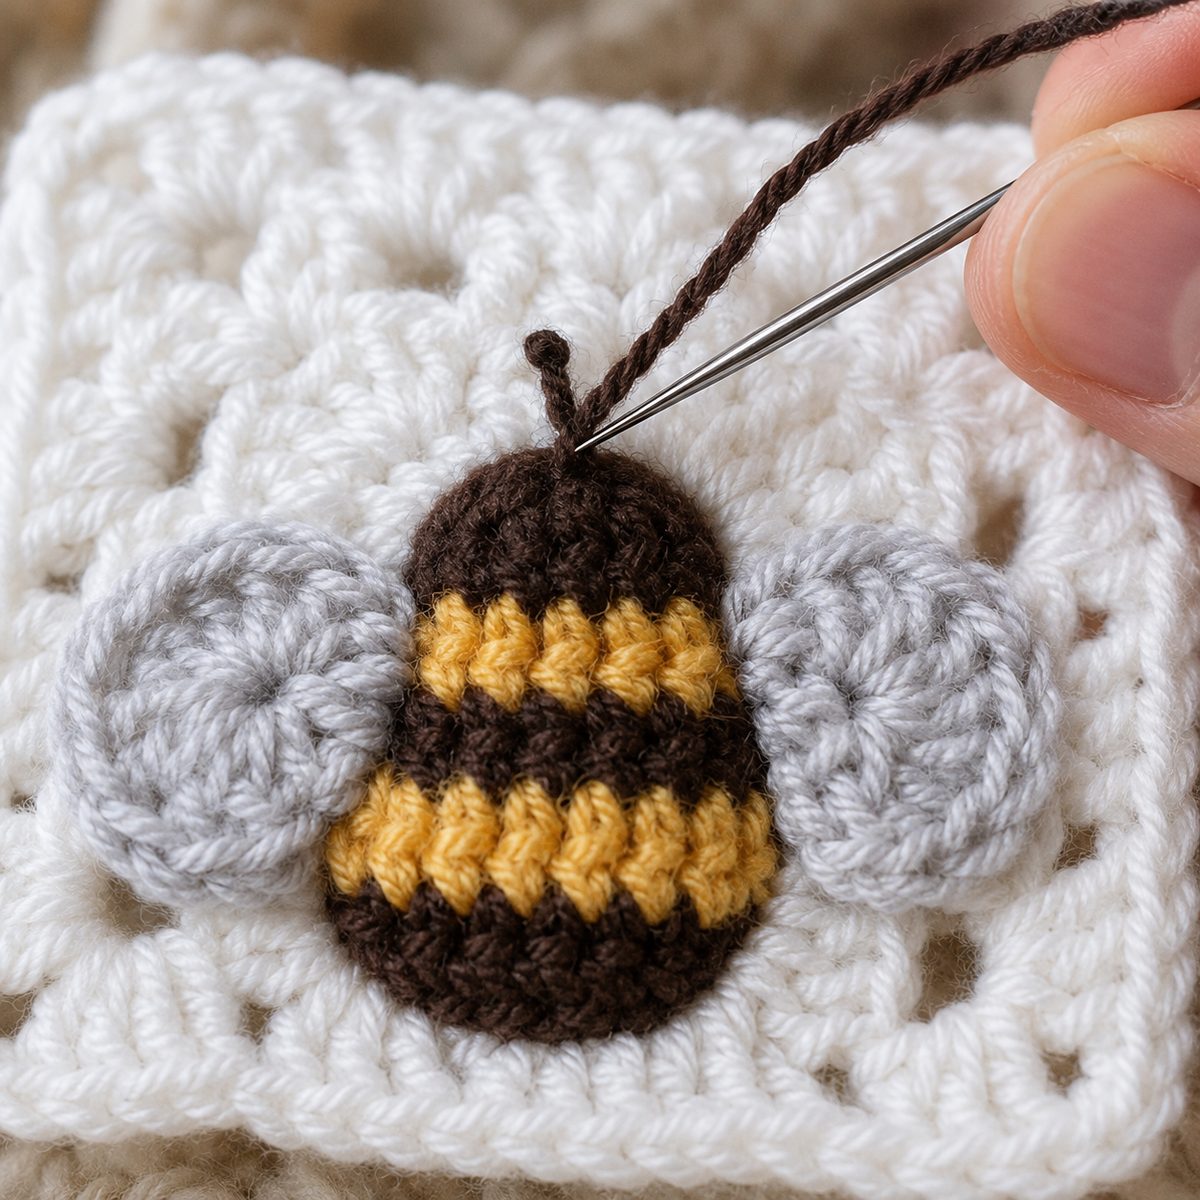
With brown yarn on the darning needle, make two long straight stitches from the top of the head, angling outward like a V. Tie a French knot at the tip of each, or work three tiny stitches over the same spot if French knots fight you. Weave the tails into the back of the head.
Tips for a Better Bee Granny Square
- Weave ends as you go. Six body rows plus wings means a dozen tails; doing them per-row takes seconds, doing them all at the end takes an evening.
- Mark the corners before Round 7. The squaring round is the only place a bee granny square can go wrong, and markers remove the guesswork.
- Count every row. The counts are stated per row: 2, 6, 6, 5, 4, then the cluster. If a row does not reconcile, fix it before changing color.
- Block every bee granny square flat before joining. The wings stay dimensional; the square around them should be dead flat.
More friends for the meadow blanket: the kitty granny square adds a face with no-sew ears, the dinosaur granny square covers the prehistoric corner, and the granny square hub holds 25+ more blocks to mix in.
Bee Granny Square FAQ
Why fasten off after every row?
Fresh joins keep each stripe’s color crisp with no bleed at the edges. The cost is more ends; weave them as you go.
Can I make it bigger?
Yes. Keep repeating the border round past Round 10; every round adds 4 stitches per side and the bee stays centered.
What color for the wings?
Pale gray reads most like a real bee against a white square, which is what our sample uses.
How are the antennae made?
Embroidered: two long straight stitches from the head with a French knot at each tip.
If you hook up this bee granny square, send a photo through the contact page and we’ll feature reader blocks right here. Happy crocheting!