Rose Blanket Free Crochet Pattern (Beginner-Friendly + Beautiful Gift Idea, Downloadable PDF)
What you will learn
- the quick answer
- why beginners struggle
- step-by-step fixes or methods
- common mistakes
- helpful next steps
# Rose Blanket Free Crochet Pattern (Beginner-Friendly + Beautiful Gift Idea)
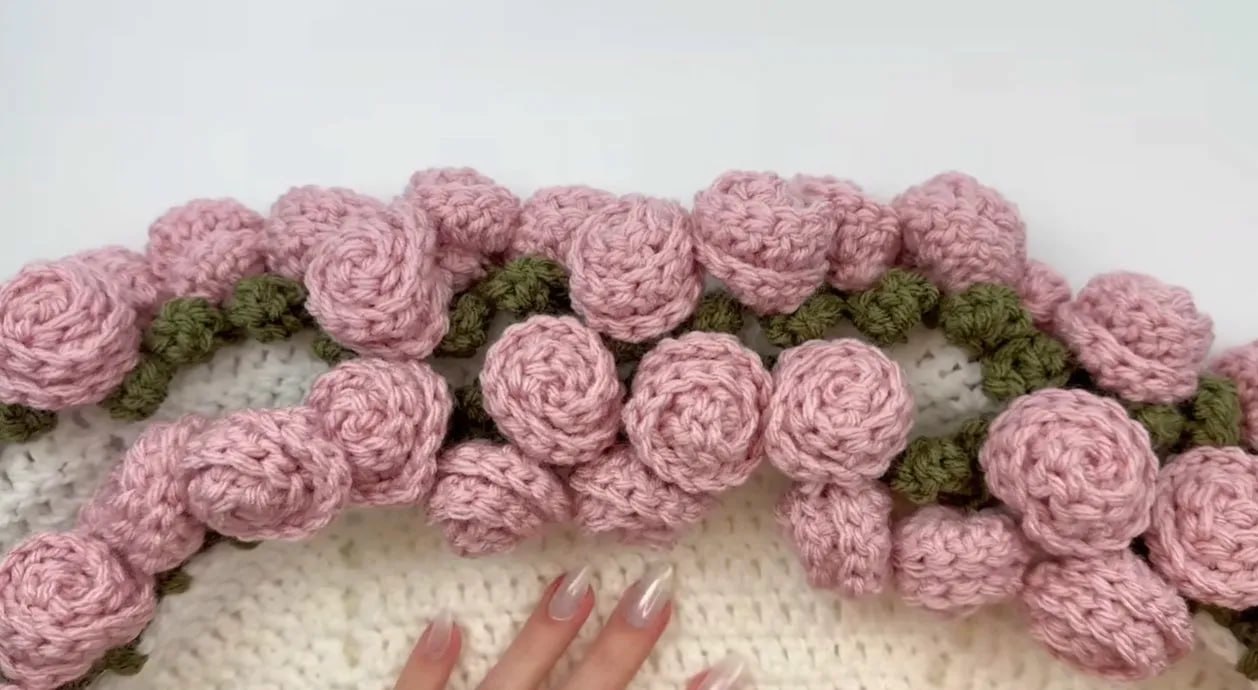
If you want a crochet project that feels both practical and unforgettable, this rose blanket free crochet pattern is the kind of design that stands out right away. It works as a cozy blanket when laid flat, but the real charm appears when you roll it into shape and reveal a bouquet-style floral finish. That combination makes it a beautiful handmade gift, a memorable nursery or sofa throw, and the kind of crochet project people actually stop to admire.
The best part is that this pattern is still approachable for beginners. Even though the finished blanket looks elaborate, the construction itself is based on clear, repeatable stitches and a very manageable round-by-round structure. If you are comfortable with basic crochet stitches and can keep a steady rhythm, you can absolutely work your way through this pattern without needing advanced shaping tricks.
Quick answer: This rose blanket free crochet pattern is a beginner-friendly round blanket worked from the center outward in double crochet, then finished with added leaves and rolled roses around the edge. It looks impressive, but the stitch logic stays simple and repeatable.
- Skill level: Beginner-friendly
- Main stitches: Chain, slip stitch, single crochet, half double crochet, double crochet
- Best use: Statement gift blanket, decorative throw, floral blanket for special occasions
- Biggest beginner tip: Track your rounds and remember that the blanket increases by 6 stitches every round
Why this rose blanket works so well for beginners
A lot of crochet blankets look simple at first and become confusing once shaping or stitch changes start stacking up. This one is different. The body of the blanket is worked in the round from the center outward, which means you are repeating the same basic construction idea while the blanket grows. That kind of repetition is exactly what helps beginners improve because your hands get more confident while the project becomes more impressive.
Another reason this project works well is that the “wow” factor comes mostly at the finishing stage. The main blanket itself stays grounded in familiar stitches, then the green leaves and pink roses are added later for the final bouquet effect. In other words, you are not fighting complexity from the first round. You are building a stable foundation first, then layering beauty onto it once the blanket base is already complete.
Materials you need for the rose blanket
Before you begin, it helps to gather all of the materials and think through your color plan. The pattern uses three colors to create the final flower-bouquet effect, but you can absolutely personalize the palette if you want a softer, brighter, or more dramatic version.
You will need:
- Worsted weight acrylic yarn in 3 colors
- White yarn for the center of the blanket
- Green yarn for the leaves
- Pink yarn for the roses
- 5.5 mm crochet hook
- Scissors
- Tapestry needle
Acrylic is a smart choice for this pattern because it keeps the blanket lightweight, affordable, and gift-friendly. It also gives you plenty of freedom if you want to make a larger size without the project becoming too heavy or too expensive. If you prefer another fiber, the biggest thing to watch is drape. You want the blanket to stay soft enough to roll cleanly into that bouquet look at the end.
Gauge and finished size
The stated gauge is approximately 13 double crochet stitches = 4 inches in the main double crochet pattern. The good news is that gauge is not overly strict here, which makes this much friendlier for beginners than a fitted garment project. A slight variation in tension is not going to ruin the blanket.
The finished size is adjustable, which is another reason this pattern is so practical. You can stop after fewer rounds if you want a smaller throw, lap blanket, or decorative floral blanket, or keep adding rounds if you want a fuller and cozier version. That flexibility lets you adapt the project to the yarn you already have, the occasion you are making it for, or the amount of time you want to invest.
Abbreviations used in the pattern
To make the instructions easier to follow, here are the core abbreviations used throughout the rose blanket pattern:
- ch = chain
- sl st = slip stitch
- sc = single crochet
- hdc = half double crochet
- dc = double crochet
- yo = yarn over
- lp(s) = loop(s)
- st(s) = stitch(es)
- rep = repeat
- sk = skip
- sp = space
- RS = right side
If you are still new to crochet abbreviations, do not let the shorthand intimidate you. Once you recognize the rhythm of chain, double crochet, and slip stitch, the pattern becomes much easier to follow. The key is to read one section at a time and translate the abbreviations as you go instead of trying to memorize everything at once.
Special stitches and techniques explained clearly
This pattern includes only stitches that most beginners can learn quickly, but it still helps to review them before you start. The cleaner your stitch basics are, the nicer the blanket will look once it expands into the larger rounds.
Slip Knot
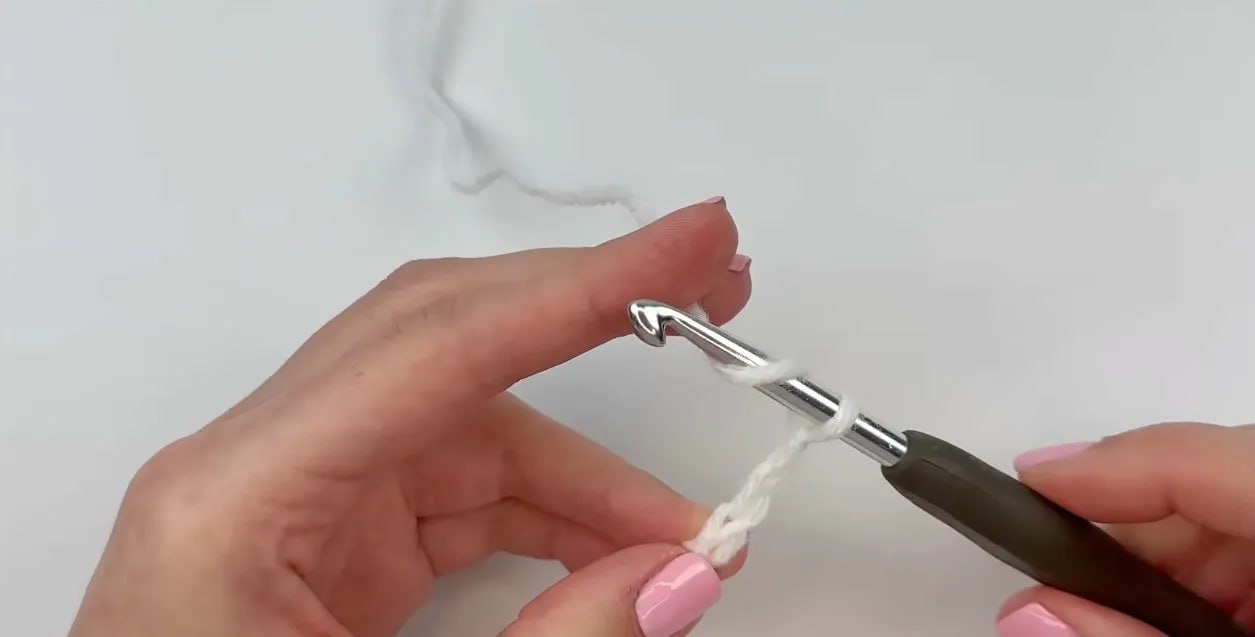
To make a slip knot, wrap the yarn around two fingers and cross it over itself. Pinch the tail, pull the second strand through, place your hook into the loop, and pull gently until it sits snugly on the hook. This is the first setup step for your foundation chain and it should feel secure but not tight.
Chain (ch)
A chain is made by yarning over and pulling directly through the loop on your hook. The most important beginner tip here is consistency. If your chains are too tight, the project will feel stiff from the very beginning. If they are too loose, the center can look sloppy. Aim for even, relaxed motion.
Slip Stitch (sl st)
Insert the hook into the indicated stitch, yarn over, and pull straight through the stitch and the loop already on your hook. Slip stitches are small but important because they are often what make transitions and joins look clean.
Single Crochet (sc)
Insert the hook into the stitch, yarn over, and pull up a loop. Then yarn over again and pull through both loops. Single crochet is a short, steady stitch that helps create structure and control.
Half Double Crochet (hdc)
Yarn over, insert the hook, yarn over again, and pull up a loop so you have three loops on the hook. Yarn over one more time and pull through all three loops. Half double crochet gives a little more height than single crochet without becoming as open as double crochet.
Double Crochet (dc)
Yarn over, insert the hook into the stitch, yarn over, and pull up a loop so you have three loops on the hook. Yarn over and pull through the first two loops, then yarn over again and pull through the remaining two loops. This is the main stitch that gives the blanket body and growth.
Important pattern notes before you start
This blanket is worked in the round from the center outward using white yarn as the main blanket body. Throughout the pattern, the chain-2 at the beginning of each round counts as one double crochet stitch. That is one of the most important details to remember, because ignoring that rule can throw off your stitch count and make the round structure feel confusing.
Another major note is that you should work only into the tops of actual stitches and skip over chain spaces when instructed. This helps the blanket maintain a cleaner, more consistent texture. The blanket increases by 6 stitches every round, which gives you a simple checkpoint to track progress. If your stitch count starts drifting, that increase pattern is the first thing to review.
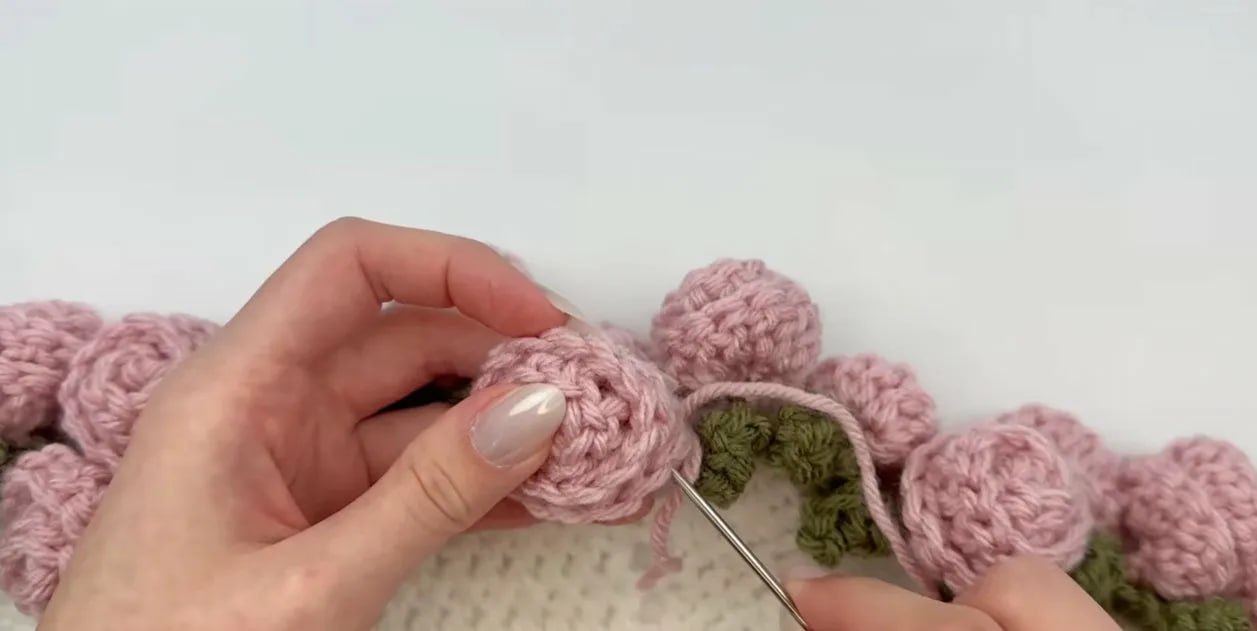
Once the main blanket is complete, the green leaves and pink roses are added to the outer edge. The roses are crocheted flat, rolled into shape, and sewn into place using a tapestry needle. That finishing stage is what transforms the blanket from a lovely throw into a striking bouquet-inspired design.
How to crochet the blanket section step by step
The blanket begins at the center and grows outward in rounds. This is helpful because you are not dealing with long row counts immediately. Instead, the shape develops in a controlled and visible way, which makes it easier to catch mistakes early.
When working the first several rounds, keep your tension relaxed and check often that the fabric is lying flat. If the center starts cupping too much, your stitches may be too tight. If it ripples too early, you may be adding more stitches than intended. Small corrections in the early rounds are much easier than trying to fix the shape after the blanket has grown larger.
As the blanket expands, focus on stitch consistency more than speed. This project rewards steady rhythm. Because the design grows by a predictable 6 stitches every round, it becomes easier to monitor your work as you settle into the repetition. That predictable growth is one of the reasons the pattern feels beginner-friendly despite the dramatic finished look.
Adding the leaves and roses
Once the blanket body is complete, the decorative floral section brings the entire design to life. The leaves are added around the outer edge in green, creating the structure that visually frames the roses. This part is where color placement matters, so it is worth taking your time and checking that the spacing feels balanced before moving on.
The roses themselves are crocheted flat, then rolled and sewn into shape. If you have never made rolled crochet flowers before, do not panic. The trick is to form the spiral gradually and secure it with the tapestry needle as you go, rather than rolling the whole piece tightly and hoping it behaves. Small adjustments while sewing will give you a much nicer rose shape in the end.
How to customize the rose blanket
One of the nicest things about this pattern is how easy it is to personalize. You can keep the white-green-pink color palette for the classic bouquet effect, or change the whole mood of the blanket by swapping in cream, sage, blush, burgundy, peach, lavender, or deeper red tones. Even a simple color adjustment can completely change the final style.
You can also change the blanket size just by continuing the round repeats longer before moving into the decorative edge. That means you do not need a second version of the pattern for a smaller or larger blanket. You simply stop when the size feels right for your project goal.
Common beginner mistakes and how to avoid them
The first common mistake is forgetting that the beginning chain-2 counts as a double crochet. That usually causes stitch counts to drift and makes the blanket shape feel inconsistent. If the rounds stop looking clean, check whether you are accidentally missing or double-counting that starting chain.
Another issue is working into chain spaces instead of the tops of stitches when the pattern tells you not to. That can change the texture and make later rounds harder to read. It is worth slowing down and placing the hook carefully rather than trying to rush through the round.
A third mistake happens during the floral finishing stage. Beginners sometimes roll the flowers too tightly or sew them down before checking the shape from the front. Always look at the rose from the visible side while adjusting the roll so the finished flower looks full and natural rather than flattened.
Why this rose blanket makes such a strong gift
A lot of crochet gifts are useful, but not all of them feel memorable. This blanket stands out because it gives both comfort and presentation. As a blanket, it is practical and cozy. As a rolled bouquet, it feels thoughtful, creative, and visually special in a way that most handmade gifts do not.
That makes it ideal for birthdays, Mother’s Day, baby showers, anniversaries, or even just a meaningful handmade surprise. It is the kind of project that feels personal without needing complicated stitches to impress people. The emotional impact comes from the design concept itself, and that is a great advantage for a beginner-friendly pattern.
FAQ
Is this rose blanket free crochet pattern really beginner-friendly?
Yes. The blanket looks advanced when finished, but the actual stitch work is built on very approachable foundations. If you can manage chain stitches, double crochet, and simple finishing with a tapestry needle, you can work through this project successfully. The key is patience, not advanced technique.
How many colors do I need?
The pattern uses three colors: one for the blanket center, one for the leaves, and one for the roses. That said, you can absolutely change the palette to fit your style or the person you are making it for. The three-color structure is what matters most, not the exact shades.
Can I make the blanket larger or smaller?
Yes. This pattern is adjustable, so you can continue adding rounds until the blanket reaches the size you want. That makes it easy to adapt for a decorative throw, lap blanket, or fuller gift blanket without rewriting the pattern.
What is the easiest part to mess up?
The easiest thing to misread is the round counting, especially if you forget that the chain-2 counts as a double crochet. That one small detail affects the structure of the blanket, so it is worth checking at the beginning of every round until it becomes second nature.
Final thoughts on this rose blanket free crochet pattern
If you want a blanket that feels both beautiful and meaningful, this rose blanket free crochet pattern is a fantastic project to save. It gives you the satisfaction of a large functional crochet piece, but also delivers a floral reveal that feels far more special than an ordinary throw. That is a rare balance, and it is exactly why this design works so well.
For beginners, the project is also a confidence builder. You get to practice foundational stitches in a repetitive format, then explore finishing details that make the result feel elevated. If you are ready for a crochet project that looks impressive without demanding advanced stitch complexity, this is a very strong one to make.
Next steps
If you want to keep building your pattern library after this one, explore more beginner-friendly projects and floral crochet ideas on KnotToYarn. Saving a few related patterns now makes it much easier to stay inspired when you finish your current project.
- Browse more free crochet patterns
- Visit the beginner crochet hub
- Read the granny square pattern guide
Helpful reference: DROPS Design free crochet patterns.
Crochet standards reference: Craft Yarn Council crochet standards.
This rose blanket free crochet pattern tutorial is easiest to follow when you treat the blanket body, leaves, and roses as three separate stages. That approach helps you stay organized, improve your tension gradually, and finish the project with a result that feels both practical and special.
This rose blanket free crochet pattern tutorial is easiest to follow when you treat the blanket body, leaves, and roses as three separate stages. That approach helps you stay organized, improve your tension gradually, and finish the project with a result that feels both practical and special.
Related beginner-friendly guides
- Free Crochet Patterns for Beginners
- Easy Crochet Flower Pattern
- Beginner Crochet hub
- Free Patterns hub
Rose Blanket Free Crochet Pattern reference
For an authoritative outside reference related to rose blanket free crochet pattern, review the Craft Yarn Council guide.
Rose Blanket Free Crochet Pattern tips
This quick section keeps the article focused on rose blanket free crochet pattern while giving the reader one more practical checkpoint.