Crochet Shrug Patterns: Lace, Bolero & Easy Button Styles

Crochet Shrug Patterns: Lace, Bolero & Easy Button Styles

Rainbow of colorful yarn skeins

Quick Answer

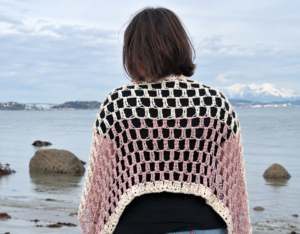
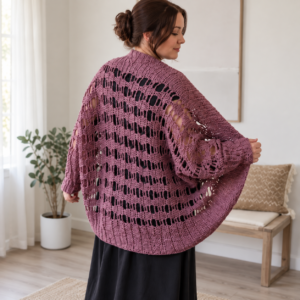
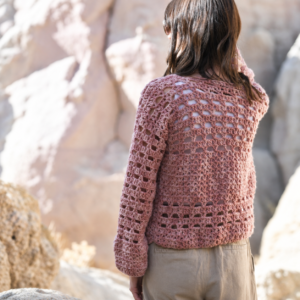
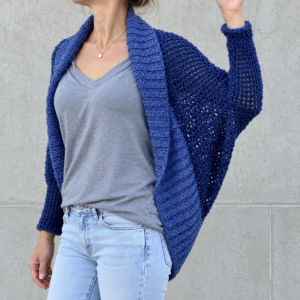
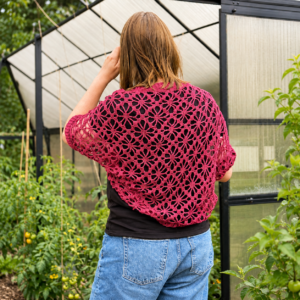
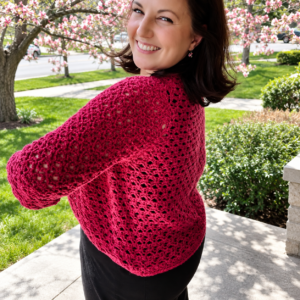
A crochet shrug pattern is one of the most flattering and versatile wearable projects you can make. This Berry Shrug pattern uses a simple double crochet mesh stitch worked in one continuous piece, then folded and joined to create stunning bell sleeves. The entire shrug is made from a flat panel with a head opening, so there is minimal seaming involved. The result is a lightweight, airy layering piece well suited to spring and summer evenings.

Shrugs and shawls both make excellent layering pieces. Our crochet hooded shawl pattern combines the best of both with pockets and a cozy hood.

Tip: Always chain loosely for the shoulder row: tight chains will make the neck opening too small for your head to fit through comfortably.

At a Glance

  • Skill level: intermediate beginner
  • Time needed: 4-6 hours (depending on sleeve length)
  • Best yarn: Loops and Threads Facets, 24/7 cotton, or any lightweight cotton yarn
  • Hook size: 5 mm

Common Mistakes to Quick Fixes

  • Neck opening too small: chain more loosely on the shoulder row, or add extra chains
  • Bulky sleeves: avoid thick acrylic yarn, use lightweight cotton or thin acrylic for a flowing drape
  • Uneven mesh stitches: count your chain-2 spaces carefully and use a stitch marker on the shoulder row

Mini Glossary

DC (double crochet), CH (chain), SL ST (slip stitch), CH-2 space (chain-2 space / mesh opening), mesh stitch (DC, CH 2, skip 2 pattern)

A crochet shrug is the perfect project when you want something between a cardigan and a shawl, light, elegant, and surprisingly easy. The Berry Shrug uses a mesh stitch for an open, lacy fabric with lovely drape. It’s worked in one continuous piece from a foundation chain, shaped with a simple shoulder row for the head opening, then finished with bell sleeves that flare at the elbows. Festival, beach evening, or a cozy everyday layer, it delivers.

It’s an ideal first wearable for anyone who’s got the basics down. This step-by-step guide covers every stage, yarn and hook, the front panel, the shoulder construction, the back panel, and both bell sleeves. Let’s dive in.

What Materials Do You Need for This Crochet Shrug Pattern?

Before you begin, gather your supplies. This shrug is designed for lightweight yarn that drapes beautifully and gives the bell sleeves their flow.

  • Yarn: approximately 150 g of Loops and Threads Facets (a #3 lightweight yarn). Other excellent choices include 24/7 Cotton or any lightweight cotton yarn. If you choose acrylic, make sure it is a thin weight, thick acrylic will make the sleeves bulky and you will lose the flowing bell shape.
  • Hook: 5 mm crochet hook
  • Notions: scissors and a tapestry needle for weaving in ends
  • Stitch marker: optional but highly recommended for the shoulder row

Complete Step 1: Foundation Chain and Row 1 (Front Panel)

The entire crochet shrug pattern starts from a single foundation chain. You need to chain a multiple of three that stretches comfortably from one shoulder to the other. In the tutorial, 60 chains were used, but your number will depend on your shoulder width. Hold the chain up near your collarbones to check the fit, it should span shoulder to shoulder with a little ease.

Once your foundation chain is complete, chain 6 more as a turning chain. Now you will begin the mesh stitch pattern that makes up the entire shrug:

  1. Yarn over and count 6 chains from your hook.
  2. Work 1 double crochet (DC) into the 6th chain from hook.
  3. Chain 2, skip 2 chains, work 1 DC into the 3rd chain.
  4. Repeat this sequence (chain 2, skip 2, DC in 3rd) all the way to the end of the row.
  5. End with: chain 2, skip 2, DC in the last stitch.

This creates a beautiful open mesh pattern. Each “mesh stitch” consists of a DC, chain-2 space, and the next DC, three chains wide and one DC tall. Count your mesh stitches at the end of this row, as you will need that number later for the shoulder row.

Complete Step 2: Continue the Front Panel (Rows 2-10)

For row 2 and every subsequent row of this crochet shrug pattern front panel, the process is straightforward:

  1. Chain 5 and turn your work.
  2. Work 1 DC into the first chain-2 space.
  3. Chain 2, work 1 DC into the next chain-2 space.
  4. Repeat across the entire row.

Continue working these rows until the panel reaches from your collarbone down to under your armpit when held against your body. In the tutorial, 10 rows were created for the front panel. The exact number will depend on your tension, yarn thickness, and body size. Just keep checking by holding it up, the bottom edge should sit comfortably under your arm.

Complete Step 3: The Shoulder Row (Creating the Head Opening)

This is the most important row of the entire crochet shrug pattern, take your time with it. The shoulder row connects the front panel to the back panel and creates the neck opening in one clever step.

  1. Chain 5 and turn your work.
  2. Work 1 DC into the first chain-2 space.
  3. Work normally into the next 3 chain-2 spaces (you should have 4 mesh stitches total on this side).
  4. Count 5 mesh stitches from the opposite end (the left side) and place a stitch marker in the 5th chain-2 space.
  5. Now count the number of open mesh stitches between your stitch marker and your last worked stitch. In the tutorial, there were 12 mesh stitches in between.
  6. Multiply that number by 3 (because each mesh stitch = 3 chains: the DC post + the chain-2 + the next DC post). So 12 x 3 = 36 chains.
  7. Chain that many chains loosely: in this case, chain 36. Do not chain tightly or the neck opening will be too small.
  8. Work 1 DC into the marked chain-2 space, remove the marker.
  9. Continue working DC, chain 2 across the remaining chain-2 spaces to the end of the row.

Try the shrug on after this row! Make sure your head fits through the opening. If it feels too tight, you can add more chains and redo the row. This is the beauty of working the front panel, shoulder, and back panel all in one continuous piece, no seaming required.

Complete Step 4: Back Panel

The back panel mirrors the front panel. Start by chaining 5 and turning your work, then work 1 DC into the first chain-2 space as usual. When you reach the long chain from the shoulder row, treat it like a foundation chain:

  1. Chain 2, skip 2 chains, work 1 DC into the 3rd chain.
  2. Repeat (chain 2, skip 2, DC in 3rd) across the chain.
  3. When you reach the other side, connect back into the chain-2 spaces and finish the row normally.

You need the same number of rows for the back panel as you made for the front panel. If you made 10 rows for the front, work 9 more (since the shoulder row is its own separate row). Count from the center fold to make sure both panels are even.

Complete Step 5: Joining the Panels and Starting the Sleeves

The construction of this crochet shrug pattern is wonderfully efficient because you never cut the yarn between sections. Lay the panels flat with one on top of the other, then fold the entire piece in half so the front and back panels are stacked. Now you will join the sides to form the arm openings:

  1. Chain 1.
  2. Insert your hook through the first available stitch on the front panel AND the first available stitch on the back panel (going through both layers).
  3. Yarn over, pull through both loops, then pull through the loops on your hook, this is a slip stitch joining both panels.
  4. Repeat for the next 2-3 stitches (3 slip stitches total creates the underarm join).

This creates the armhole opening. The remaining chain-2 spaces along each side form the sleeve openings, which you will now crochet in the round. This is where your crochet shrug pattern really starts to look like a garment!

Complete Step 6: Crocheting the Bell Sleeves

Now the crochet shrug pattern really starts to take shape. After the slip stitch join, chain 5 and begin working mesh stitches around the sleeve opening. Treat the gap at the chain-5 from the start as a chain-2 space and work 1 DC into it. Continue with the standard mesh pattern (DC, chain 2) around the entire sleeve.

Close each sleeve row by chaining 2 and working a slip stitch into the 3rd chain of the starting chain-5.

Sleeve Increase Schedule

The bell shape comes from strategic increases. Work straight rows until the sleeve reaches your elbow, then begin increasing:

  • First increase round: Increase on every 3rd stitch (work DC, chain 2, DC in the same space)
  • 2 normal rows with no increases
  • Second increase round: Increase on every 5th stitch
  • 2 normal rows
  • Third increase round: Increase on every 7th stitch
  • 2 normal rows
  • Fourth increase round: Increase on every 9th stitch

You can continue this pattern (every 11th, every 13th) until the sleeve reaches your desired length. Each increase adds width, creating the beautiful flared bell shape. When your sleeve is long enough, chain 1, cut the yarn, and secure with a knot. Then weave in your ends using a tapestry needle, pick up loops in the mesh stitches and work back and forth for a secure finish.

Complete Step 7: Second Sleeve

The second sleeve of your crochet shrug pattern is worked identically to the first. Join your yarn by inserting your hook into the 3rd chain from the chain-5 on the other side of the underarm join. Make a slip knot, pull through both loops, chain 1, then work 3 slip stitches joining front and back panels as before. Chain 5 and begin the mesh stitch pattern, following the same increase schedule as the first sleeve.

Yarn and Material Tips for the Best Results

The yarn makes a big difference in how the shrug turns out. A good shrug relies on drape and movement, so yarn choice is key. A few practical tips from the tutorial and experience with this pattern:

  • Cotton yarns like Loops and Threads Facets or 24/7 Cotton create the best drape and bell sleeve flow. Cotton holds its shape while staying lightweight.
  • If using acrylic, choose a thin, soft acrylic. Thick or stiff acrylic will make the sleeves bulky and the mesh pattern will not flow as nicely.
  • Chain loosely on the shoulder row. This is the single most common issue, tight chains make the neck opening too small. Test it on your body before continuing to the back panel.
  • Count your mesh stitches on the shoulder row and multiply by 3 for your chain count. This math ensures the back panel aligns perfectly with the front.

For more guidance on choosing materials, check out our guide on the best yarn for beginner crochet projects and our crochet hook sizes chart to make sure you have the right tools for the job. For standard crochet terminology, the Craft Yarn Council is an excellent reference for yarn weight classifications, and you can explore more wearable crochet shrug designs on Ravelry.

Frequently Asked Questions

How much yarn do I need for a crochet shrug pattern?

You will need approximately 150 grams of a lightweight (#3) yarn for an adult-sized shrug. If you are making a larger size or longer sleeves, plan for up to 200 grams. Cotton yarns like Loops and Threads Facets or 24/7 Cotton work beautifully because they create the flowing drape that bell sleeves need. If you are new to crochet, start with a smooth, light-colored yarn so you can easily see your stitches.

Can I make this shrug with acrylic yarn?

Yes, but choose a thin acrylic rather than a thick one. Bulky acrylic will make the sleeves stiff and you will lose the flowing bell shape that makes this shrug so beautiful. Look for a worsted or DK weight acrylic that drapes well. The thinner the yarn, the more elegant your finished double crochet mesh fabric will look and feel.

How do I adjust the size of the shrug?

One of the best things about this shrug is how easily it adapts to different sizes. Chain a multiple of 3 that spans shoulder to shoulder held near your collarbones, more chains for a wider shrug, fewer for a narrower one. The front-panel length (rows before the shoulder row) sets how far down it sits, and the number of sleeve rows sets the sleeve length. Very customizable for any body.

Why is my neck opening too small?

This usually happens because you chained too tightly on the shoulder row. To fix it, unravel the shoulder row and rechain with a looser tension. You can also add extra chains (increase by 3 or 6) to widen the opening. Always try the shrug on after completing the shoulder row before moving on to the back panel, it is much easier to adjust at that stage than after finishing the entire piece.

How do I make the bell sleeves more dramatic?

For more dramatic bell sleeves, keep going past every 9th stitch, add rounds increasing on every 11th, then every 13th. Each progressive increase adds width, giving the sleeve that signature fairy-like flare. You can also add a few plain rows between increase rounds for a longer, more gradual flare. Keep trying the sleeve on as you work to get the shape you want.

Final Thoughts

This shrug looks complicated but is actually quite approachable once you understand the construction. Working the body in one piece, front panel, shoulder, back panel, means minimal seaming and a clean finish. The mesh stitch makes an airy, lightweight fabric well suited to layering, and the graduated bell-sleeve increases give it an ethereal, fairy-like quality.

In the forest green from the tutorial or your own favorite color, this shrug is bound to become one of your most-worn handmade pieces. If you enjoyed it, you might also like our other crochet wearables, explore more of our free patterns for your next project.

Similar Posts

Leave a Reply

Your email address will not be published. Required fields are marked *