Pink Gingham Blanket Crochet Pattern: Free Step-by-Step Guide
This pink gingham blanket crochet pattern is a timeless classic that brings warmth, charm, and a touch of vintage nostalgia to any room in your home. The iconic gingham checkered design is achieved using a clever color-changing technique with just three shades of pink yarn, working blocks of ten stitches in alternating colors to form the familiar checkerboard pattern that everyone knows and loves.
\nOriginally designed by Tiffany Brown of Daisy Farm Crafts, this pink gingham blanket crochet pattern has been cherished by crocheters around the world for its simplicity, elegance, and gorgeous results. The finished blanket measures approximately 36 inches square, making it the perfect size for a baby blanket, a cozy lapghan, or a decorative throw for your favorite reading chair.
What makes this pink gingham blanket crochet pattern especially appealing is that the entire piece is worked using only the single crochet stitch, making it one of the most beginner-friendly blanket patterns available.
There are no complex stitch combinations in this pink gingham blanket crochet pattern, no tricky colorwork charts to follow, and no bobbins to manage.
Instead, you simply work ten stitches in one color, then switch to the next color for the next ten stitches, carrying the unused yarn along the row as you go. The result is a clean, professional-looking checkerboard with no visible floats on the right side of the fabric and a neat carried yarn on the wrong side that is completely hidden within the stitches.
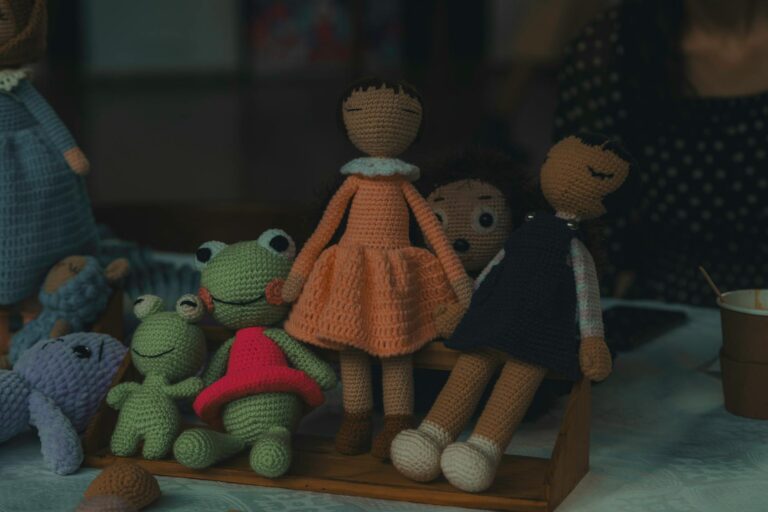
 KnotToYarn
Subscribe to KnotToYarn!
Get the best free crochet patterns, tutorials & tips delivered straight to your inbox. Join our growing community!
This pink gingham blanket crochet pattern uses a sweet color palette that gives this blanket, feminine look that is absolutely perfect for nursery decor, little girls’ rooms, or as a thoughtful handmade baby shower gift.
However, the beauty of this pink gingham blanket crochet pattern is that you can easily adapt it to any color scheme by simply substituting three colors that graduate in intensity from light to dark. Try blue gingham for a baby boy, yellow gingham for a cheerful kitchen throw, or green gingham for a farmhouse-style living room blanket. The possibilities are truly endless once you master the simple color-changing technique of this pink gingham blanket crochet pattern.
Pink Gingham Blanket Crochet Pattern Technique
The secret behind this pink gingham blanket crochet pattern lies in how the color blocks are arranged and stacked. Each row alternates between two colors, working blocks of ten stitches each. When you finish a block of ten stitches in one color, you pick up the second color on the last yarn over of the tenth stitch, so the transition is completely seamless and virtually invisible in the finished fabric. The unused color is carried along the wrong side of the work, encased within the stitches of the active color, which means there are no dangling floats or loose strands to catch on fingers or toes.
The gingham effect emerges when you stack the color blocks in an offset pattern across multiple rows.
In the first section of the blanket, you alternate between White and Soft Pink for ten rows, then switch to Soft Pink and Strawberry for the next ten rows, creating the characteristic diagonal shift that makes gingham so distinctive. This stacking technique is what transforms simple blocks of single crochet into the iconic checkered pattern. The genius of this approach is that it requires no planning, no chart-reading, and no complicated color management beyond the basic ten-stitch blocks.
Materials for Pink Gingham Blanket
- Caron Simply Soft yarn (100% acrylic, 170g/6 oz, 288m/315 yds per skein)
- 3 skeins each in: White, Soft Pink, and Strawberry (9 skeins total)
- Size H/5.00mm crochet hook (for the foundation chain only)
- Size J/6.00mm crochet hook (for the blanket body)
- Tapestry needle for weaving in ends
- Scissors
The reason for using two different hook sizes is essential to the success of this pink gingham blanket. The smaller H hook (5.00mm) is used exclusively for the foundation chain to create a tight, firm base that prevents gaps and holes at the starting edge of the blanket. Once the foundation chain is complete, you switch to the larger J hook (6.00mm) for the body of the blanket. The larger hook creates a softer, more flexible fabric with better drape, making the finished blanket cozy and comfortable to wrap around yourself or a little one.
Caron Simply Soft is an ideal yarn choice for this project because it has a beautiful subtle sheen, comes in an enormous range of coordinating colors, and is widely available at most craft stores. The acrylic fiber is also machine washable and dryable, which is a practical consideration for a blanket that will likely see plenty of use and love. For more information about yarn weight standards and substitutions, the Craft Yarn Council provides a full guide that is helpful for crocheters of all skill levels.
Finished Size and Sizing Adjustments
The finished pink gingham blanket measures approximately 36 inches by 36 inches (91cm x 91cm), which is a generous and versatile size that works beautifully as a baby blanket, a stroller blanket, a lapghan, or a decorative throw.
The original pattern uses 131 foundation chains (which is 130 + 1) to achieve this width. If you want a smaller or larger blanket, you must chain a multiple of 10 plus 1.
Valid chain counts include 71 for approximately 20 inches, 81 for approximately 22 inches, 91 for approximately 25 inches, 101 for approximately 28 inches, and 111 for approximately 31 inches. Choosing a chain count that ends in 1 when divided by 10 ensures that the starting and ending colors of each row match up perfectly, which is critical for clean checkerboard lines.
Stitch Guide for Pink Gingham Blanket
Single Crochet (SC): Insert your hook into the designated stitch, yarn over and pull up a loop, yarn over and pull through both loops on your hook. This is the only stitch used throughout the entire blanket, making it truly beginner-friendly while still producing a gorgeous, professional-looking result. Even if you have only been crocheting for a few weeks, you have all the skills needed to complete this beautiful pink gingham blanket.
Pink Gingham Blanket Pattern Instructions
Foundation Chain
Using the smaller H hook and White yarn, make a foundation chain of 131 chains (for the 36-inch blanket) or 111 chains (for the 31-inch blanket). Remember that your chain count must be a multiple of 10 plus 1, so valid counts are 71, 81, 91, 101, 111, 121, and 131. Each block of the gingham pattern is exactly ten stitches wide, so having the correct multiple ensures your checkerboard lines up perfectly from row to row without any shifting or misalignment.
Rows 1 Through 10 (White and Soft Pink)
Switch to the larger J hook. In the second chain from the hook, work 1 SC and continue with 1 SC in each of the next 9 chains for a total of 10 SC in White. On the tenth SC, do not complete the last step of the stitch. Instead, pick up the Soft Pink yarn and pull through to complete the stitch, then work 1 SC into each of the next 10 chains in Soft Pink.
While working with Soft Pink, lay the unused White yarn along the row of stitches and crochet over it, encasing it within your stitches. Keep the carried yarn somewhat taut to prevent loose loops on the wrong side of the blanket. At the tenth Soft Pink stitch, change back to White by picking it up on the last yarn over. Continue alternating White and Soft Pink every ten stitches across the entire row until you reach the end.
Rows 2 through 10: Chain 1 and turn at the end of each row. Carry the unused yarn around the end of the row and continue crocheting over it until it is needed again. Keep switching colors every ten stitches, maintaining the checkerboard pattern of White and Soft Pink blocks. After row 10, the two-color checkerboard section is complete and you are ready to introduce the third color.
Rows 11 Through 20 (Soft Pink and Strawberry)
At the end of row 10, cut off the White yarn. Work the first 10 stitches with Soft Pink, and on the tenth stitch, pull through with Strawberry to begin the color change.
Continue alternating Soft Pink and Strawberry every ten stitches exactly as you did with White and Soft Pink. On row 11, the Soft Pink stitches should be worked into the White stitches from the previous row, and the Strawberry stitches should be worked into the Soft Pink stitches, creating the characteristic diagonal offset that makes gingham so distinctive and recognizable.
KnotToYarn
Subscribe to KnotToYarn!
Get the best free crochet patterns, tutorials & tips delivered straight to your inbox. Join our growing community!
Chain 1 and turn after each row, carrying the unused yarn as before. Keep alternating Soft Pink and Strawberry every ten stitches. Repeat this two-color block pattern for ten rows, then cut off Soft Pink and return to White and Soft Pink for the next ten rows. Continue this cycle of 20-row blocks until you have completed 130 rows total. Tie off and weave in all ends before beginning the border.
Pink Gingham Blanket Border
The scalloped border on this pink gingham blanket adds a beautiful, professional finishing touch that elevates the entire design from a simple checkerboard to an heirloom-quality piece. Switch back to the smaller H hook for the border since you will be working with only one strand of yarn at a time, and the smaller hook creates tighter, neater border stitches.
Round 1: Using Soft Pink yarn, SC into each stitch around the entire blanket, working 3 SC into each corner stitch to turn the corners smoothly and evenly. This round establishes a solid border base for the scallops and creates a clean edge all the way around the blanket.
Round 2: SC in the next stitch, then *chain 5, slip stitch around the post of the SC you just made to create a decorative loop. SC into the next 4 stitches.* Repeat from the asterisk all the way around the blanket. When working around a corner, put 2 SC into the corner SC to maintain even spacing. Slip stitch to join the round.
Round 3: *Work 6 SC into the circle of chains created in Round 2. Skip over the next SC, SC into the next 2 stitches, skip the next SC.* Continue repeating from the asterisk all the way around the blanket to create a beautiful shell-like scalloped edge that frames the gingham pattern perfectly.
Round 4: SC into each and every stitch all the way around the blanket. This final round smooths out the scallops and creates a neat, finished edge. Slip stitch to the first stitch of the round and fasten off. Weave in all remaining ends securely.
Tips for Your Pink Gingham Blanket Crochet Pattern
Consistent tension is the single most important factor for achieving clean, even gingham checks. If your tension varies between colors or throughout the project, the blocks may appear uneven, wavy, or distorted. Take your time with the color changes and make sure you are carrying the unused yarn smoothly and consistently at the same tension as your working yarn. Practice the color-change technique on a small 30-stitch swatch before starting the full blanket if you are new to carrying yarn within your stitches.
When weaving in ends, take extra care to secure the color-change points firmly so they do not come undone with regular washing and use. This pink gingham blanket is machine washable when made with Caron Simply Soft acrylic yarn, but always lay it flat to dry to maintain its shape and prevent stretching. Do not hang the blanket to dry, as the weight of the wet yarn can cause the blanket to elongate and lose its square shape.
With proper care, this blanket will last for years and can even become a treasured family heirloom passed down through generations. This pink gingham blanket crochet pattern is a wonderful project for anyone who loves creating handmade gifts for loved ones.