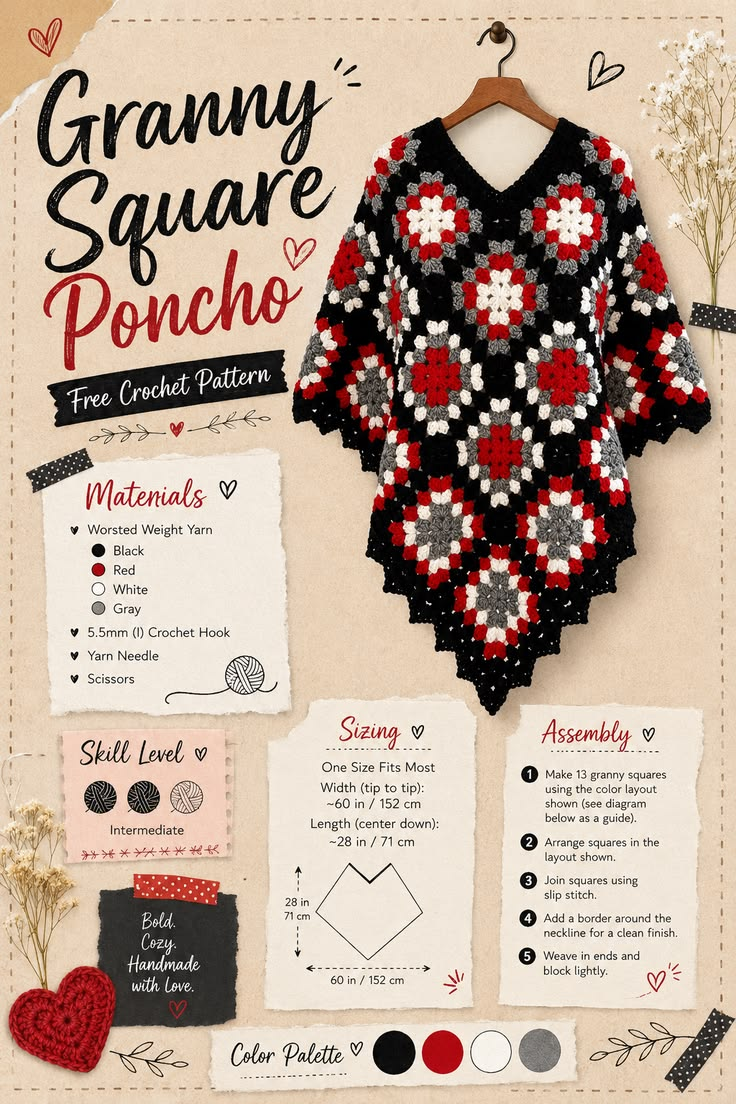
Granny Square Poncho: Free No-Sew Join-as-You-Go Pattern
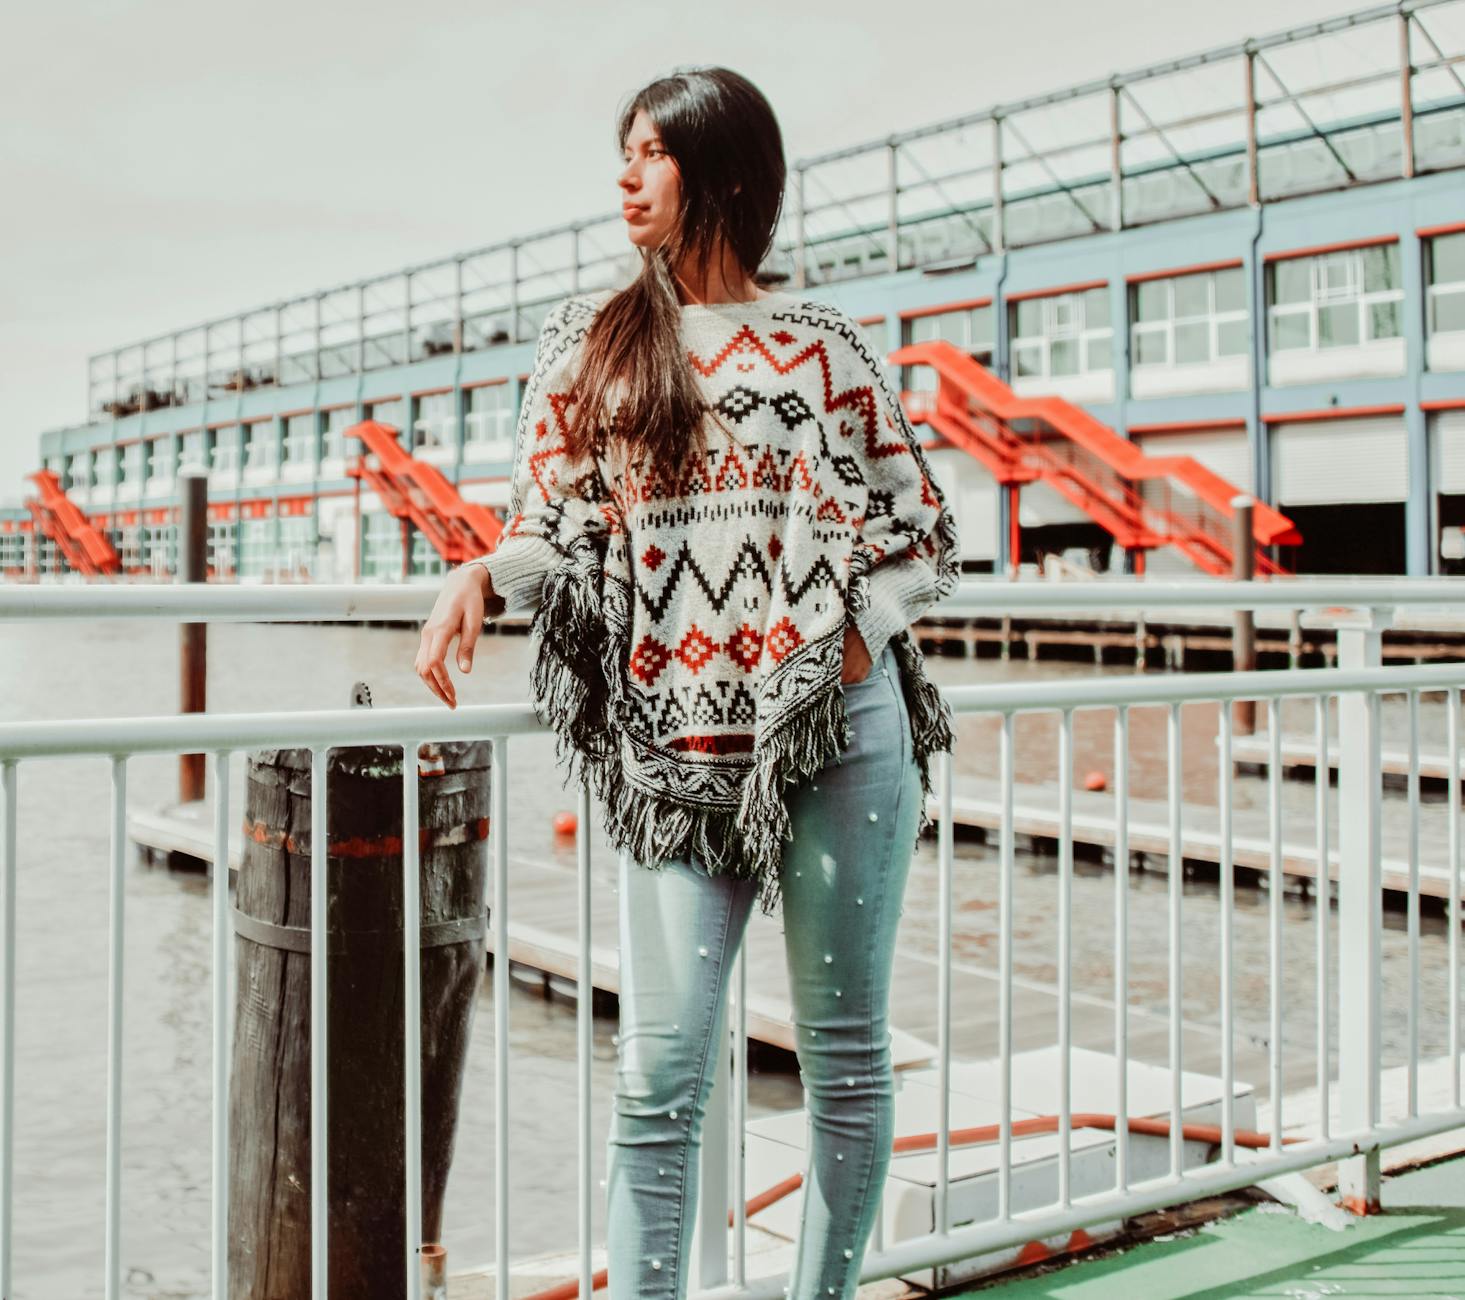
This granny square poncho pattern is one of the most beginner-friendly garment projects you can tackle. If you have ever wanted to turn your granny square skills into a wearable piece, this granny square poncho pattern is the perfect place to start.
Granny Square Poncho Pattern at a Glance

| Pattern type: | Granny square poncho (two-panel construction) |
| Skill level: | Beginner to intermediate |
| Yarn: | Lion Brand Color Made Easy (worsted weight, category 4) |
| Hook size: | 6.5 mm (K-10.5) or whatever gets you to gauge |
| Total granny squares: | 16 (6 of Motif A, 6 of Motif B, 4 of Motif C) |
| Finished square size: | Approximately 8 inches per square |
| Colors needed: | 4 — 1 main color + 3 accent colors |
| Seaming method: | Join-as-you-go (no sewing required for the panels) |
| Shoulder seams: | Single crochet seam (right sides together) |
| Estimated yardage: | Approximately 800–1000 yards total (2 balls of main color + 1 ball each of accents) |
How This Poncho Is Constructed
The construction of this granny square poncho pattern is what makes it such an approachable project for crocheters who already know the basics. If you can make a standard granny square and work a double crochet, you have every skill needed to complete this granny square poncho pattern. The entire poncho is built from two rectangular panels, each made up of eight granny squares arranged in a 2×4 grid. The two panels are then joined at the shoulder seams with a simple single crochet seam, leaving a neck opening at the center top. There is no complicated shaping, no armhole decreases, and — best of all — no hand-sewing required for the main panels.
 KnotToYarn
Subscribe to KnotToYarn!
Get the best free crochet patterns, tutorials & tips delivered straight to your inbox. Join our growing community!
Each panel consists of eight granny squares connected using a join-as-you-go method. This means that instead of making all 16 squares separately and then sewing them together at the end, you work the final round of each square directly onto the adjacent squares as you go. The result is a sturdy, seamless join that looks cleaner than most sewn seams and saves you from having to weave in dozens of extra ends. The only actual seaming happens at the two short shoulder edges, and even that is done with a crochet hook rather than a darning needle.
Every time we share this granny square poncho pattern with readers, the join-as-you-go technique is the feature that gets the most positive feedback.
What You Will Need
Before starting this granny square poncho pattern, gather the following materials. The yarn recommendation below comes directly from the original pattern source, but any worsted weight (category 4) yarn with similar yardage will work.
Having the right supplies on hand before you begin this granny square poncho pattern makes the entire process smoother and more enjoyable.
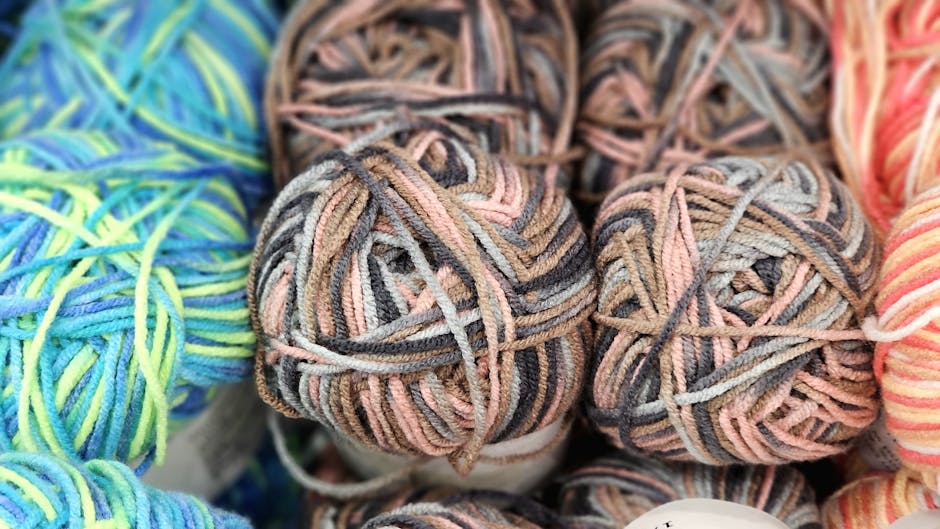
- Yarn: 2 balls of Lion Brand Color Made Easy in your main color (the original pattern uses “Caviar,” a rich black). You will also need 1 ball each of 3 accent colors. Color Made Easy is a worsted weight acrylic that works up smoothly and comes in a wide range of solid shades, making it easy to find four colors that complement each other. If you substitute a different yarn, look for a smooth, medium-weight yarn that holds up well to repeated joining.
- Crochet hook: 6.5 mm (K-10.5). As always, check your gauge and adjust your hook size up or down if your squares are coming out larger or smaller than the 8-inch target. A hook one size larger will give you a drapier, more relaxed poncho. A hook one size smaller will produce a denser, warmer fabric.
- Scissors: For cutting yarn between color changes and at the end of each panel.
For more information about the yarn used in this pattern, visit the Lion Brand Color Made Easy product page. If you are newer to granny squares and want to brush up on the basics, the Craft Yarn Council’s yarn weight standards page is a helpful reference for understanding yarn categories and recommended hook sizes.
That is genuinely the full supply list. There is no darning needle required for the main construction because the granny squares are joined as you go and the shoulder seams are worked with a crochet hook. If you want to weave in your loose ends at the very end, a tapestry needle is helpful but not strictly necessary — you can use your hook to pull tails through nearby stitches.
This minimal supply list is one reason this granny square poncho pattern is so accessible — no special tools beyond a hook, yarn, and scissors.
The Three Granny Square Motifs
This granny square poncho pattern uses three different granny square motifs (called Motif A, Motif B, and Motif C in the original pattern), each distinguished by its color arrangement. All three are standard granny squares in terms of stitch construction — the only difference is which round each color appears on. Understanding how the colors are distributed is the key to reading the layout diagram correctly.
Motif A: The first accent color appears in the center two rounds of the granny square. The main color is worked for the outer round (Round 4 or 5, depending on your square size). You will need 6 of these — 3 for each panel. Organizing your motifs as you finish each one keeps this granny square poncho pattern on track.
Motif B: The second accent color takes the center position. The construction is identical to Motif A, but the center color changes. Again, you need 6 of these — 3 per panel. Keeping Motif A and Motif B separate in your workspace helps prevent mix-ups in this granny square poncho pattern.
Motif C: The third accent color sits in the center. This motif appears only 4 times total — 2 on each panel. The reason there are fewer Motif C squares is that the two center-top positions of this granny square poncho pattern of the layout (where the neckline opening sits) are left open, so each panel only needs 8 squares instead of 10 for a full 2×5 grid.
Important note on the main color: Every single granny square, regardless of motif, has the same main color (the original pattern uses black) worked as its final outer round. This is what allows the join-as-you-go method to work so seamlessly — when all outer rounds share the same color, the join stitches blend in perfectly and become virtually invisible.
Understanding the Layout
This granny square poncho pattern arranges each panel in a 2-wide by 4-tall rectangle of granny squares. Think of it as a grid where the 4 squares run vertically from the hem to the shoulder, and the 2 squares run horizontally across the width of the panel. When you lay both completed panels flat, the total piece is 4 squares wide (two panels side by side) and 4 squares tall.
Visualizing the layout before you start joining squares saves time and prevents mistakes in this granny square poncho pattern.
The layout follows a specific color rotation. Starting from one bottom corner and reading across and up, the motifs alternate: A, B, C, A on the first panel, then A, B, C, A mirrored on the second panel. The exact placement is not as critical as making sure you have the right count of each motif — 6 of A, 6 of B, and 4 of C — and that the main color faces outward on every square.
When both panels are finished, they are placed right sides together and joined along the top edge (the shoulder seams). The shoulder seam on each side is only 2 squares long (the width of one panel), which means each seam is roughly 16 inches. The two unjoined center squares at the top of each panel form the neckline opening, which should measure approximately 16 inches across — wide enough to slip over your head comfortably.
How to Make the Granny Squares
Each granny square in this poncho follows the standard construction: a starting ring, then successive rounds of three double crochet clusters separated by chain-one spaces, with chain-two corners. The center rounds use your accent color and the final round uses the main color.
A quick refresher on the standard granny square, which is the building block of this granny square poncho pattern, if you need one:
- Round 1: Ch 4, join with a slip stitch to form a ring. Ch 3 (counts as first DC), work 2 DC into the ring. Ch 2, work 3 DC into the ring. Repeat (3 DC, ch 2, 3 DC) two more times into the ring. Ch 2, join with a slip stitch to the top of the beginning ch-3. You should have 4 clusters of 3 DC separated by ch-2 corners.
- Round 2: Slip stitch into the first ch-2 corner space. Ch 3 (counts as first DC), work 2 DC in the same corner space. Ch 1. In the next ch-1 space along the side, work 3 DC. Ch 1. In the next corner, work 3 DC, ch 2, 3 DC. Continue around, working 3 DC in each side space and (3 DC, ch 2, 3 DC) in each corner. Join with a slip stitch to the top of the beginning ch-3.
- Rounds 3–4 (or 5): Continue the same pattern, increasing the number of 3-DC clusters along each side by one per round. This is the standard granny square growth method used throughout this granny square poncho pattern. Each round adds one more side cluster between the corners. Switch colors as needed for your motif assignment.
- Final round: Work in your main color. This is the round that will be used for the join-as-you-go method when connecting squares.
For this poncho, each finished square should measure approximately 8 inches across. If your squares are measuring smaller, go up a hook size. If they are measuring larger, go down a hook size. Consistent gauge across all 16 squares is more important than hitting exactly 8 inches — what matters is that all squares match each other so the panels lie flat.
Consistent square size is the single most important factor for success with this granny square poncho pattern.
Join-As-You-Go Method
The join-as-you-go technique is what makes this pattern so satisfying to work. Instead of making 16 individual squares and then spending an evening whip-stitching them all together, you join each new square to the previous ones as you work the final (main color) round. This method works best when all outer rounds use the same color, which is exactly how this poncho is designed.
Mastering the join-as-you-go method opens the door to countless other projects, but this granny square poncho pattern is one of the best ways to practice because the repeats are manageable and the results are so satisfying.
Joining Two Squares Together
The joining technique is the heart of this granny square poncho pattern. Start by completing one full granny square in its entirety, including the main color outer round. This becomes your anchor square. Then, when you begin the main color round on the next square, work normally through the first two sides and the first half of the third side. When you reach the third side (the side that will be adjacent to the anchor square), the joining begins.
Here is the step-by-step process:
- Start the new square: Place a slipknot on your hook, insert it into any corner of the completed anchor square, and work 1 SC followed by ch 2. Work 3 DC, ch 1, then 3 more DC to complete the first corner of the new square’s final round.
- Work to the joining side: Continue working 3 DC in each space along the first side and the second side, with ch 1 between each cluster. Work normally — no joining yet.
- Reach the third side: Work 3 DC, ch 1 into the corner as you normally would. Then, instead of chaining 1 and moving to the next space, place the wrong sides of both squares together.
- Join at the corner: Insert your hook through the corresponding corner space of the anchor square and complete 1 SC (instead of a chain 1). This connects the two squares at the corner.
- Continue joining along the side: Work 3 DC into the next space on the new square. Then, instead of chaining 1, insert your hook through the corresponding space on the anchor square and work 1 SC. Repeat this across the entire side: 3 DC on the new square, 1 SC join to the anchor square.
- Complete the corner: When you reach the end of the side, work 3 DC into the corner space of the new square. Then insert your hook through the corner of the anchor square, work 1 SC, ch 1, and continue working normally along the fourth (unjoined) side.
- Close the round: Work 3 DC in each space along the fourth side. Ch 1, then slip stitch into the third chain of the beginning ch-3 to close. Chain 1, cut yarn, and pull through.
Joining Three Squares at a Corner
When three granny squares meet at a single point (which happens in the middle of each panel), the joining technique needs a small adjustment to keep the corner clean and secure. This situation occurs where one horizontal row meets a vertical column of squares in this granny square poncho pattern.
Work along the first square normally until you reach the corner where all three squares meet. At this corner, you will join to the adjacent square on one side first, just as described above — work 3 DC, then 1 SC into the corresponding corner of the next square. But instead of chaining 1 and moving on, rotate your work slightly and work a second SC into the corner of the third square. This means that at the shared corner, you work: 3 DC (finish the cluster), SC into Square 2 corner, SC into Square 3 corner, ch 1, then continue along the next side.
This double-single-crochet corner join keeps the intersection point tidy, prevents gaps, and ensures the three squares lay flat against each other without puckering. It may feel a little awkward the first time you try it, but it becomes second nature quickly. The key is to keep your joins loose — if you pull the SC joins too tight, the panel will curl and the squares will not sit flat. This is especially important in a granny square poncho pattern where multiple corners meet at one point.
Completing Both Panels
Assembling the panels is the most rewarding phase of this granny square poncho pattern. Work through all 8 squares for each panel using the join-as-you-go method described above. Remember: you only work a full main color border around one square (the first one). Every subsequent square gets joined to the adjacent completed square during its final round. Keep your layout diagram handy so you place the correct motif (A, B, or C) in the right position.
When both panels are complete, you should have two rectangular pieces, each measuring approximately 16 inches wide by 32 inches tall (2 squares wide by 4 squares tall). Take a moment to lay them flat and check that all squares are aligned and the joins look even. If any squares are noticeably different in size, this is the time to notice — it is much easier to address now than after the shoulder seams are done.
Taking the time to check your panels at this stage ensures your finished granny square poncho pattern turns out beautifully.
Joining the Shoulder Seams
The final step in completing this granny square poncho pattern is joining the two shoulder seams. Once both panels are finished, the last construction step is to join the two shoulder seams. This is the only actual seaming in the entire pattern, and it is done entirely with a crochet hook — no darning needle needed.
How to Single Crochet the Shoulder Seam
- Position the panels: Place both panels with right sides facing each other and wrong sides facing outward. Line up the top edge (shoulder edge) of one panel with the top edge of the other. The shoulder seam runs along the short side of each panel — just 2 squares wide, which is roughly 16 inches.
- Find the starting corner: Starting at one corner of the shoulder edge, locate the chain-2 corner space. You only want to join through the chain space closest to the side edge — not both chains in the corner space. Joining through both would accidentally close the neckline. Insert your hook through the nearest chain on one panel and the corresponding chain on the other panel.
- Work the seam: Yarn over and pull through both layers to complete 1 SC. Continue working 1 SC through each pair of corresponding stitches along the shoulder edge. Work through both strands of each stitch on both panels to ensure a strong, even seam.
- Keep the seam relaxed: This is the most important tip for the shoulder seams. Work your single crochets at a comfortable tension — do not pull tight. The seam should join the two panels together without cinching or gathering the fabric. If you work the seam too tightly, the poncho will pull awkwardly at the shoulders and will not drape properly. A good test: when the seam is finished, the joined edge should lie flat and the fabric on both sides should be smooth with no puckering.
- Finish the seam: When you reach the end of the shoulder edge, chain 1 and cut the yarn. Pull the tail through the last loop to secure. Repeat the entire process for the second shoulder seam on the other side.
After both shoulder seams are complete, the poncho is essentially finished. The neckline opening is created naturally by the unjoined center section at the top of each panel — it should be approximately 16 inches wide, which is a comfortable fit for most adults. Try the poncho on and adjust if needed.
Congratulations — you have completed a granny square poncho pattern from start to finish! The join-as-you-go construction means there are no bulky sewn seams to distract from your clean granny square motifs.

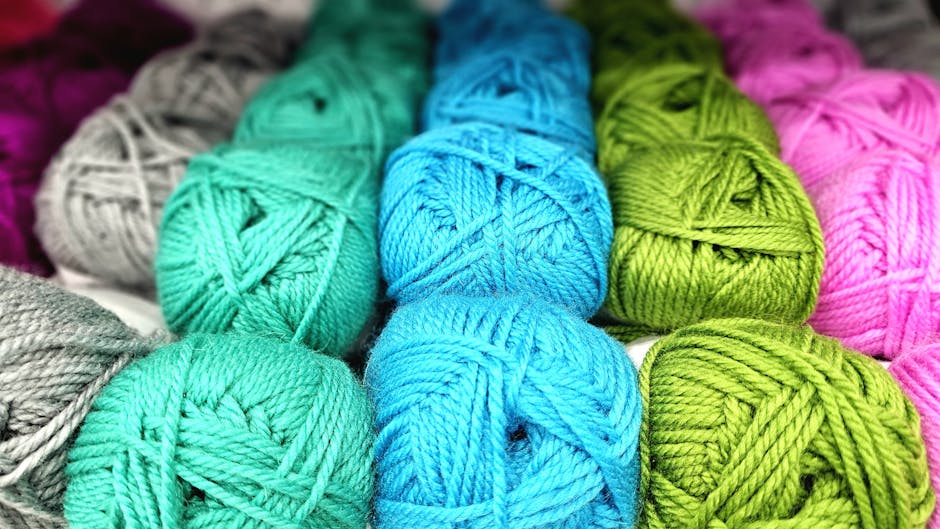
Color Scheme Ideas
The original pattern uses Lion Brand Color Made Easy in Caviar (black) as the main color, with three accent colors that each take the center position of one motif type. The contrast between a dark main color and brighter accent squares creates a bold, graphic look that shows off the granny square structure beautifully. Here are a few alternative color combinations to consider:
KnotToYarn
Subscribe to KnotToYarn!
Get the best free crochet patterns, tutorials & tips delivered straight to your inbox. Join our growing community!
Choosing colors is one of the most fun parts of any granny square poncho pattern. Do not be afraid to experiment with combinations you would not normally pair together.
- Earth tones: Main color in Wheat or Oatmeal, with accents in Terracotta, Forest, and Mustard. This combination has a warm, autumnal feel and works well for a transitional piece that pairs easily with jeans and boots. Earth tones are a timeless choice for any granny square poncho pattern.
- Coastal palette: Main color in Navy or Denim, with accents in Sea Foam, Coral, and Ivory. Light and breezy, this combination is perfect for a spring or summer poncho worn over a tank top. A coastal color palette gives this granny square poncho pattern a fresh, summery vibe.
- Jewel tones: Main color in Charcoal or Black, with accents in Amethyst, Emerald, and Ruby. Rich and sophisticated, this palette elevates the humble granny square into something that looks like it belongs in a boutique. Choosing jewel tones elevates this granny square poncho pattern from casual to elegant.
- Pastel rainbow: Main color in White or Cream, with accents in Lavender, Blush Pink, and Soft Mint. A lighter, more delicate look that is great for spring layering or for crocheters who prefer softer color stories. A pastel granny square poncho pattern is a wonderful gift for a new baby or a spring occasion.
The most important rule for choosing colors for your granny square poncho pattern is contrast. Your accent colors should stand out clearly against the main color so the granny square structure reads well. If your main color and accent colors are too similar in value, the squares will blend together and you will lose the geometric pattern that makes this poncho so striking.
Sizing and Gauge
Because this granny square poncho pattern is constructed from individual granny squares, sizing is determined by two factors: the size of each individual square and the number of squares in each panel. This pattern uses 8-inch squares in a 2×4 grid per panel, which produces a one-size-fits-most adult poncho with roughly the following finished measurements:
- Width across (both panels, laid flat): Approximately 32 inches
- Length from shoulder to hem: Approximately 32 inches
- Neckline opening: Approximately 16 inches
These measurements make this granny square poncho pattern a comfortable one-size-fits-most design that flatters a wide range of body types.
If you want a smaller poncho using this granny square poncho pattern (for a child or teen), use a smaller hook or a lighter yarn weight to produce 6-inch squares. If you want a larger or longer poncho, add an extra row of squares to each panel (making it 2×5 instead of 2×4) or use a larger hook to produce 9 or 10-inch squares. The join-as-you-go method works the same regardless of square size.
Tips for the Best Results
After reviewing the full construction process, here are the tips that matter most for a clean, professional-looking finished granny square poncho pattern:
Following these tips will help your granny square poncho pattern look handmade rather than homemade.
- Block your granny squares before joining. If your squares are not perfectly consistent in size, blocking them before you start joining will help. Lay each finished square flat, spray lightly with water, and pin to the 8-inch measurement. Let dry completely before joining. This small step makes a noticeable difference in how the final panels line up in this granny square poncho pattern.
- Keep your joins loose. Whether you are joining with the join-as-you-go method or working the shoulder seams, loose tension is your friend. Tight joins cause puckering, curling, and fabric that will not lay flat. If your joins look like they are pulling the squares toward each other, you are working too tight.
- Count your motifs before starting. Make sure you have exactly 6 Motif A, 6 Motif B, and 4 Motif C before you begin the joining process. It is much easier to make an extra square now than to realize you are one short when you are halfway through joining a panel.
- Use stitch markers at the neckline corners. When working the shoulder seams, it is easy to accidentally join into the wrong chain at the corner and partially close the neckline. Place a stitch marker in the chain that marks the neckline edge so you know exactly where to stop seaming your granny square poncho pattern.
- Weave in ends as you go. With 16 granny squares and multiple color changes, you will have a lot of loose ends. Weaving them in as you complete each square (before joining) keeps the process manageable and prevents a daunting pile of tails at the end.
- Work a border around the neckline and hem (optional). The raw edges of the granny squares look perfectly fine on their own, but if you want a more polished finish, work one or two rounds of single crochet around the neckline opening and the bottom hem edge. This also helps prevent the corners from curling.
Common Questions
Can I use a different yarn than Lion Brand Color Made Easy?
Absolutely. Any smooth worsted weight (category 4) yarn with a similar gauge will work for this granny square poncho pattern. Look for a yarn that has good stitch definition so the granny square clusters are clearly visible. Avoid fluffy or textured yarns for your first attempt — they make it harder to see your stitches and to match gauge consistently across 16 squares.
Is this poncho really no-sew?
The main panels are joined using the join-as-you-go crochet method, so there is no hand-sewing required for connecting the granny squares. The shoulder seams are also worked with a crochet hook (single crochet through both layers). The only time you might want a darning needle is for weaving in loose ends, and even that can be done with your hook if you prefer.
How long does this poncho take to make?
For a crocheter who is already comfortable with granny squares, expect to spend approximately 8 to 12 hours on this granny square poncho pattern. Each granny square takes roughly 20 to 30 minutes, and the joining process adds another 2 to 3 hours per panel. The shoulder seams are quick — less than 30 minutes for both. Total time depends on your speed, how many color changes you are managing, and whether you need to block your squares.
Can I make this in one solid color?
You can, but you will lose the visual interest that comes from the three different motif colors. If you want a simpler look, consider using two colors — a main color and one accent — instead of four. Use the accent color for the center rounds and the main color for the outer rounds, keeping the same layout structure.
What if my gauge is different?
As long as all 16 squares are the same size as each other, the poncho will work. The 8-inch target is a guideline — if your squares come out at 7.5 inches or 8.5 inches, the poncho will simply be slightly smaller or slightly larger. If you are more than half an inch off on either side, try adjusting your hook size and making a gauge swatch before committing to all 16 squares.
How do I care for the finished poncho?
Lion Brand Color Made Easy is machine washable and dryable, which makes care simple. Wash on a gentle cycle in cold water and lay flat to dry. If you used a different yarn, follow the care instructions
<

p>on that yarn’s label. For the best results over time, store the poncho folded rather than hung to prevent stretching. Proper care keeps your finished granny square poncho pattern looking great for years.
More Granny Square Patterns to Try
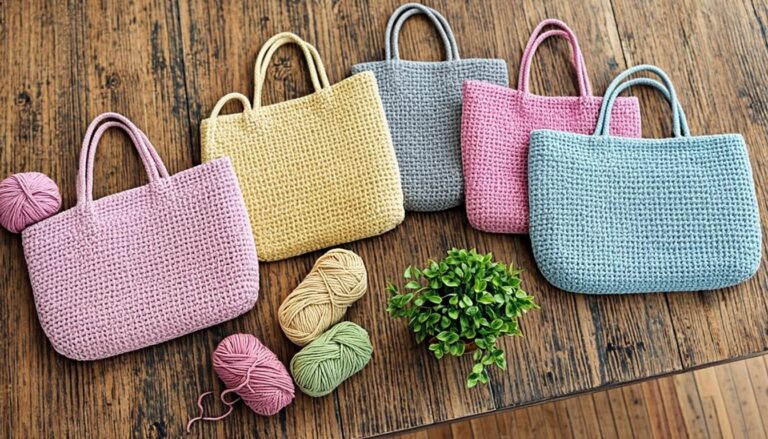
If you enjoyed this granny square poncho pattern, there are plenty of other projects that use the same joining techniques and granny square construction. This granny square poncho pattern is a great starting point. A granny square blanket is the most obvious next step — the join-as-you-go method works exactly the same way, just on a larger scale. For a wearable that uses fewer squares, try a granny square bag or a granny square cardigan. If you are newer to granny squares and want to brush up on the basics first, our granny square tutorial walks through the stitch step by step with photos.
For more free crochet patterns, stitch guides, and project ideas, bookmark our granny squares hub page — it is updated regularly with new patterns and tutorials. We hope this granny square poncho pattern has inspired you to try making your own wearable granny square project — happy crocheting!