|

Crochet Drawstring Bag Pattern: 9 Step-by-Step Tips (with PDF)

Ready to start your next project? This guide has clear steps, helpful tips, and a few tricks I wish I had known when I first started crocheting.

\n

Crochet Drawstring Bag Pattern at a Glance

  • Topic: crochet drawstring bag pattern
  • Skill level: Beginner to Intermediate
  • Main goal: Create a beautiful, functional drawstring bag using simple crochet stitches
  • Related topics: beginner crochet bags, market bag patterns, crochet abbreviations

Quick Answer

Crochet drawstring bag pattern — A crochet drawstring bag pattern walks you through making a versatile, closable pouch using basic stitches like single crochet and double crochet. It is one of the best beginner-friendly projects because it works up quickly and teaches essential skills like working in the round, creating eyelets for the drawstring, and finishing techniques. Tip: Use a cotton-blend yarn for a sturdy bag that holds its shape through daily use.

\n
Written by an experienced crocheter — Every pattern and technique shared on KnotToYarn has been tested and verified. We focus on clear, actionable instructions so you can finish each project with confidence, whether it is your first day or your hundredth.

At a Glance

  • Skill level: Beginner to Intermediate
  • Time needed: 2–4 hours
  • Best yarn: Worsted weight cotton or cotton-blend (Size 4)
  • Hook size: 5.0 mm (H-8) or 5.5 mm (I-9)

Common Mistakes → Quick Fixes

  • Bag is too stretchy: Switch to cotton yarn and add a tighter stitch pattern in the base.
  • Drawstring eyelets are uneven: Count your stitches carefully and use a stitch marker at each eyelet placement.
  • Bag curls at the top edge: Block your finished bag by steaming or wet-blocking to flatten the opening.

Mini Glossary

ch = chain stitch · sc = single crochet · dc = double crochet · hdc = half double crochet · sl st = slip stitch · st(s) = stitch(es) · sp = space · rep = repeat · fo = fasten off · mr = magic ring · For a complete list of abbreviations, check our crochet abbreviations guide.

A crochet drawstring bag pattern is one of the most versatile and enjoyable projects you can tackle — whether you are just learning how to crochet or looking for a quick handmade gift. These bags are perfect for storing everything from cosmetics and yarn scraps to lunch items and gym essentials.

KnotToYarn KnotToYarn

Subscribe to KnotToYarn!

Get the best free crochet patterns, tutorials & tips delivered straight to your inbox. Join our growing community!

Free newsletter. No spam, ever.

In this guide, you will find 9 essential step-by-step tips for creating a gorgeous drawstring bag from start to finish. I will walk you through every detail — from choosing the right yarn to adding the perfect drawstring closure — so you can feel confident at every stage of the pattern.

Why You Will Love This Crochet Drawstring Bag Pattern

Drawstring bags are having a major moment in the crafting world. They are simple, practical, and endlessly customizable. Whether you need a project bag, a gift pouch, or a reusable market tote, a crochet drawstring bag pattern delivers every time. This crochet drawstring bag pattern is designed to be your go-to reference for making beautiful, functional bags.

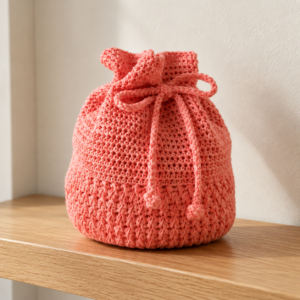
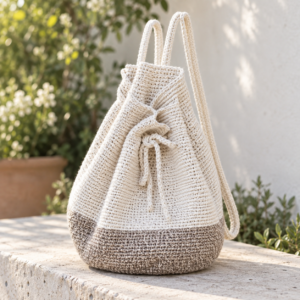
Completed crochet drawstring bag pattern made in cotton yarn with woven drawstring closure on wooden table

Here is what makes this project so rewarding:

  • Beginner-friendly: Uses basic stitches you likely already know. If you need a refresher, our how to crochet for beginners guide has you covered.
  • Quick to finish: Most drawstring bags can be completed in a single afternoon.
  • Minimal materials: You only need one skein of yarn, a hook, and a tapestry needle.
  • Great for gifts: Everyone loves a handmade bag — perfect for birthdays, holidays, or just because.

Materials You Need for This Project

Before we dive into this crochet drawstring bag pattern, gather these essential supplies:

  • Yarn: 100–150 yards of worsted weight (Size 4) cotton or cotton-blend yarn. Cotton is the best choice because it creates a sturdy, washable fabric that holds its shape.
  • Crochet hook: 5.0 mm (H-8) or 5.5 mm (I-9). If you are new to hook sizing, the Craft Yarn Council’s hook size chart is an excellent reference.
  • Tapestry needle: For weaving in ends and threading the drawstring.
  • Stitch markers: At least 2 — one for your starting chain and one for marking rounds.
  • Drawstring cord: Either a length of chained yarn (about 30 inches), a leather cord, or a satin ribbon.
  • Scissors

Tip 1: Choose the Right Yarn for Your Crochet Drawstring Bag

The yarn you choose makes a huge difference in how your finished bag looks and performs. For a crochet drawstring bag pattern, I strongly recommend cotton or a cotton-acrylic blend.

Why cotton? Cotton creates a dense, structured fabric that does not stretch out over time. Your bag will keep its shape even when filled with heavier items. Acrylic yarn is softer and more affordable, but it tends to stretch and lose structure.

Worsted weight yarn is the sweet spot — thick enough to work up quickly but not so bulky that the bag feels stiff. If you want a lighter summer bag, try a DK weight yarn with a smaller hook.

Tip 2: Master the Foundation Stitches

This crochet drawstring bag pattern relies on a handful of core stitches. If you are comfortable with these, you will breeze through the project:

  • Chain (ch): The foundation of almost every crochet project. Learn it in our single crochet stitch tutorial.
  • Single crochet (sc): Creates a tight, dense fabric — perfect for the base of your bag.
  • Double crochet (dc): Adds height and drape — ideal for the body of the bag.
  • Half double crochet (hdc): A great middle-ground stitch that works up faster than sc but is denser than dc.
  • Slip stitch (sl st): Used for joining rounds and creating the drawstring eyelets.

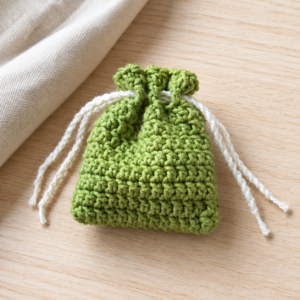
Stitch detail of a crochet drawstring bag pattern showing single crochet, double crochet, and chain stitches

Practice these stitches before starting if you feel rusty. A smooth, consistent tension is the key to a professional-looking bag.

Tip 3: Start with a Flat Circle Base

Most crochet drawstring bag patterns begin with a flat circle worked in the round. Learning this technique is essential for any crochet drawstring bag pattern you encounter. This becomes the bottom of your bag. Here is the basic approach:

  1. Start with a magic ring (mr) or chain 4 and join with a sl st to form a ring.
  2. Round 1: Work 8 sc into the ring. Join with a sl st. (8 sc)
  3. Round 2: Ch 1, 2 sc in each st around. Join. (16 sc)
  4. Round 3: Ch 1, *2 sc in next st, sc in next st*, repeat around. Join. (24 sc)
  5. Continue increasing by 8 stitches each round until your flat circle reaches your desired bag width (typically 4–6 inches for a small pouch).

The essential thing here is to keep your increases even. Place a stitch marker at the beginning of each round and count your stitches. An uneven base will cause your bag to warp or lean to one side.

Tip 4: Build the Bag Body Without Increasing

Once your flat base is the right size, stop increasing and work even rounds (one stitch per stitch, no increases) to build the sides of the bag. This is where the bag starts to take its three-dimensional shape.

For the body, I recommend using half double crochet (hdc) or double crochet (dc) stitches. They work up quickly and give the bag a nice drape. Continue working in the round until the bag reaches your desired height — usually 6–10 inches depending on what you plan to carry.

Remember to move your stitch marker up at the start of every round. It is incredibly easy to accidentally add or drop a stitch when working in continuous rounds.

Tip 5: Create the Drawstring Eyelets

The drawstring closure is the defining feature of this crochet drawstring bag pattern. A well-made drawstring elevates any crochet drawstring bag pattern from ordinary to exceptional. Eyelets are small gaps in the fabric where the cord will thread through.

Here is a simple method for creating even eyelets:

  1. Work 1–2 rounds of sc at the top of the bag for a neat, tight edge.
  2. In the next round, work: *ch 2, skip 2 sts, sc in next 4 sts*. Repeat from * to * around.
  3. This creates evenly spaced gaps for your drawstring cord.
  4. Work one more round of sc around the entire top edge for stability.

Space your eyelets evenly — I recommend 8–12 eyelets total depending on the bag circumference. Mark each ch-2 space with a stitch marker so you can thread the drawstring through later without missing any gaps.

Tip 6: Make and Attach the Drawstring

You have several options for the drawstring closure in your crochet drawstring bag pattern:

  • Chained cord: Chain a length of yarn to about 30–36 inches. This is the simplest and most cohesive option since it matches your bag.
  • Cotton cord or paracord: Adds durability and a contrasting texture.
  • Satin or grosgrain ribbon: Gives a polished, gift-ready look.
  • Leather cord: Adds a modern, boho-chic vibe. You can find quality options from retailers like Yarnspirations or your local craft store.

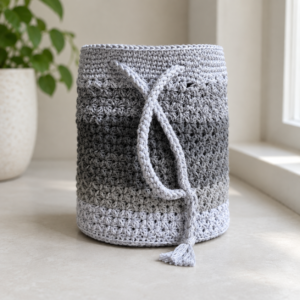
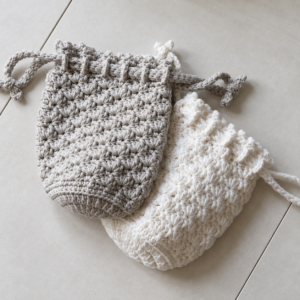
Drawstring cord threaded through eyelets of a finished crochet drawstring bag pattern project

To attach, use your tapestry needle to thread the cord through every other eyelet going in one direction, then continue through the remaining eyelets going back the other direction. Pull both ends tight and tie them in a knot or bow. Add small wooden beads to the cord ends for a finished, professional touch.

Tip 7: Size Your Bag for Its Intended Purpose

One of the best things about a crochet drawstring bag pattern is how adaptable it is. Here are some popular size guidelines:

  • Small pouch (4″ wide × 6″ tall): Perfect for coins, jewelry, lip balm, or earbuds. Great for gifts and party favors.
  • Medium bag (6″ wide × 8″ tall): Ideal for cosmetics, crochet notions, or a small lunch. This is the most versatile size.
  • Large tote (8″ wide × 10–12″ tall): Works as a project bag, a market tote, or a beach bag. You may want to add a lining for larger bags.

Adjust your starting circle and body rounds to hit your target dimensions in this crochet drawstring bag pattern. Always measure your gauge first — crochet a small swatch, measure 4 inches, and calculate how many stitches per inch you get. This prevents sizing surprises.

Tip 8: Add a Lining for a Professional Finish

While not strictly necessary, adding a fabric lining elevates your crochet drawstring bag pattern from homemade to handcrafted. A lining prevents small items from slipping through the stitches and gives the bag more structure.

Here is how to add a simple lining:

  1. Trace the bottom circle of your bag onto fabric and cut it out with a ¼-inch seam allowance.
  2. Measure the height and circumference of the bag body. Cut a rectangular piece of fabric to match, plus seam allowance.
  3. Sew the rectangle into a tube, then attach the circle base.
  4. Insert the lining into the bag, fold the top edge under, and slip-stitch it in place by hand.

Cotton quilting fabric works wonderfully for linings. Choose a coordinating or contrasting print for a fun pop of color inside the bag.

KnotToYarn KnotToYarn

Subscribe to KnotToYarn!

Get the best free crochet patterns, tutorials & tips delivered straight to your inbox. Join our growing community!

Free newsletter. No spam, ever.

Tip 9: Block and Finish Your Crochet Drawstring Bag

Blocking is the final step that transforms your project from “good” to “wow.” It evens out your stitches, smooths the fabric, and gives the bag its intended shape.

For cotton bags, wet blocking works best:

  1. Soak the bag in cool water for 15–20 minutes.
  2. Gently squeeze out excess water (do not wring or twist).
  3. Lay the bag flat on a towel, shape it to the correct dimensions, and pin it in place.
  4. Let it air dry completely.

After blocking, weave in any remaining ends with your tapestry needle. Thread the drawstring through the eyelets, add beads or closures if desired, and your bag is complete!

More Crochet Patterns to Try

Once you finish your drawstring bag, here are some related patterns you will love exploring:

Free Crochet Drawstring Bag Pattern PDF

Want to take this crochet drawstring bag pattern offline? Download the ad-free, printable PDF version below. It includes the complete step-by-step instructions, a sizing chart, a stitch glossary, and a materials checklist — everything you need in one tidy document.

The PDF is formatted for standard letter-size paper and includes helpful photos at each stage. Print it out, toss it in your project bag, and crochet on the go!

Frequently Asked Questions

What is the easiest yarn for a beginner drawstring bag?

Cotton worsted weight yarn is the easiest and most forgiving choice for any crochet drawstring bag pattern. It does not split like some acrylics, holds its shape well, and is widely available at any craft store.

Can I make this bag without a magic ring?

Absolutely! If you are not comfortable with the magic ring, chain 4, join with a sl st to form a ring, and work your first round of single crochets into that ring. The result is nearly identical.

How do I keep my drawstring from pulling out?

Tie a knot in each end of the drawstring cord that is larger than the eyelet openings. You can also thread a small bead onto each end and tie a knot below it. This prevents the cord from slipping back through.

Can I sell bags made from this pattern?

In most cases, yes — you can sell finished items made from free patterns. However, always check the specific pattern license. If you created your own design based on these techniques, you are free to sell it.

How do I wash my crochet drawstring bag?

Hand wash in cool water with a gentle detergent. Lay flat to dry. Cotton bags can also be machine washed on a delicate cycle in a mesh laundry bag, but air drying is recommended to maintain shape.

Final Thoughts

This crochet drawstring bag pattern is a fantastic project for crocheters of every skill level. It teaches fundamental techniques — working in the round, creating eyelets, finishing and blocking — while producing something genuinely useful.

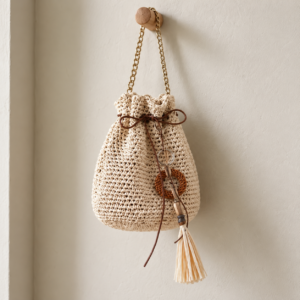
Whether you make one as a gift, a market tote, or a project bag for your growing crochet stash, you will come back to this crochet drawstring bag pattern again and again. The possibilities for customization are endless: try different color combinations, add stripes or color-block sections, experiment with stitch patterns, or embellish with tassels and beads.

Grab your hook and favorite cotton yarn, and let us get started. And do not forget to share your finished bags with us — we love seeing what you create!

POILU LAK

Passionate crochet designer and instructor with years of experience creating beginner-friendly patterns, tutorials, and guides that help crafters build real skills from day one.

Published: May 12, 2026 · Updated: May 26, 2026

Similar Posts

Leave a Reply

Your email address will not be published. Required fields are marked *